Clarified butter and ghee are the same product. Both are butter slowly simmered until the water evaporates and the milk solids separate out, leaving nothing but clear, golden butterfat. If you have searched for how to make clarified butter and ghee, the answer is that one pound of unsalted butter turns into roughly 220 ml of finished ghee, and it takes about 20 minutes at the stovetop on medium-low heat.
Why bother when the butter wrapper is right there? Three reasons. The fat takes heat to roughly 230°C (450°F) before it browns, against about 175°C (350°F) for plain butter, so it suits high-heat cooking. It keeps for months without refrigeration once fully clarified. And the milk solids that sink to the bottom brown into the nuttiness that makes ghee taste like itself.
Making it yourself is also the cheapest way to get a jar of it, and you control the butter. More on the timing below, because a recipe that tells you ten minutes flat is the reason so many people end up with a bitter, scorched mess.
Table of Contents
- What You Need
- Step-by-Step: How to Make Clarified Butter and Ghee
- How to Make Clarified Butter on the Stovetop
- How to Make Ghee in the Oven
- Clarified Butter vs. Ghee: What Changes?
- How to Store Clarified Butter and Ghee
- Ways to Use Clarified Butter and Ghee
- Common Mistakes
- Frequently Asked Questions
- Is clarified butter the same as ghee?
- How long does it take to make clarified butter or ghee?
- Do I need to add water when making clarified butter?
- How do I know when clarified butter is ready?
- What happens to the milk solids, and can I eat them?
- Conclusion
What You Need
The ingredient list is short. The equipment is the part where most people improvise badly.
- 1 pound (4 sticks) unsalted butter, cut into 1-inch cubes so it melts evenly
- A heavy-bottomed saucepan or shallow stainless skillet, light or silver base preferred so you can watch the solids change colour
- A wooden spoon or flat spatula for skimming
- A fine-mesh sieve lined with cheesecloth, a paper towel, or a clean towel in a colander
- A heatproof glass jar or container with a tight lid
- An instant-read thermometer, useful but not essential
Cube the butter cold and let it sit on the counter for five minutes before it hits the heat. Straight-from-the-fridge butter will cool the pan enough that you go looking for a flame that is not there.
Two substitutions to note. For the oven method, any heatproof bowl works in place of the saucepan, and a spoon does the skimming. Skip the coffee filter. Several people have reported that clarified fat barely passes through one, which turns a ten-minute job into an hour of thumbing filter paper.
Step-by-Step: How to Make Clarified Butter and Ghee
The stovetop method is faster and far more controllable. The oven method is hands-off and better if you are making a two-kilo batch or want to walk away from the kitchen.
How to Make Clarified Butter on the Stovetop
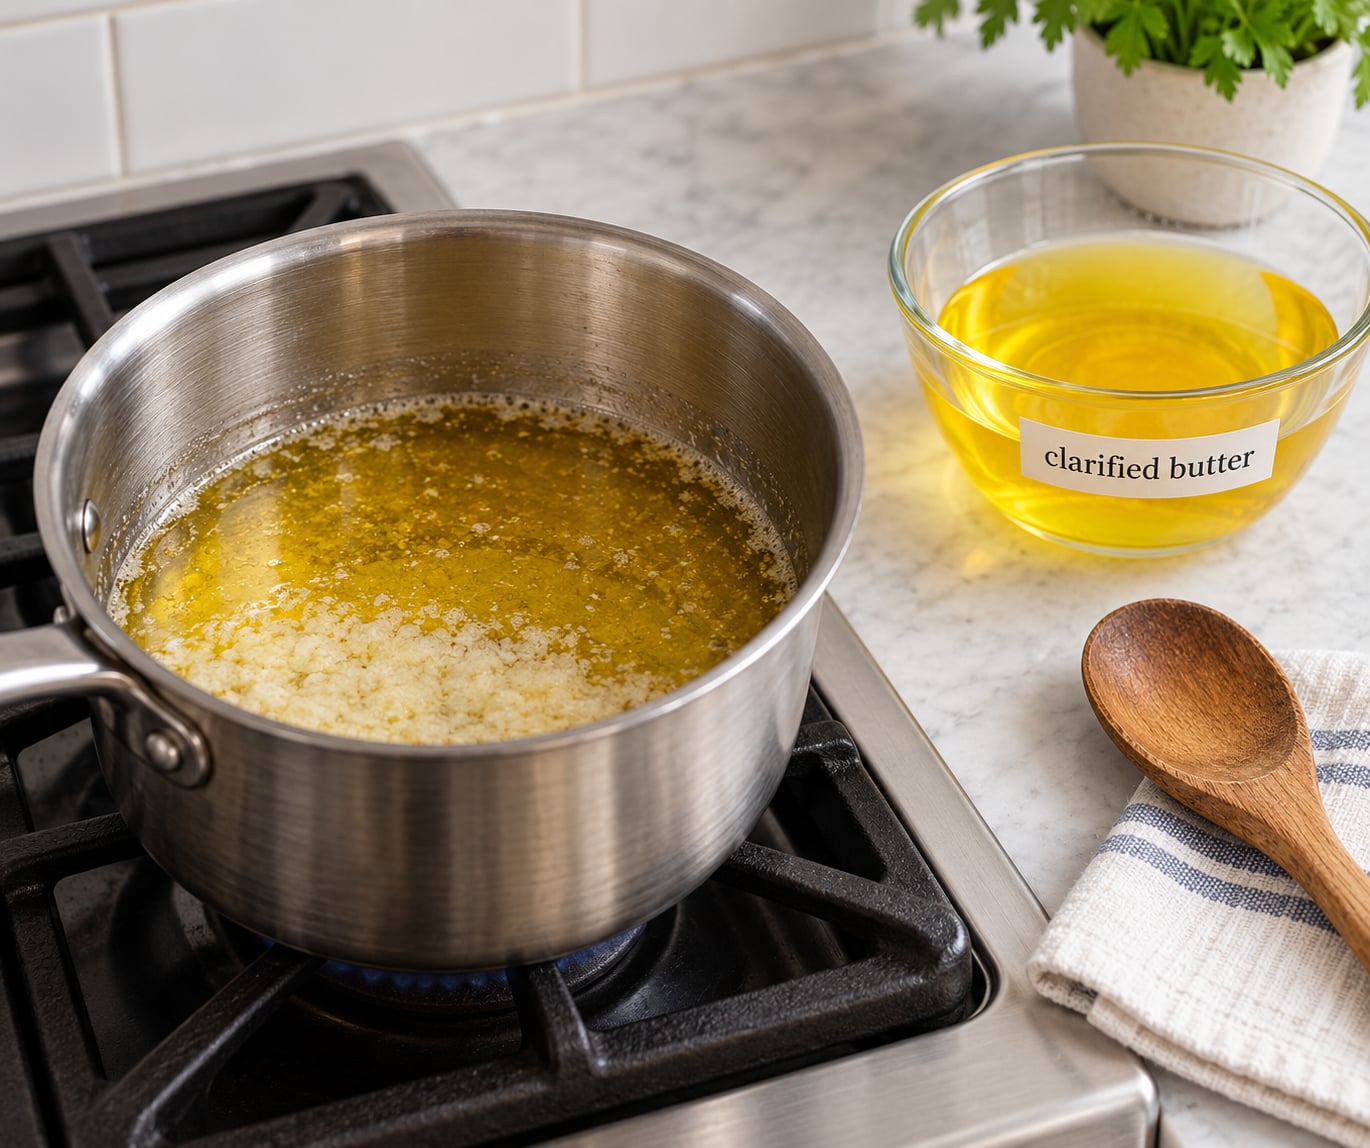
One stick of butter takes 8 to 10 minutes. The important thing to understand is that cooking time scales with the batch, not with a clock. A pound is usually 15 to 20 minutes. Doubling it again can push past half an hour, and a shallow pan gets there faster than a deep pot because more surface area means more evaporation.
Step 1. Melt the butter. Put the cubes in the dry pan over medium-low heat. Let them melt without stirring for the first two or three minutes.
Step 2. Skim the foam. As the butter melts, water turns to steam and pushes a white froth to the surface. Spoon off whatever foam rises in the first few minutes and discard it. Some people stir it back in instead; both work, skimming just gives you a clearer result faster.
Step 3. Cook down quietly. Now leave the pan alone. A gentle lazy simmer is what you want, not a rolling boil, and a splatter screen or a part-lidded lid helps when you are working with more than a pound. Blowing the foam off the top is not stirring, and it takes a lot of the noise out of a big batch.
Step 4. Watch for the solids to brown. This is the whole method. Foam subsides, the bubbling slows, and the milk solids drop to the base of the pan where they dry out and turn golden. Somewhere in this stage a second, sparser foam can appear as the water leaves. People in cooking forums swear by that second foam as the signal that the job is nearly done.
Step 5. Strain and store. Pour the clear fat through a fine-mesh sieve or cheesecloth-lined colander into a clean heatproof container. The solids stay behind. Set the jar aside to cool uncovered, then lid it and label it with the date.
How do you know it is done? Look for these four things together rather than trusting a timer:
- The foam has gone or thinned to almost nothing
- The liquid is clear and golden, not milky or cloudy
- Milk solids have settled and browned to a deep amber at the base of the pan
- A spoon drawn through the fat leaves a clean line rather than a frothy wake
Pull it the moment the solids are golden and the fat runs clear. Twenty seconds too long turns nutty into acrid, and the bitterness stays in the jar.
Salted butter works, but it does not give you salted ghee. Salt dissolves in the watery phase and most of it leaves with the water, so the finished fat tastes much milder than the butter you started with. Unsalted is the cleaner choice, and cultured or fermented butter gives the most traditional flavour in South Indian kitchens.
How to Make Ghee in the Oven
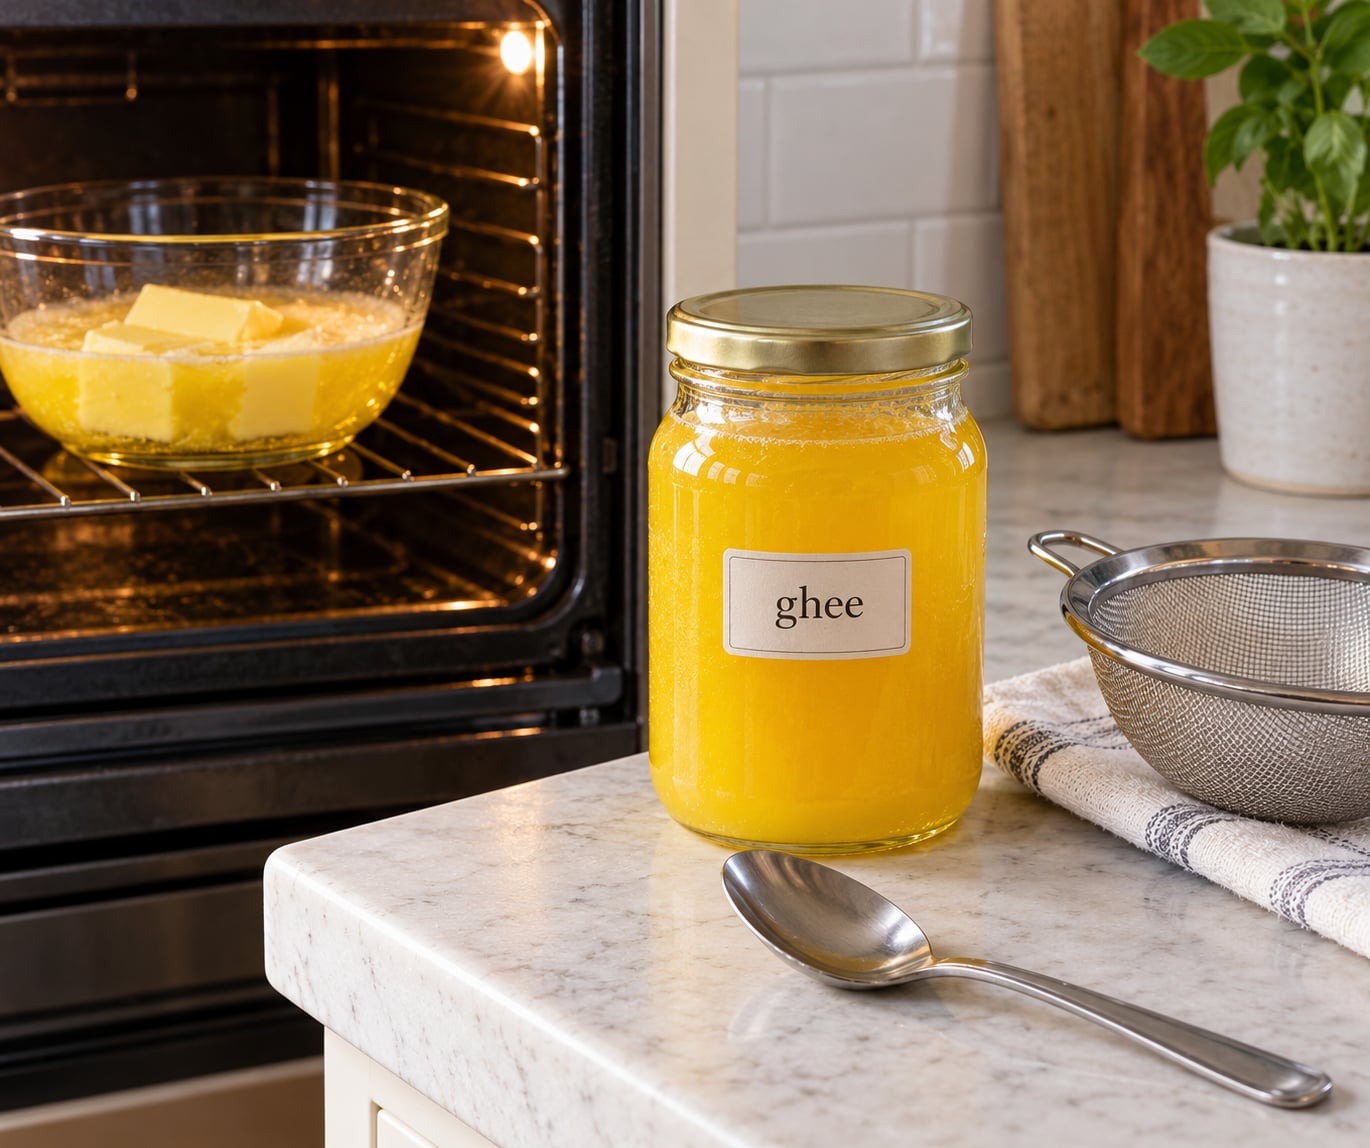
The oven trades control for hands-off time. Heat the oven to 250°F (120°C). Put your cubed butter in a heatproof bowl or shallow dish, uncovered, on the middle rack.
Give it 30 to 40 minutes for a pound, longer for a larger batch, and check at the 30-minute mark. The butter will foam, quiet down, and the solids will brown at the bottom just as they would on the stove. Stir once or twice so the solids do not scorch against the dish.
Strain the same way. A pound of butter still gives you roughly 220 ml, about three-quarters of a cup, of finished ghee.
If you want to try a microwave, use short bursts on medium power, stirring between each, and expect the same cues to take longer than they would on the stove.
Clarified Butter vs. Ghee: What Changes?
Ghee is not a different ingredient from clarified butter. It is a particular way of making it: heat the butter slowly until every trace of water is gone and the milk solids have been fully cooked and removed. Clarified butter is the general category, and it includes some lazy versions where the cook only skims the foam and pours off the fat, leaving moisture and fine solids behind. That skim-only butter is not shelf stable and belongs in the fridge.
Fully clarified ghee and fully clarified butter are then the same substance. The differences are cultural and culinary rather than chemical.
- Flavour and aroma. A properly browned batch carries a faint nuttiness from the toasted milk solids. Lightly clarified butter tastes closer to plain butter. Cook the solids further and you land in brown butter territory, which is a deliberate stop, not a mistake.
- Texture. Liquid and pourable at room temperature in a warm kitchen, semi-solid in a cool one. It sets to a soft, crumbly texture in the fridge, never hard like a stick of butter.
- Customary use. Ghee has a long home in dal, biryani, roti and naan baking, where its aroma is the point. Clarified butter turned up in European kitchens first, for Hollandaise and pan sauces.
- Heat tolerance. Both handle high heat the same way, around 230°C (450°F), because both are pure milk fat.
- Storage. Fully clarified product of either name keeps on a pantry shelf. Anything that still smells milky or pours cloudy goes in the fridge.
One substitution worth knowing: you can swap ghee for butter one for one in most recipes. You cannot swap plain butter for ghee one for one in a custard or a frosting without adjusting the liquid, because you are adding back fat the water was holding in suspension.
How to Store Clarified Butter and Ghee
Storage is where most homemade batches go wrong, and it is almost always the same mistake: covering a jar that was still warm. Trapped steam condenses on the inside of the lid and drips back in.
Set the strained fat aside, uncovered, until it is completely cool to the touch. Only then seal it. Wipe the rim clean before the lid goes on, since a greasy rim is the other way moisture gets in.
| Where it lives | How long it keeps | Notes |
|---|---|---|
| Pantry shelf, cool and dark | About 3 months | Fully clarified only. A cloudy or milky batch does not belong here. |
| Refrigerator, airtight | Up to 12 months | The safest home if your kitchen runs warm or you are unsure how dry your batch is. |
| Freezer | 6 months or more | Portion into small jars or ice cube trays so you take out only what you need. |
There is no harm in refrigerating everything, and for anyone making small batches the fridge is the low-drama option. Leave a little headroom in the jar rather than filling it to the neck.
Condensation on the underside of a lid means water got back in. That batch goes in the fridge and gets used first.
Discard it if the aroma turns crayon-like or stale, if a grey or green film appears, or if it smells sour. Properly clarified fat does not support mould growth, but a trace of water left behind can, and once you see anything fuzzy no amount of straining fixes it.
When cold fat goes solid and grainy, scoop it into a mug and set the mug in a bowl of hot water for a few minutes. It softens without going anywhere near a microwave and without picking up water from a slow boil.
Ways to Use Clarified Butter and Ghee
The nuttiness is the reason to reach for it deliberately, and a neutral oil is the right call when you do not want dairy flavour in the dish. Here is where each one earns its place.
- Eggs. Fry or scramble them in ghee at a heat plain butter cannot take. Perfect for a soft scramble finished with a spoon of the cooking fat.
- Roasted vegetables. A spoonful melted over carrots, cauliflower or beets before they go into the oven gives the edges a deeper colour.
- Potatoes. Hash browns and rosti made in ghee come out crisper, because the fat has not been diluted by water. This is the most reliable everyday win.
- Naan and flatbread. Brushing ghee onto naan straight off the tandoor or griddle is what gives it that blistered, slightly nutty surface.
- Fish and meat. Sear steaks, chops and skin-on fish, then baste with the buttery drippings at the end. Finishing in the pan rather than adding cold butter keeps the sauce from splitting.
- Dumplings and noodles. A teaspoon in the pan before they steam or fry gives you crisp bottoms that an oiled pan will not.
- Popcorn. Ghee-kerneled popcorn stays crisp for days instead of going soft overnight.
- Sauces. Whisk a spoon into a pan sauce, a dal finishing or a tomato masala. It emulsifies without the milk proteins that can turn a sauce grainy.
- Rice and grain dishes. Stir a spoonful into basmati or into a biryani at the end, off the heat.
Skip it for a delicate fish like sole, for a plain salad dressing, or for anything where dairy flavour would fight the main ingredient. There, a neutral oil is the better tool.
Common Mistakes
Nearly every disappointing batch traces back to one of five things.
Heat too high. High heat boils the water off violently, spatters across the stove and burns the solids before you can strain anything. Fix: medium-low, a lazy simmer, and a lid cracked slightly if you are doing a big batch.
Solids left until they scorch. The line between golden and bitter is narrow. Fix: pull as soon as the solids are deep amber, and lean toward stopping slightly early. Clear fat still hot in the jar is safe; acrid fat is ruined.
Stopping before it is actually clarified. Cloudy output is not a failure, it means water is still in there and it may not be shelf stable. Fix: let it simmer a few minutes longer and strain it a second time through a paper-towel-lined sieve.
Water getting back in. A wet spoon, a greasy jar rim, or a lid on while warm will all put moisture back. Fix: cool the jar fully, wipe the rim, then seal.
Storage mistakes. Treating skim-only clarified butter as pantry stable, or leaving a jar near the stove in a hot kitchen. Fix: refrigerate anything with a doubt about it, and label the jar with the date you made it.
A few habits that make it easier: use unsalted butter so you can taste the result properly, start every batch on medium-low heat, strain twice if you want it crystal clear, and always cool before covering.
Frequently Asked Questions
Is clarified butter the same as ghee?
Yes, once the job is done properly they are the same substance: pure milk fat with the water and milk solids removed. Ghee is simply the traditional name for clarified butter in South Asian cooking, where it is cooked slowly until every trace of moisture has gone. The term clarified butter is broader, because it also covers shortcut versions where someone skims the foam and pours off the fat while water and fine solids remain. Those lighter versions keep in the fridge; properly clarified ghee keeps on a pantry shelf.
How long does it take to make clarified butter or ghee?
One stick of butter takes about 8 to 10 minutes on medium-low heat. A pound usually needs 15 to 20 minutes, and larger batches take considerably longer, sometimes past half an hour. Timing scales with the volume of butter and the depth of your pan rather than following any fixed recipe number. A shallow pan finishes faster than a deep pot because more surface area means faster evaporation. Watch the butter rather than the clock, and stop when the solids are golden and the fat runs clear.
Do I need to add water when making clarified butter?
No. Adding water actively works against you. The entire point is to remove the roughly one-fifth of butter that is water, and any water you add has to be evaporated again, which means a longer cook and more risk of scorching the milk solids. Some traditional recipes begin by churning cream into butter first, but that is a separate way of making butter, not a step in clarifying it. Start with plain unsalted butter in a dry pan and let its own moisture do the work.
How do I know when clarified butter is ready?
Look for four things at once. The foam should have subsided or thinned to almost nothing, the liquid should be clear and golden rather than milky, the milk solids should have sunk to the base and browned to a deep amber, and a spoon drawn through the fat should leave a clean line instead of a frothy wake. A second, sparser foam often appears late in the process as the last of the water escapes, which many experienced cooks treat as the signal that straining is close.
What happens to the milk solids, and can I eat them?
They sink to the bottom of the pan, cook until they dry out and turn golden, and that browning is where the nutty aroma comes from. Once they are deep amber and not scorched they are completely fine to eat straight from the pan, and cooks often stir them back into curries or dal at the end. Keep an eye on them rather than walking away, because the same solids turn from nutty to bitter and acrid in well under a minute. If they are black or smell burnt, discard them and start that batch again.
Conclusion
Getting the hang of how to make clarified butter and ghee is mostly about watching the pan instead of the clock. Start with one stick of unsalted butter over medium-low heat, let it melt untouched, skim the early foam, then wait until the milk solids at the base turn deep amber and the fat above them runs clear. Strain it into a clean jar, let it cool completely before you lid it, and write the date on the label. From there the oven method takes care of itself while you work out what you are going to cook first.