Wash it by hand with warm water and mild dish soap right after you finish, dry it standing upright with both faces open to the air, and re-oil it with food-grade mineral oil about once a month. Never put wood in the dishwasher, never soak it, and never reach for olive or vegetable oil. That routine takes about five minutes a session and it is the whole job.
I keep three boards in my kitchen: a big end-grain block for vegetables, a thin walnut board for bread and citrus, and a bamboo slab that came with the kitchen. All three are still flat after years. The only board I ever ruined did it the wrong way: it sat flat on a wet counter for an hour, and it was cupped by morning.
Wood is porous and it drinks. It also takes on water far faster on one face than the other, which is exactly how warping starts. Learning how to care for a wooden cutting board is mostly about keeping that water moving in and out evenly, and about putting an oil barrier back in once the wood starts looking thirsty.
Table of Contents
- What You Need
- How to Care for a Wooden Cutting Board: Step-by-Step
- 1. Wash the board promptly after use
- 2. Dry it immediately and completely
- 3. Oil the board when it looks dry (how to oil a cutting board)
- 4. Treat stains, odors, and rough patches
- 5. Store the board correctly
- Common Mistakes
- Frequently Asked Questions
- Do you wash wood cutting boards with soap?
- How often should you re-oil a cutting board?
- How do I remove mold from a wooden cutting board?
- How long should you wait after oiling a cutting board?
- Can you put a wooden cutting board in the dishwasher?
- What is the healthiest oil to use on cutting boards?
- A Simple Care Routine to Keep
What You Need
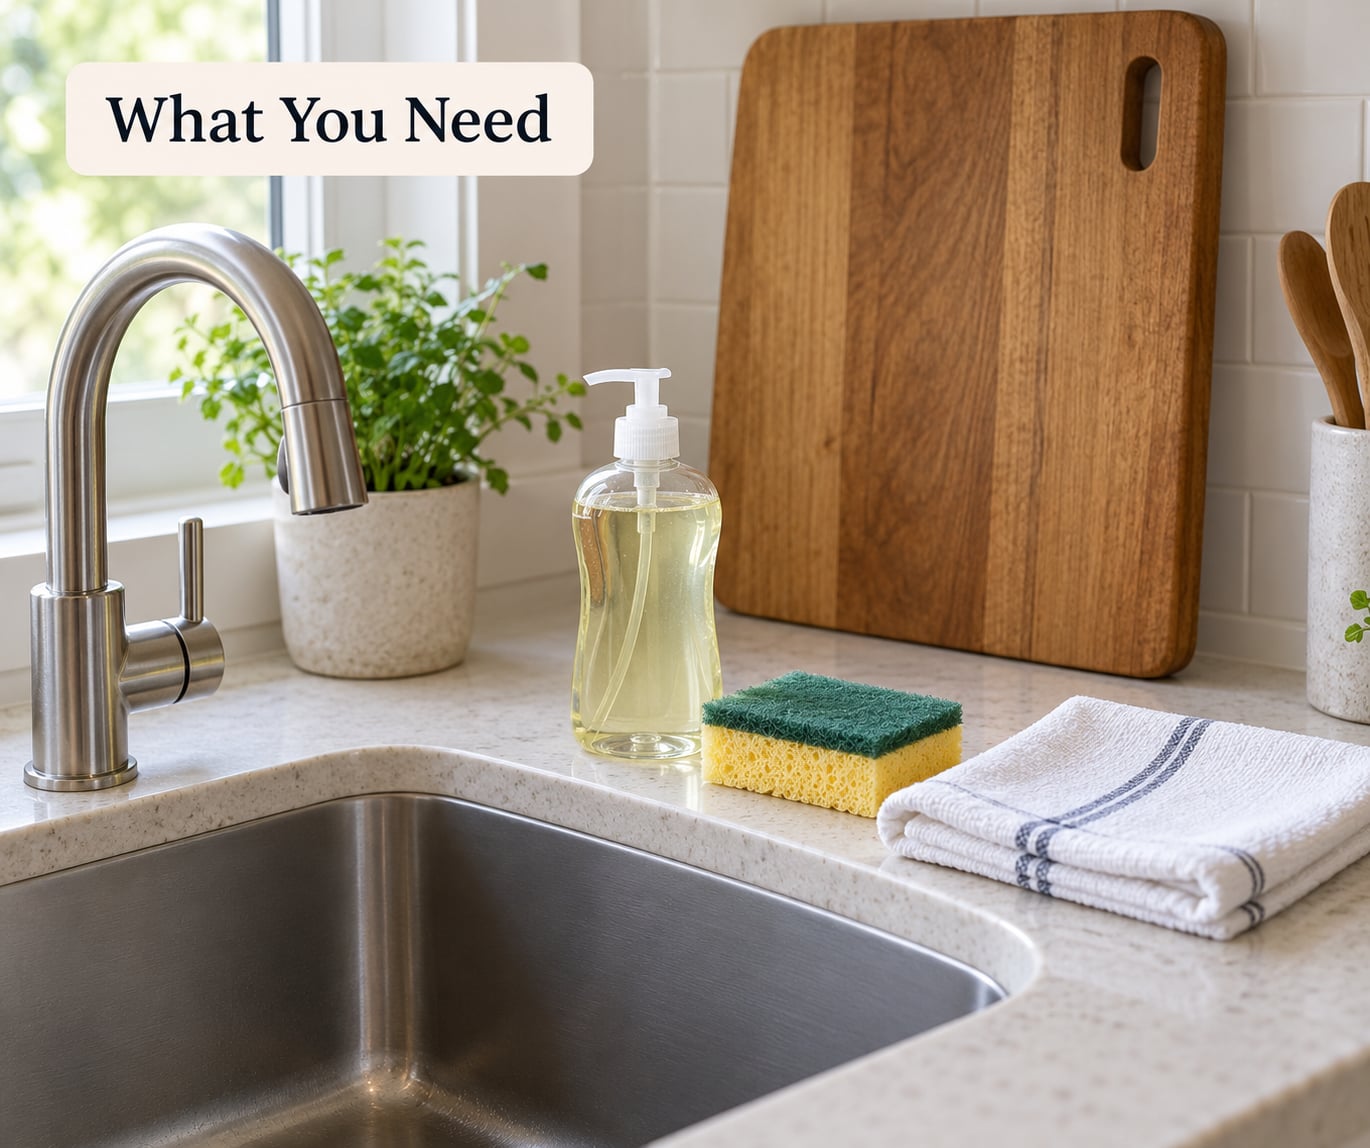
None of this is special equipment. If you already have a kitchen sink, you can start today.
- Mild dish soap. The clear, unscented kind. Soap is not the enemy people think it is on wood.
- Warm water and a soft sponge or brush. No steel wool, no chainmail, no stiff nylon bristle brush.
- A clean, dry towel. A cotton or linen dish towel that you will not mind staining.
- Food-grade mineral oil or board cream. Look for USP or food-grade mineral oil, or a board butter made of mineral oil and beeswax.
- A drying spot with air on both sides. A rack, a dish slot, or the edge of the sink where the board can stand on its long side.
- A bench scraper or the back of a spoon. Optional, but it removes dried food in seconds.
That is the full kit. Anything fancier is optional.
How to Care for a Wooden Cutting Board: Step-by-Step
1. Wash the board promptly after use
Scrape or brush off the loose food first, then rinse the board under warm water and work a drop of dish soap over both faces with a soft sponge. Pay attention to the edges, the handle, and any groove your knife has carved, because that is where residue hides.
You can use soap. A short contact with mild dish soap will not dry out wood or eat through a food-safe finish. What ruins boards is water sitting in the wood, not suds passing over it for thirty seconds.
How you know it worked: the surface feels tacky-free and slightly damp, not slick. If food still sticks, scrub the spot again rather than reaching for harsher soap.
Rinse with warm water, then move straight to drying. Do not put the board in the dishwasher, and do not leave it sitting in a filled sink. A board that has been through raw chicken or beef still gets the same soap and water treatment as one that held lemons, plus a vinegar rinse if you want extra peace of mind.
A surface that feels fuzzy or slightly rough right after its first wash is normal. Water makes the wood fibres swell and stand up. It flattens again as the board dries, and a light pass with 220-grit paper removes anything that stays raised.
2. Dry it immediately and completely
Drying is the step people rush, and it is the one that decides whether your board lasts a year or twenty years. Set the board upright on its long edge so air moves over both faces and both edges at once. A dish rack slot, a gap beside the sink, or leaning against the backsplash all work.
Laying it flat on a counter is the problem, not just because water pools underneath but because the bottom face stays wet while the top face dries in the air. That imbalance is what cups a board. Leaving it flat on a damp towel is worse.
Pat the surface with your towel first to speed things up, then let air finish the job. It should take 20 to 40 minutes for a normal board, longer for a thick end-grain block.
How you know it worked: the board feels room-temperature and weighs about the same as it did before the wash. Pick it up and hold it flat by the two short edges: if it rocks like a see-saw, it is still holding moisture on one side.
3. Oil the board when it looks dry (how to oil a cutting board)
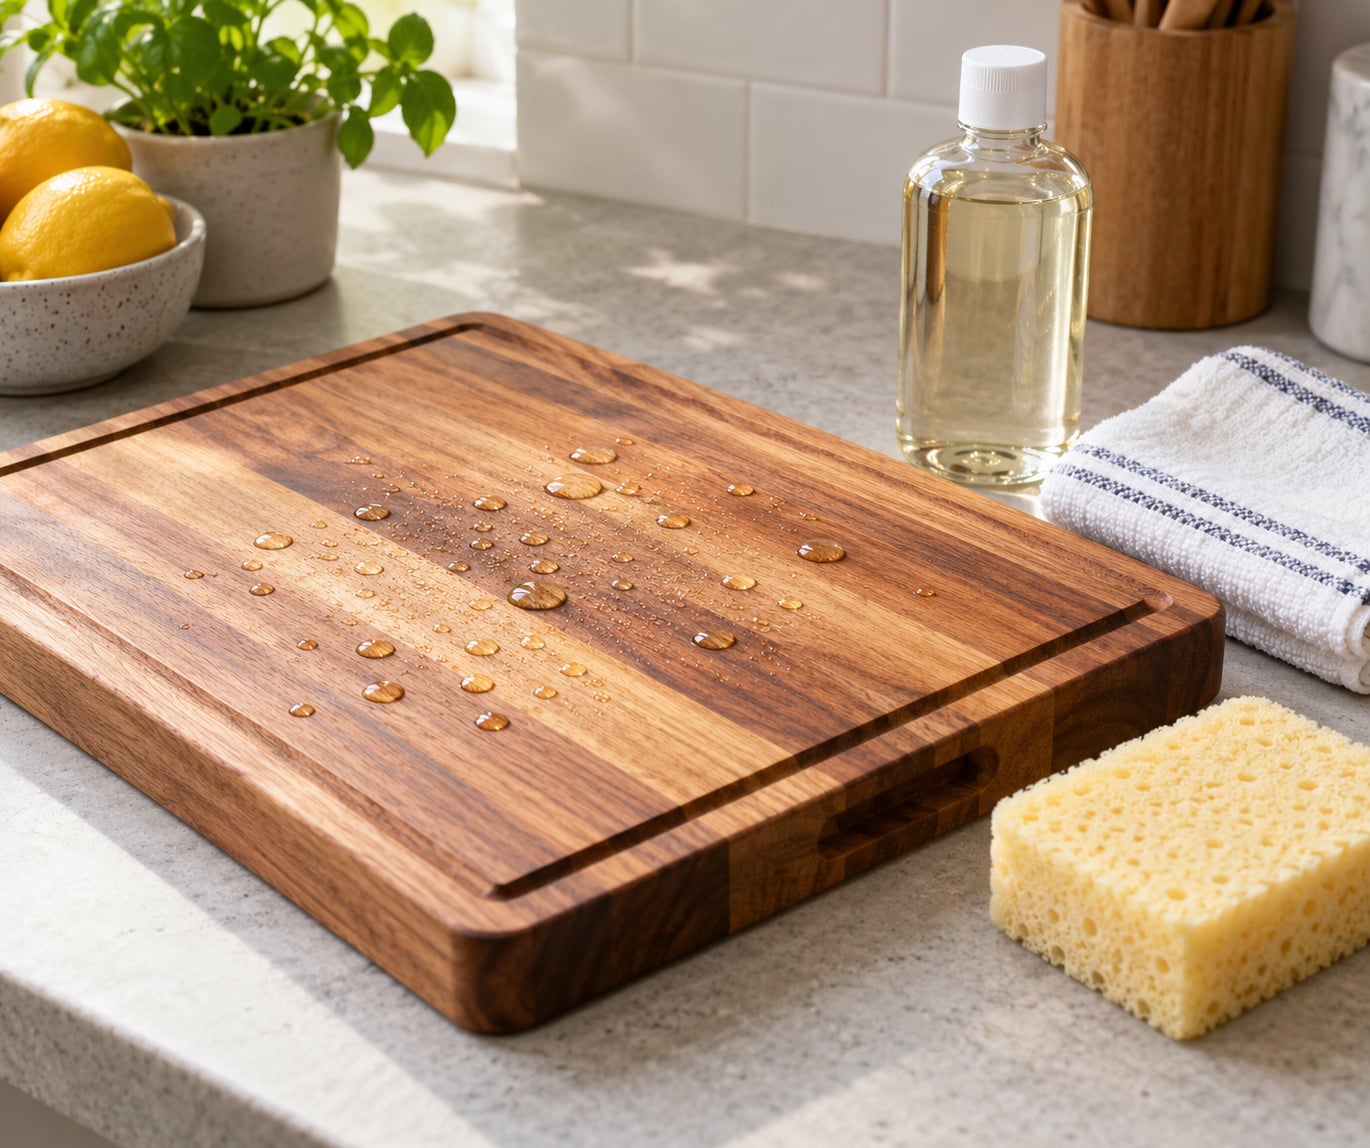
A properly oiled board sheds water in beads. Flick a few drops of water onto the surface: if they sit as round beads, the oil is doing its job. If they soak in and leave a dark patch, the board is dry and needs conditioning.
Timing matters. Oil a new board before you use it, and oil any board that has been washed a few days ago. For an oiled board in regular home use, monthly is the common answer. A heavy daily cook should look weekly; a board used for bread once a week can go a few months between coats.
Here is how to oil a cutting board properly:
- Make sure the board is completely dry. Oil applied to damp wood traps moisture instead of sealing it.
- Pour a small puddle of food-grade mineral oil in the middle. A board the size of a large bread loaf needs roughly a tablespoon.
- Spread it with a clean paper towel or a cloth, working along the grain, until the surface looks evenly damp and not glossy.
- Let it sit for 15 to 30 minutes so the oil soaks in rather than sitting on top.
- Buff the surface with a dry clean towel until it feels dry to the touch, not tacky.
Repeat once a week for the first month when the board is brand new, then settle into a monthly rhythm. End-grain blocks absorb faster than face-grain boards, so plan on more coats there.
Some people finish with a beeswax board cream instead of plain oil. It behaves more like a surface seal, so water repellency lasts noticeably longer between coats. The trade-off is that a wax film needs a light sanding to refresh once it wears thin.
How you know it worked: water beads on the surface, the wood has darkened slightly and looks richer, and a finger dragged across it feels smooth rather than rough.
4. Treat stains, odors, and rough patches
Most marks come from things like turmeric, beet juice, curry, coffee and red wine. Start gentle and work up only if the stain stays.
For surface stains, scrub the spot with coarse salt and the cut face of half a lemon, then rinse and dry upright. The salt acts as a mild abrasive and the citrus acid lifts the pigment. This is the most-repeated DIY remedy in cooking forums and it works better than anything you would buy.
For odors, especially garlic and onion, a raw potato or apple piece rubbed over the damp board picks up the smell, and a paste of baking soda left on for ten minutes followed by a rinse absorbs what is left. Keep the paste off any wax finish, which it will slowly strip.
For a deep clean, wipe the board with white vinegar diluted one part vinegar to four parts water, leave it on the surface for a few minutes, then rinse and dry. Do not soak the board in that solution.
For mold, black or green patches in the corners or along a damp edge: scrub the area with a solution of one tablespoon unscented liquid dish soap per cup of water, rinse, and dry fully in open air. If the black marks come straight back within days, the board is sitting somewhere permanently damp and no cleaning will fix it.
Stay away from bleach, hydrogen peroxide, oven cleaner, and steel brushes. They strip the oil, bleach the wood, and leave a surface your knife will catch on. If a board has deep pitting or black speckling that never washes out, stop cleaning it and replace it.
5. Store the board correctly
Store the board upright, on its long edge, or flat on its feet if it has them. Feet lift the board off the counter so both faces dry at the same rate, which is the entire reason they exist.
Never stack a damp board under another board. Two wooden surfaces pressed together while wet is the fastest route to a warped one.
Keep boards away from the dishwasher, the oven, a sunny window, and a stovetop. Heat and repeated low humidity dry wood unevenly, and a board that sits beside a sink all day will pick up moisture it cannot shed.
Upright storage near the sink beats lying flat, but the best spot is anywhere with airflow and no direct heat. If you only have a flat spot, make sure it is dry and use a rack that lets the board breathe underneath.
Common Mistakes
Almost every warped or split board I have seen traces back to one of these. Each has a straightforward fix.
Soaking the board. A sink of warm water lets water soak in from all sides at once, and the board swells unevenly as it dries. Fix it: keep water contact short and always dry standing up.
Running it through the dishwasher. The heat, the detergent, and the long soak cycle cook and strip the wood, split bamboo laminates, and drive glue out of the seams. There is no recovery from a dishwasher cycle for a wooden board.
Drying only one side. Patting the top and leaving the bottom on a wet counter is the classic cupping error. Fix it: stand it on edge or flip it halfway through drying.
Oiling with olive, vegetable, walnut, or plain coconut oil. These are food oils with proteins that break down, go rancid, and start smelling within weeks. Walnut oil is a specific problem for anyone with a nut allergy. Fix it: use food-grade mineral oil, fractionated coconut oil, or a beeswax board cream.
Storing the board while it is still damp. Sealing moisture in between two boards or in a closed drawer produces warping and mold. Fix it: wait until it feels dry to the touch at room temperature.
Sanding too often. Heavy sanding strips the oil and leaves a rough, hungry surface. Fix it: use 220-grit lightly, only when the board has gone fuzzy, and re-oil straight afterwards.
Buyers of “tung oil” finishes should know that many hardware-store tung oil products are a blend with driers and solvents, not pure tung oil, and are not rated food-safe. If the label does not say food-safe for food contact, do not put it on a board you cut food on.
For a maintenance rhythm, here is what most home cooks settle into:
- After every use: scrape, hand wash with soap, dry upright.
- Weekly: check for raised fibres and sand lightly at 220 grit if the surface feels rough. Wipe down counters and sinks that touch raw meat.
- Monthly: run the water-beading test and re-oil if water sinks in.
- Twice a year: sand, re-oil, and check glue lines on laminated bamboo for seepage.
- Yearly: inspect for deep splits, black speckling, or a persistent smell, and retire the board if any of those show up.
Frequently Asked Questions
Do you wash wood cutting boards with soap?
Yes. Wash a wooden cutting board with warm water and a small amount of mild dish soap after every use. A short contact with soap will not damage the wood or a food-safe oil finish. What harms a board is water soaking in and staying there, so rinse quickly, dry the surface with a towel, then stand the board upright so both faces dry in the air.
How often should you re-oil a cutting board?
For a board used daily, oil it about once a month, and check weekly with the water-beading test: drops that sit as round beads mean the oil is still working, while water that soaks in and leaves a dark patch means it is time to condition the wood again. A brand new board takes a coat before first use plus weekly coats for the first month. A board used for bread once a week can go several months.
How do I remove mold from a wooden cutting board?
Scrub the affected area with a solution of one tablespoon unscented liquid dish soap per cup of water, rinse, and let the board dry completely in open air. For stubborn black patches, try a paste of coarse salt and the cut face of half a lemon, then re-oil once the wood is dry. If black speckling returns within days, the board is sitting somewhere permanently damp and should be replaced.
How long should you wait after oiling a cutting board?
Let the board sit for 15 to 30 minutes after spreading the oil, then buff it with a clean, dry towel until it feels dry rather than tacky. Longer soaking times do not seal better; they only leave a greasy film that eventually turns sticky. Never oil a damp board, because sealing in moisture encourages warping and mold rather than preventing them.
Can you put a wooden cutting board in the dishwasher?
No. Dishwasher heat, strong detergent, and the long soak cycle strip the oil, split laminated bamboo along its glue lines, and dry wood unevenly enough to warp it permanently. Hand washing takes under a minute. If a board is permanently stuck on a dishwasher rack, soak it briefly in warm soapy water, scrub it, dry it upright, and re-oil it within a few hours.
What is the healthiest oil to use on cutting boards?
Food-grade mineral oil, often labelled USP mineral oil, is the safest and most neutral choice: it has no smell, no taste, and it does not go rancid. Fractionated coconut oil is a good alternative, and beeswax board cream adds longer-lasting water repellency. Avoid olive, vegetable, walnut, and plain coconut oil, which break down and turn rancid, and avoid nut-based products if anyone in the house has a nut allergy.
A Simple Care Routine to Keep
Wash after every use. Dry upright, never flat and never damp. Oil when the water test says the board is thirsty, which for most kitchens means monthly. Store on its edge or on its feet, away from heat and dampness. That is how to care for a wooden cutting board, and it works whether the board is maple, walnut, acacia or bamboo.
That is genuinely all of it. None of the boards you own should ever see a dishwasher, a soak, or a bottle of cooking oil, and a board cared for this way gets better looking with age instead of worse.
Replace a board when it has deep cracks that catch a fingernail, permanent black speckling, a smell that survives a full wash and re-oil, or a warp so pronounced that food will not stay on it. A warped board can sometimes be flattened: dampen the cupped face, put it under a flat heavy weight with a towel between, and leave it for a day or two. End-grain splits can be glued and clamped back together. Persistent mold and spalting cannot be fixed, and those boards should go.
The type does change the details. End-grain butcher blocks drink oil faster and need more frequent coats, walnut is a closed grain that drinks little, acacia is hard and dense but marks easily, and bamboo is glued from thin laminates that can seep glue along the seams when they get wet. Know which one you are holding and the same four-step routine works for all of them.