Lard is one of the best-kept secrets in a home kitchen: a neutral-tasting pork fat that takes high heat without smoking, fries food to a hard shatter, and makes pie crust that stays flaky even after you re-roll it. Most home cooks reach for butter or vegetable oil out of habit, not because lard is worse. Once you know which kind of lard to buy and how much to put in the pan, cooking with lard becomes one of the simplest upgrades you can make to a weeknight dinner.
If you have wondered how to cook with lard and when to use it, this guide covers the answer: when to swap it for butter or oil, the amount that actually belongs in a skillet, and how to tell when the fat is too hot before your food splatters across the stove.
Table of Contents
- What You Need
- How to Cook with Lard and When to Use It
- Step-by-Step
- How to Crisp Skin or Vegetables with Lard
- How to Roast with Lard for Crisper Results
- How to Use Lard in Doughs, Batters, and Finishing Fat
- Common Mistakes
- How to Tell When Lard Is Too Hot
- How to Store Lard Safely
- Frequently Asked Questions
- Can I use lard instead of butter when cooking?
- Is lard better than oil for crispy skin?
- What is the smoke point of lard?
- Is seasoned lard or plain lard better for cooking?
- How much lard should I use in a skillet?
- How long should homemade lard be refrigerated?
- Conclusion
What You Need
Before anything else, sort out which product you are actually holding. Plain rendered lard is fat that has been melted out of pork fat, strained, and poured into a jar or tub. It is solid and white to ivory at room temperature and clear when melted. Seasoned lard, or cracklings, is the crunchy residue left behind after that rendering. Cracklings are a snack, and they are seasoned with salt and often pepper, so they have no business in a pie crust or a pan of vegetables.
For everyday cooking, plain rendered lard is what you want. Leaf lard, taken from around the kidney, is the closest thing to a premium version: whiter, milder, and the traditional pick for pastry. Back fat, sometimes sold as fatback, is cheaper and carries a slightly deeper pork note that disappears in a hot pan.
Check the label before you buy. If it lists partially hydrogenated vegetable oil, BHA, BHT, or the words hydrogenated or hydrolyzed, it is an industrial shortening with a lard-style name. That kind of fat works fine for frying, but it is not what you want in a pie crust, and it can smell faintly chemical when it heats.
A few tools make the job easier:
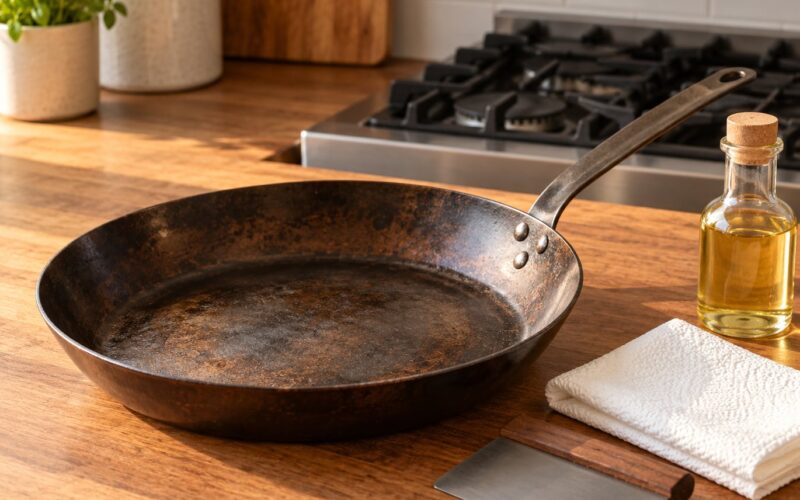
- A heavy skillet — cast iron or stainless steel holds temperature better than a thin nonstick pan, and heat stability is the whole reason to reach for lard.
- A sheet pan with low sides — for roasting and for skin-side-down crisping.
- An instant-read thermometer — the only reliable way to stop guessing at doneness.
- A heatproof measuring spoon — cold lard sticks to everything else.
- A fine strainer or a slotted spoon — to lift food without carrying a heavy layer of fat back to the pan.
A salt box matters more than people expect. Unsalted lard lets you season the food; salted lard in a skillet can push a dish over the edge before you taste it.
How to Cook with Lard and When to Use It
The short answer: use lard whenever browning, crisp texture, or a clean savory richness is the goal. Skip it when you want the dairy flavor of butter, the peppery bite of olive oil, or a fat that does not firm up when cold.
Lard is roughly 40 percent saturated fat and about 45 percent monounsaturated fat, and it holds almost no polyunsaturated fat. That last part is why it behaves. Seed oils with a high polyunsaturated content break down at frying temperatures and go acrid. Lard does not. Its smoke point sits around 375°F / 190°C, which means it stays usable well past the temperature most pan cooking needs.
Reach for it in these situations:
- Crisping skin — pork belly, chicken thighs, duck breast, or a whole fish. The fat renders out of the skin while the surface dries, and you get shatter instead of chewy.
- Roasting — rubbed on vegetables or meat before they go in the oven. It seasons the outside and reduces how much oil the dish needs.
- Sautéing and pan-frying — especially anything you want deeply browned rather than merely cooked through.
- Deep or shallow frying — hush puppies, fries, fried chicken, empanadas, tamales, doughnuts. Lard gives an even, pale-golden crumb and a thin shattering crust.
- Basting — spooning hot fat over a roast halfway through, which keeps the surface from drying out.
- Enriching doughs and batters — pie crust, biscuits, scones, and cookies, where it produces flaky layers and a savory depth butter cannot fake.
- Greasing pans — popovers, biscuits, and cornbread sticks that need a nonstick surface without a chemical coating.
Choose something else in these cases:
- You want butter’s flavor, such as in a pan sauce, a cake, or finishing a roast. Butter and lard are not interchangeable on flavor, only on function.
- You are dressing a salad or making a light vinaigrette. Solid fat will not emulsify the way oil does.
- You are marinating in acid. Lard has no place in a vinaigrette-style marinade.
- You are cooking delicate fish or a thin cut over moderate heat. Lard’s high melting point means it stays solid where a thinner oil would coat the food evenly.
- The recipe calls for a neutral oil and the flavor of fat would be wrong, such as in a delicate cake or a vinegar-based dressing.
For a straight swap, use lard one for one for butter, olive oil, or vegetable shortening by weight. Expect one difference: butter brings water and milk solids with it, and lard does not, so a lard version of a recipe will be less tender and more crumbly unless the recipe already includes other fat or shortening.
Step-by-Step
The core workflow is the same whether you are frying a chicken or roasting a tray of carrots.
- Pick the fat. Plain rendered lard for the pan, leaf lard for pastry, cracklings for snacking.
- Measure a thin layer. One to two tablespoons for a 12-inch skillet is plenty for sautéing. For shallow frying you want about a quarter inch of fat in the pan, which for most home skillets means roughly a cup.
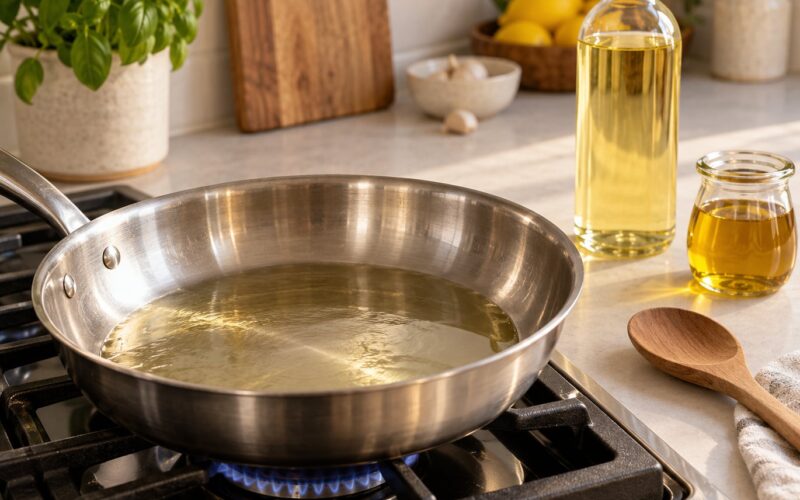
- Heat the fat, not just the pan. Put it in first, then bring it to temperature. Lard foams and begins to shimmer when it is ready; it should not smoke.
- Dry the food. Wet surfaces cause violent splattering. Pat skin, vegetables, and meat dry before they go in.
- Cook undisturbed. Let each piece sit until it releases from the pan on its own, usually three to four minutes, before turning.
- Judge the result. Deep golden color, a firm crust, and a clear temperature reading. For whole cuts of meat, fish, and poultry breasts, the USDA minimum internal temperature is 145°F / 63°C. Ground meat needs 160°F / 71°C, and poultry needs 165°F / 74°C.
- Drain and rest. Lift onto a rack or a paper-lined plate. Food left on a plate sits in its own fat and steams itself soft.
How to Crisp Skin or Vegetables with Lard
Melt a thin layer of lard in a heavy skillet over medium heat until it shimmers and lies flat across the base. Add the skin or vegetables cut side down, press them into the fat, and leave them alone.
The signs that the fat is working are quiet. The edges of the pieces go translucent, the skin slackens, and a clear layer of rendered fat collects around them. That pooled fat is what used to be the moisture in the skin. When the pieces release from the pan on their own and the underside is deep gold, they are done.
For whole cuts, check the center with your thermometer and pull at 145°F / 63°C. Then move the pieces to a rack. Paper towels trap steam underneath and undo the crispness you just built.
How to Roast with Lard for Crisper Results
For a roast, cut the cold lard into small pieces and work them into the skin or the surface of the meat, or drizzle melted lard over vegetables and toss until every piece looks glossy. A quarter cup for a two-pound roast is plenty.
Roast at your recipe’s usual temperature, usually between 375°F / 190°C and 425°F / 220°C for anything that needs browning. Lard does the work that oil would, and it adds a slight savoriness on top.
Baste only if the surface looks dry before the halfway mark. Then keep an eye on the color from the last third of the cook. Fat that has gone from gold to dark brown and starts smelling sharp has gone past useful and is heading toward bitter, and no amount of basting fixes that.
Rest the meat 10 to 15 minutes before carving, so the juices stay in the meat instead of on the board.
How to Use Lard in Doughs, Batters, and Finishing Fat

In baking, lard is a measuring question as much as a cooking one. Cut it into the flour with a pastry cutter and rub it through until the mixture looks like coarse crumbs, then add just enough ice water to bring it together. Because lard has a much higher melting point than butter, the dough stays cold and firm while you work it, and it does not shrink in the oven the way a butter dough can.
That higher melt point is also why you never need to rest lard dough. You can re-roll the scraps two or three times without the pastry turning tough.
A practical pie crust ratio is two parts flour to one part fat by weight, with roughly a tenth of the flour weight in salt and enough cold water to hold. Lard works for biscuits and scones the same way, cut into the dry ingredients and left in pieces so the finished crumb has visible layers. It also works in gingersnaps and other cookies, where it gives a snap rather than a cakiness.
When a recipe asks for melted or liquid fat, melt the lard gently and let it cool a few minutes before adding it. Straight from the heat it will melt the butter you were expecting to cream, and the dough will come out greasy.
Bacon drippings are not lard, though they are close cousins. They render out of the meat rather than the fat, they carry salt and smoky flavor, and they are darker. They are excellent for frying eggs or greasing a griddle and a poor substitute for the neutral fat in a sweet pastry.
Common Mistakes
Nearly every disappointing lard dish traces back to one of a handful of problems.
The fat smoked. Lard that smokes before the food goes in is too hot, and the smoke carries an acrid edge into everything. Lower the heat, take the pan off the burner for a minute, and add the food when the fat is shimmering rather than smoking.
Food came out greasy. Two causes: too much fat in the pan, or food sitting in fat after cooking. Use a thin layer, and drain on a rack instead of a plate.
Nothing browned. Either the pan was crowded or the food was moved too early. Give every piece a centimeter of space, and let it sit until it releases on its own. Steam, not heat, is what keeps a crowded pan pale.
Food stuck. Lard seasons cast iron over time, but it is not automatically nonstick. A crowded pan sticks because of contact with other food, not because the fat failed. Wipe the pan with a paper towel between batches.
The crust burned before the center cooked. The fat got too hot while the interior was still cool. Baste more often, or lower the temperature by 25°F / 15°C and give it more time.
Big splatters across the stove. The pan was hot and the food was wet. Dry everything, and add food away from the heat rather than dropping it in.
The jar in the back of the pantry smells off. Fat stored warm or open to air goes rancid long before it goes dangerous, but the smell is unpleasant enough that you will not want to cook with it.
How to Tell When Lard Is Too Hot
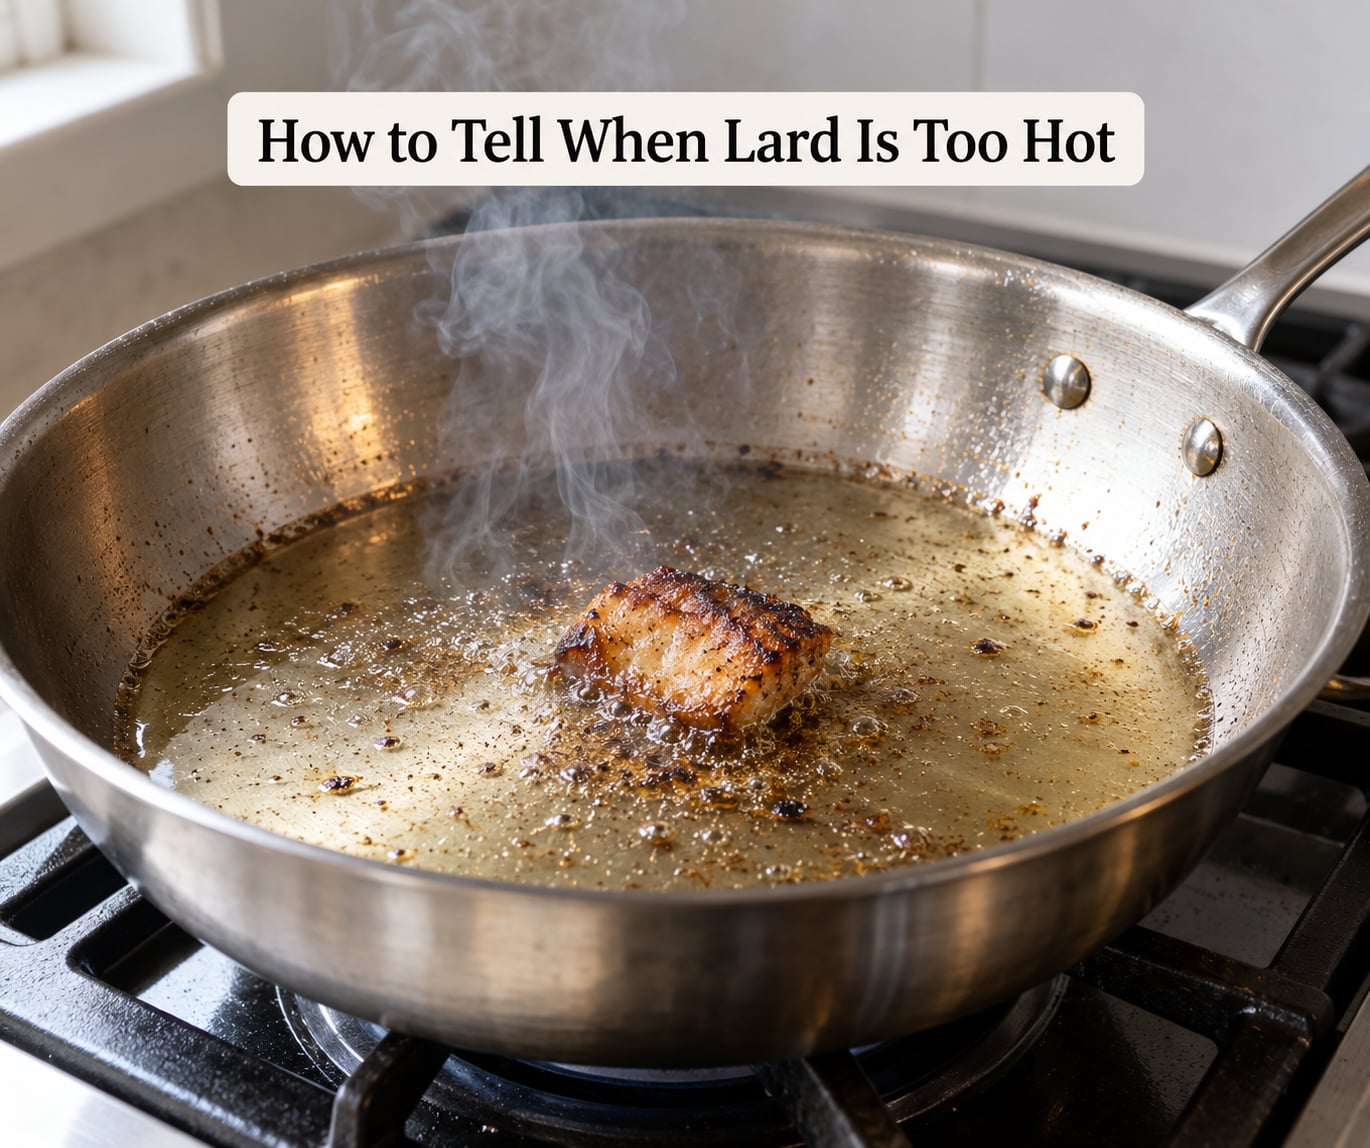
Too-hot lard announces itself in a specific order. It goes from clear to a pale straw color, then starts to smoke in thin lazy threads. The smell shifts from nothing to a sharp, burnt-pork odor that is nothing like the mild smell of properly rendered fat. If you catch it at the smoke stage, move the pan to a cold burner or lower the flame before the fat turns dark and the smell turns acrid.
Water is the real danger here. A drop of water in properly hot fat produces a burst of steam that throws droplets across the room. Wet ingredients, ice, or a crowded pan releasing moisture all do the same thing, which is why dry food and moderate batch sizes matter more than any other habit in the whole process.
A good test before you commit: flick a tiny bit of dry food into the fat. It should sizzle immediately and steadily. Silence means the fat is too cool; a violent pop and a smoke cloud mean it is too hot.
How to Store Lard Safely
Commercially packaged lard is shelf-stable until you open it. Follow the package label for unopened products, and refrigerate the tub after opening in a cool cupboard or the fridge, depending on what the label says.
Homemade lard has a much shorter life. Strain it through a fine sieve or cheesecloth into a clean jar, press out the last bits of crackling, and refrigerate it airtight. Use it within three to four days, or freeze it in portions for longer storage. Frozen lard keeps its quality for several months.
Label the jar with the date. Lard is nearly colorless, and freshness is the one thing you cannot check by looking.
Rancid fat smells like old crayons or stale nuts, and it tastes bitter the moment it hits the pan. A cloudy or grainy look in the jar means water crept in, and the batch should go. Sniff a spoonful of the old jar next time you buy new stock.
Frequently Asked Questions
Can I use lard instead of butter when cooking?
Yes, for frying, roasting, and sauteing, where you want browning and crisp texture rather than dairy flavor. Swap it one for one by weight for butter, olive oil, or shortening. The one real difference is that lard has no water in it, so a lard version of a baking recipe will be less tender unless the recipe includes other fat. Skip lard when the flavor of butter is the point.
Is lard better than oil for crispy skin?
Usually yes. Lard holds heat more steadily than most vegetable oils and has a smoke point near 375F / 190C, so it fries at a stable temperature instead of drifting. Its low polyunsaturated fat content also means it does not go bitter under sustained heat. Pat the skin dry, use a thin layer, and lay the pieces down skin side without moving them for the first few minutes.
What is the smoke point of lard?
Plain rendered lard begins to smoke at roughly 375F / 190C, which is higher than butter and about where a good deep-frying oil sits. That is its smoke point, not its flash point. Actual cooking rarely needs more than 400F / 205C, so a well-rendered lard is comfortable for frying, searing, and roasting. Once it smokes, the flavor turns acrid quickly, so lower the heat rather than cooking through the smoke.
Is seasoned lard or plain lard better for cooking?
Plain rendered lard. Seasoned lard, sold as cracklings, has salt and often pepper worked into it, and it is a snack rather than a cooking fat. The salt makes it hard to season a dish properly, and the texture has no place in a pan or a pie crust. Keep cracklings for eating and keep plain lard for frying, roasting, and baking.
How much lard should I use in a skillet?
One to two tablespoons for a 12-inch skillet is enough to prevent sticking and start rendering skin. For shallow frying you want about a quarter inch of fat in the pan, which usually works out to roughly a cup. Deep frying needs more so the food is partly submerged. Using too much is the most common reason lard-fried food turns greasy, and it can cool the pan below frying temperature.
How long should homemade lard be refrigerated?
Strain it through a fine sieve or cheesecloth into a clean airtight jar and keep it in the refrigerator for three to four days. For longer storage, freeze it in small portions and thaw one at a time on the counter as you need it. Homemade batches lack the preservatives that make shelf-stable commercial lard, and repeatedly warming a jar in a cool cupboard shortens its life considerably.
Conclusion
If you have never cooked with lard, start here: buy plain rendered lard rather than cracklings or hydrogenated shortening, put one to two tablespoons in a heavy skillet, and let it shimmer before the food goes in. That single habit fixes most of what goes wrong.
From there, match the fat to the goal. Skin, fries, and fried chicken want a hot pan and a thin layer. Roasts and vegetables want it rubbed on before they go in the oven. Pie crust and biscuits want it cut into flour with cold hands. And when you want butter’s flavor or a light, acidic dressing, use something else. Lard is not a replacement for every fat in the kitchen. It is the one to reach for when you want browning, crispness, and a savory depth.