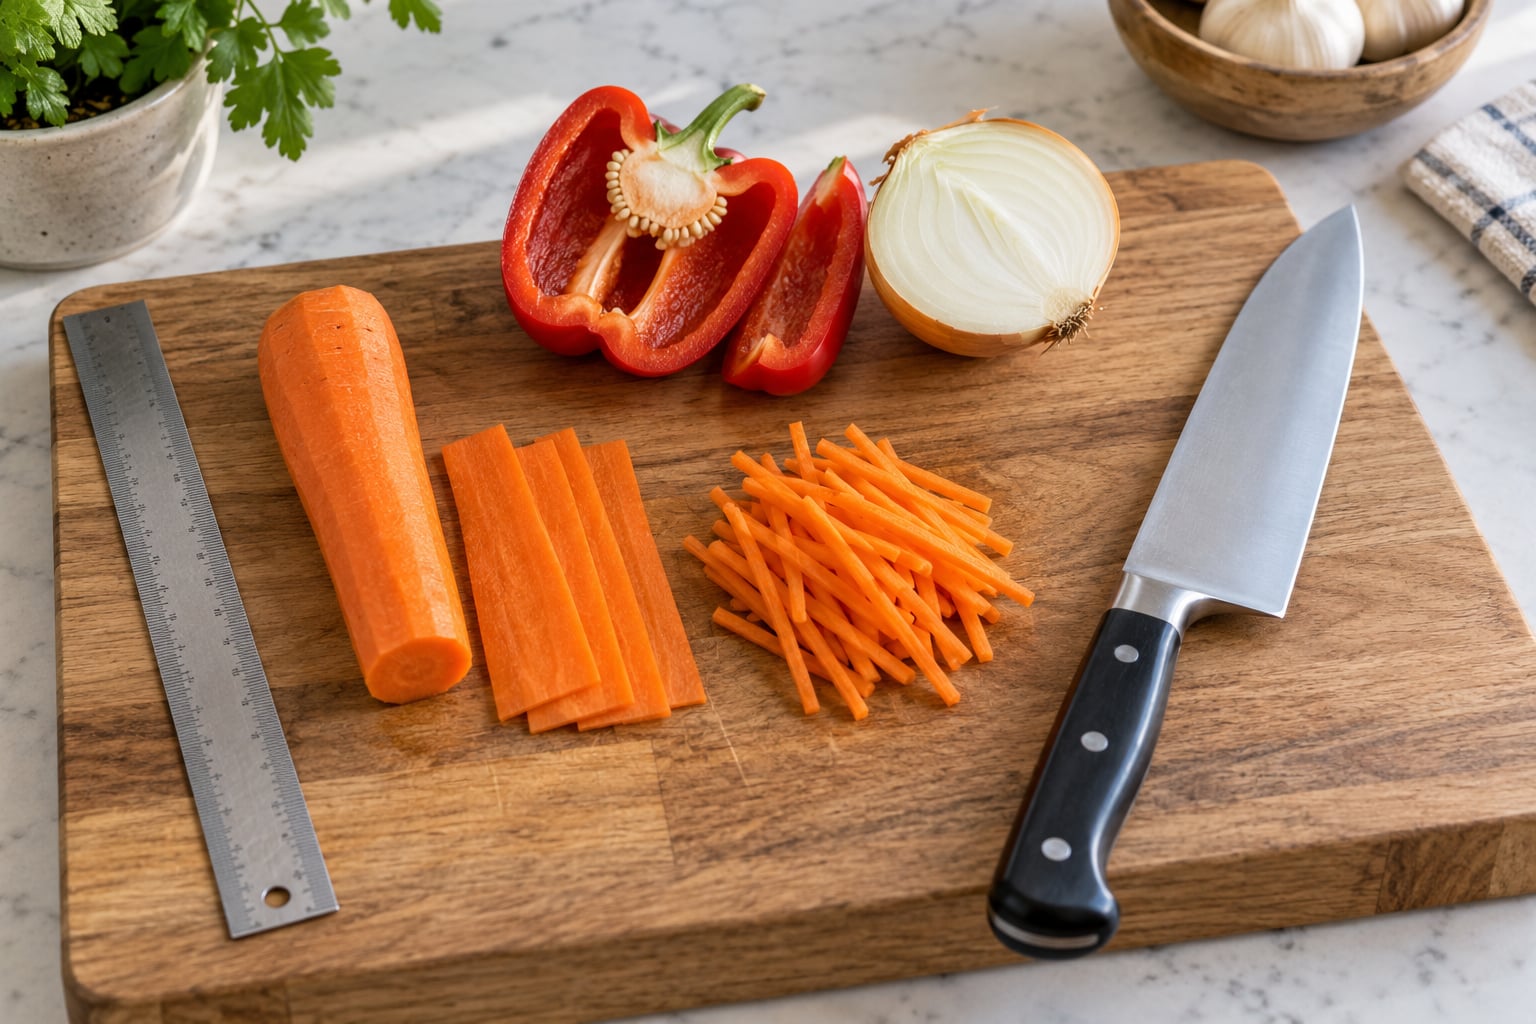
The easiest way to learn how to julienne vegetables by hand is to square off one side of the vegetable so it lies flat, slice it lengthwise into 1/8 inch planks, stack those planks, and cut across them into 1/8 inch matchsticks 2 to 3 inches long. A sharp chef’s knife and a steady cutting board are genuinely all you need. No mandoline, no julienne peeler, no processor.
A julienne (French for matchstick, also called an allumette cut) is about 1/8 inch by 1/8 inch by 2 to 3 inches, which is 3 mm by 3 mm by 5 to 7 cm. When every strip is the same thickness, a slaw or a stir-fry cooks at one rate instead of some pieces going soft while others stay raw.
If you have sharpened a knife in the last few months, you can finish a plate of julienned carrot in about ten minutes. If not, allow yourself twenty and put a damp paper towel under your board first.
Table of Contents
- How to julienne vegetables by hand in six steps
- What You Need
- Step-by-Step: How to Julienne Vegetables by Hand
- Square off the vegetable and set up a stable board
- Cut planks, stack them, and slice them into even matchsticks
- Common Mistakes
- Frequently Asked Questions
- What is the easiest way to julienne vegetables by hand?
- Which vegetables are best for hand-julienning?
- How do I cut julienne strips the same thickness without a mandoline?
- Do I need a special knife or tool to julienne vegetables?
- How thick should julienne strips be?
- What can I do with julienned vegetables after I cut them?
- Conclusion
How to julienne vegetables by hand in six steps
- Trim and wash the vegetable, then cut it into 2 to 3 inch lengths.
- Slice a thin plank off one side to create a flat face, then stand the piece on that face.
- Slice lengthwise into planks about 1/8 inch thick, checking the first one against a coin or credit card.
- Line the planks up so their long edges touch, and press the stack gently to close air gaps.
- Hold the stack with curled fingers and cut crosswise into 1/8 inch wide matchsticks.
- Repeat with the mirrored grip if your other hand is weaker, and keep cut strips in a bowl so they do not scatter.
What You Need
You need a knife you can hold steady, a surface that will not move, and a way to judge 1/8 inch. That is the whole kit.
- A sharp chef’s knife or Santoku, 7 to 8 inches. Length matters less than sharpness. A dull blade crushes and tears the vegetable instead of parting it, which is what produces jagged ends and thick-thin-thin strips.
- A large cutting board. Small boards force you to reach over your work. Put a damp paper towel or a wet cloth underneath so the board stops sliding.
- Something to measure with. A ruler is the honest answer, and cooks who train on this cut keep one in the kitchen bag. Failing that, a US quarter is roughly 1/8 inch thick and a credit card is about 1/8 inch too, so either works as a gauge for vegetables, and a penny is closer to 1/16.
- The vegetable itself. Firm, dense ones such as carrot, daikin, potato, celery, and bell pepper hold the cut best. Softer produce like cucumber and tomato needs a gentler hand.
A mandoline is optional, and for most home cooks it is not worth the drawer space or the risk. Here is how the common options compare for someone trying to julienne vegetables by hand.
| Tool | Result | Worth it for |
|---|---|---|
| Chef’s knife | Even 1/8 inch matchsticks with clean ends, full control of length | Almost always, once you can do the square-off |
| Julienne peeler | Quick matchsticks from firm raw vegetables, but rounds are lost to the blade | Large batches of carrot or daikon, if you already own one |
| Mandoline | Very fast and adjustable, with a real injury risk on the carriage | Experienced hands doing a lot of prep |
| Food processor grater blade | Fast but usually closer to a rough shred than a true julienne | Coarse work in big volume, not precise cuts |
Step-by-Step: How to Julienne Vegetables by Hand
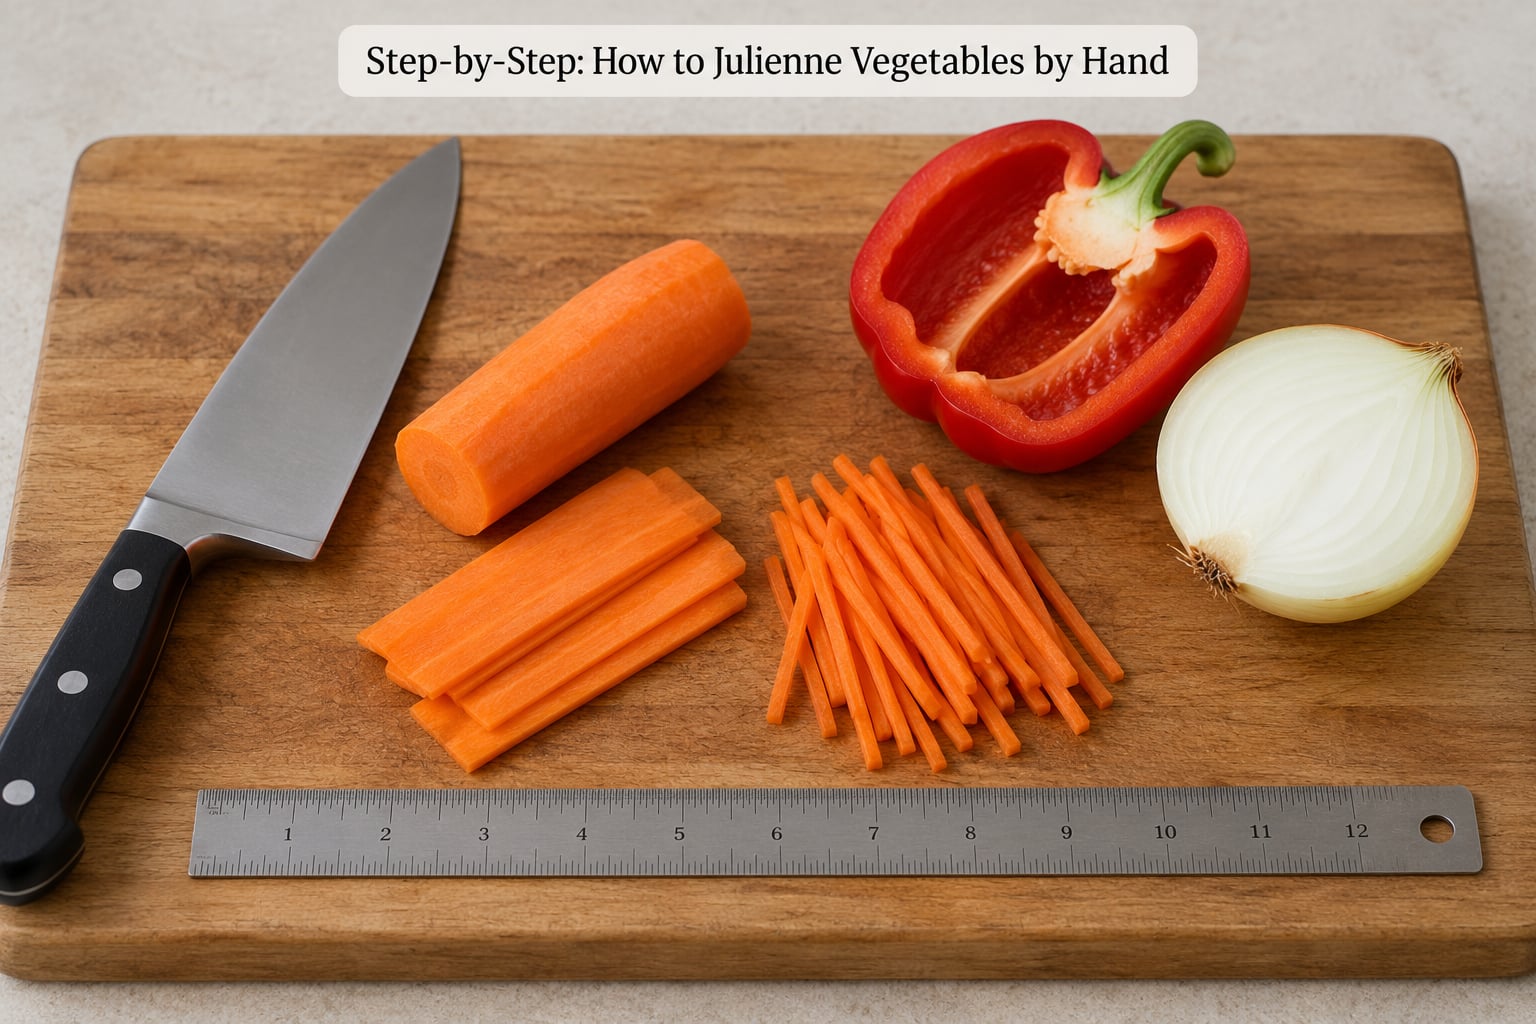
Square off the vegetable and set up a stable board
Start by giving yourself a flat, non-slip surface. Wipe the board, set it on a damp towel, and put the knife within easy reach. A board that moves halfway through a plank cut is how a lot of near-misses happen, and I have had more than one carrot roll off the counter.
Wash and trim the vegetable, then cut it into 2 to 3 inch lengths. This step is easy to skip and it matters: long pieces wobble, and short pieces give you matchsticks of a sensible eating length. A 12 inch carrot becomes three pieces before you start cutting it lengthwise.
Now choose the easiest orientation. For a round vegetable like a carrot or a potato, stand it on its base and cut a slice off the side to create one flat face, then set the piece down on that face. For a bell pepper, the flat side is already there, so you can go straight to planks. For a leek, cut the root end off and split the stalk down the length if it is thick, so the layers stay together as you work.
Flatten any curved leftovers rather than fighting them. A convex side down rocks, so turn it concave side down instead, and a short piece of onion half with the curve facing the board is far steadier than a whole round one.
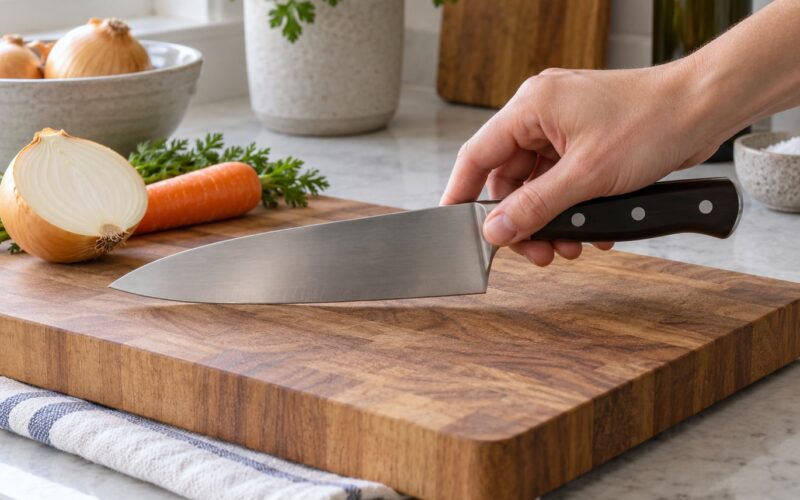
Now set your hand position. Rest the pads of your fingers and the pad of your thumb against the blade’s flat side, curl your fingertips under, and let the blade rest against the middle knuckle of your index finger. The knuckles stay on the spine, the fingertips pull back behind it, and the knife rocks rather than sawing. This is the single habit worth building, and cooks in the training trenches describe it as the one they had to force themselves into first.
Make your first two cuts with that grip before you worry about thickness. If your hand feels like it is in the way, the usual cause is a grip that’s too tight rather than too loose.
Cut planks, stack them, and slice them into even matchsticks
Set the flat piece on the board and slice lengthwise into planks about 1/8 inch thick. Check the very first plank against your quarter or credit card, and adjust before you go further, because all the later strips inherit that first measurement. A plank that is 1/8 inch thick becomes a matchstick 1/8 inch wide when you cut across it.
Line the planks up with their long edges touching so you get one wide rectangle rather than a row of separate pieces. Press down lightly on the stack with the flat of the blade and close any air gaps, because slices that touch the board at one point and hover at another rock and produce the thick-and-thin mess everybody complains about.
Here is the beginner-versus-experienced split. If this is your first few times, stack three or four planks and cut them, then move back down the board and repeat. A full stack of eight or ten planks gives a nicer, faster result and works well once the plank stage is automatic, but it also gives your wrist more to complain about and more to send flying when the stack shifts.
There is a third method that avoids stacking altogether: lay each plank flat and cut across it one at a time, fanning the finished matchsticks to the side as you go. It is slower, which is fine, and for watery vegetables like onion and pepper it is often the better choice because the slices stay put.
Turn the stack so the cut edge faces the blade, curl your guiding-hand fingers under, and cut crosswise into 1/8 inch wide matchsticks. Move the blade with a rocking heel-to-toe motion rather than pushing straight down, and let the knife do the work. Repeat the whole plank-and-stack routine on the mirrored side, where you cut lengthwise to get even strips from both faces, so a thick wedge does not hide at the back of the piece.
Per-vegetable notes, because they change the setup more than the technique does:
- Carrot, daikon, potato: The easiest case. Peel, cut to lengths, stand on the base, slice the flat face, then proceed.
- Onion: Peel, halve through the root, and cut with the grain. Onions fall apart into layers when you stack them, so cut planks one at a time and let each layer fall away as you finish it.
- Bell pepper: Cut a face off the side, remove the seeds and white pith, and lay the piece skin-side down. It is already flat, so you skip the square-off.
- Leek: Cut the dark green tops off, split thick stalks lengthwise, and separate the layers. Each layer is a natural plank, so you cut rather than stack.
- Celery: Peel the strings, then cut the stalk lengthwise into thin slices. Celery gives you planks straight from the stalk’s own curve.
- Cucumber and zucchini: Peel if you want colour, halve, scoop the watery seed core, then cut skin-side down. The flesh is soft, so sharpen your expectations of the cut.
If you are left-handed, everything above still works. The only change is the direction the stack sits relative to the blade, and on a board with a raised edge on the handle end you may prefer to work with the edge on your dominant side.
Common Mistakes
The strips are all different thicknesses. This is the most common complaint by far, and it is usually not a technique failure. Look at the first plank you cut: if it was off, every strip after it was off by the same amount. A second cause is not pressing the stack together, so slices cut at slightly different heights as the knife travels. A third is cutting too fast, because the blade starts descending before it has landed on the board.
The pieces are too thick or too thin. Thicker than 1/8 inch and you have made batonnets or a French fry cut instead. Thinner and the strips wrinkle and dry out before they reach the pan. Both are measurement failures, not cutting failures, so measure the first plank and only then keep going.
The knife is dull. Jagged, torn, compressed ends are a sharpening problem. Wipe the blade and draw it across a piece of paper; if it tears or skips, that is your answer. Push strokes need no force, and a julienne is the cut most likely to expose a dull edge because you are making so many cuts in a small area.
The vegetable rolls or slides. You are cutting a rounded piece on a round side, or your board is moving. Set a flat face down, and put a damp towel under the board.
The planks scatter when you cut them. Push them together with the flat of the blade before lifting, and drop finished matchsticks into a bowl instead of leaving them on the board.
Your wrist hurts after a big pile. Use smaller stacks and cut more often, or switch to the no-stack method. Repetition, not load, is what makes this cut fast.
A few tips worth keeping:
- Consistency matters more than hitting 1/8 inch exactly. Strips that are all the same width cook evenly, and nobody measures a slaw.
- Practice on cheap vegetables, save the trimmings, and freeze them. Onion ends, carrot peelings and celery leaves make a stock bag that costs nothing.
- Hold cut vegetables in ice water for a few minutes before serving, or add a squeeze of lemon to a bowl of water for potatoes, apples and pears, and it slows the browning.
- Cut before you cook, not during. Julienne is a prep cut, and doing it first means the strips hit a hot pan at once instead of sitting in a pile while everything else catches up.
Frequently Asked Questions
What is the easiest way to julienne vegetables by hand?
Square off one side of the vegetable, cut it into 2 to 3 inch lengths, slice it lengthwise into 1/8 inch planks, then stack the planks and cut across them into matchsticks. The square-off is the part people skip, and it is what makes the rest safe and even. Practise on carrots and onions, the two most forgiving vegetables, before trying softer ones.
Which vegetables are best for hand-julienning?
Firm, dense vegetables give the cleanest matchsticks: carrot, daikon, potato, bell pepper, celery, leek and onion. They hold their shape on the board and the blade parts them instead of squashing them. Cucumber and zucchini work but are softer and wetter, so take a lighter pass and expect some irregular ends.
How do I cut julienne strips the same thickness without a mandoline?
Measure the first plank against a quarter or a credit card, which are both close to 1/8 inch, and adjust before cutting anything else. Then press the plank stack flat so the slices sit at one height, and cut with a steady rocking motion rather than pushing straight down. If the strips still vary, the first plank was off, not the last one.
Do I need a special knife or tool to julienne vegetables?
No. A sharp 7 or 8 inch chef’s knife or Santoku and a stable cutting board are enough, and a ruler or coin helps you check thickness. A julienne peeler, mandoline or food processor can be faster in bulk, but none of them is required, and the knife gives you the most control over the length and the ends.
How thick should julienne strips be?
About 1/8 inch by 1/8 inch in cross-section, roughly 3 mm by 3 mm, and 2 to 3 inches long. If yours are noticeably thicker you have made a batonnet, which is 1/4 inch, or a French fry cut at 1/3 to 1/2 inch. Exactness is not critical, but every strip being the same width is.
What can I do with julienned vegetables after I cut them?
They go into slaws, stir-fries, spring rolls, salads, soups and quick pickles, and they work as a garnish on soups and grain bowls. Hold them in ice water before serving to crisp them up, and keep cut potatoes, apples and pears in acidulated water so they do not brown. Uncooked julienne also freezes well on a tray before you bag it.
Conclusion
Start by trimming the vegetable into 2 to 3 inch lengths and cutting one flat face so it cannot roll, then plank, stack and slice crosswise into even 1/8 inch matchsticks. That sequence is the whole technique, and it is what you repeat in every vegetable from carrots to peppers. A sharp knife and a board that stays put will get you further than any gadget in the drawer, so sharpen the knife, dampen the board and cut a few onions. Updated for 2026.