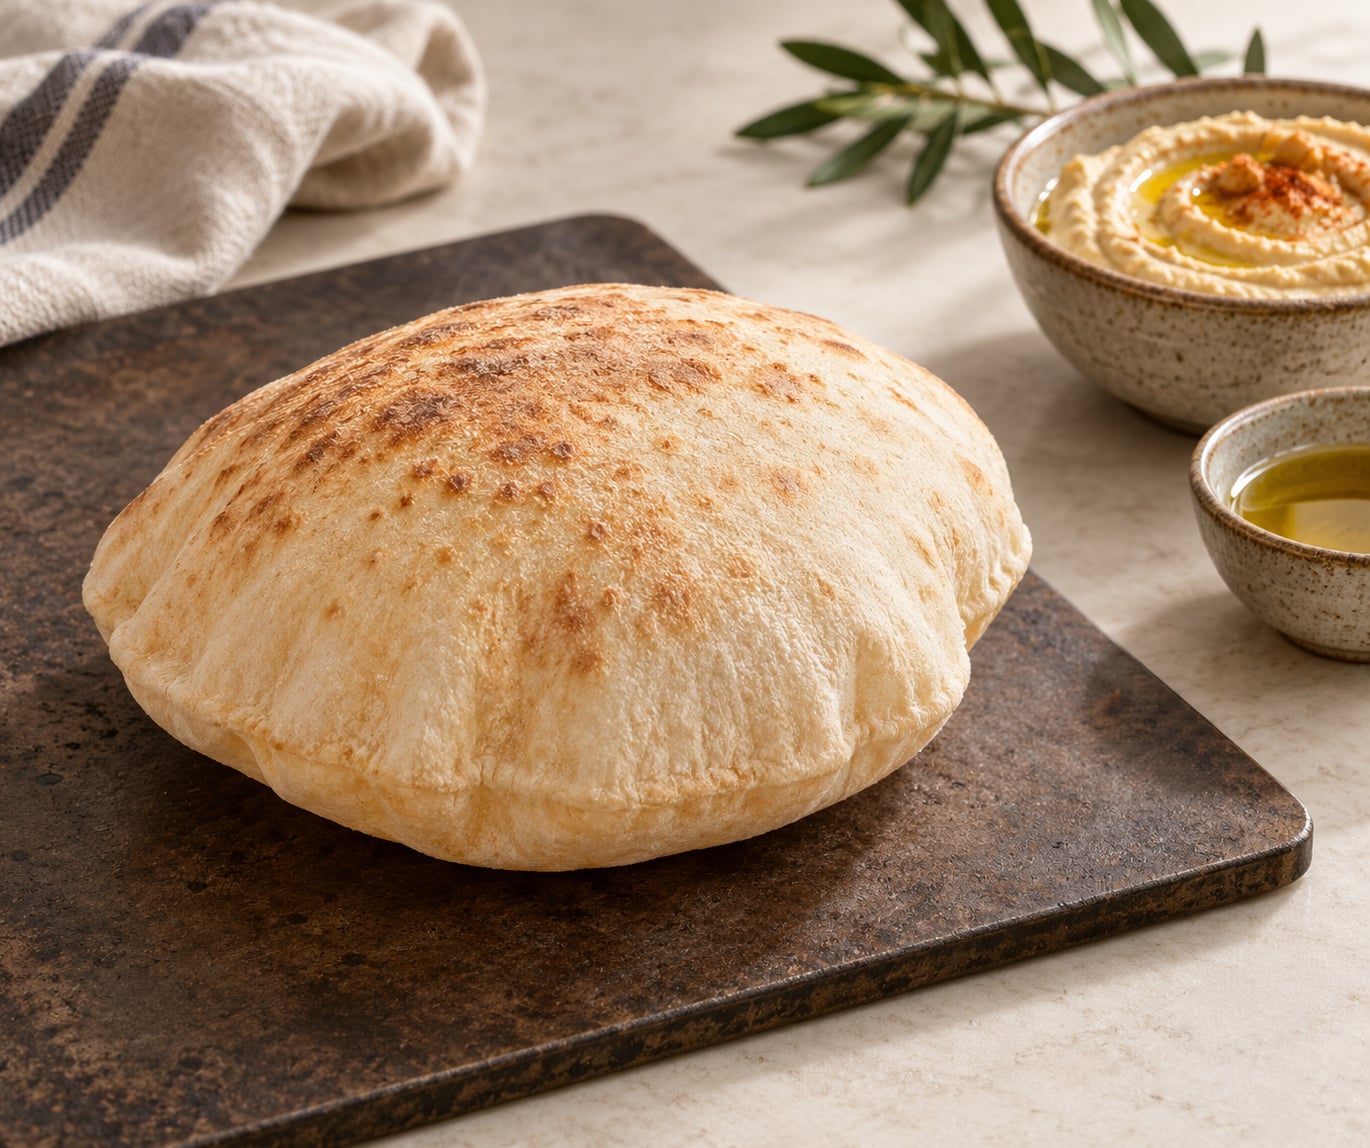
To make pita bread that puffs, roll it thin, leave it unpunctured, rest it, and bake it on a surface at 500F (260C) so the moisture inside flashes to steam and lifts the top into a pocket. Most flat pita comes down to three things: dough that has not proofed long enough, a round rolled too thick, or an oven that was never fully preheated.
The whole process takes about three hours, most of it waiting. Once you know what the dough and the baking surface should look like, it stops being guesswork.
Table of Contents
- What You Need
- Step-by-Step: How to Make Pita Bread That Puffs
- 1. Mix the Dough
- 2. Knead Until Smooth
- 3. Let the Dough Rise
- 4. Divide and Shape the Pitas
- 5. Rest the Shaped Pitas
- 6. Bake Until the Pitas Puff
- Which baking surface should you use?
- Common Mistakes
- Frequently Asked Questions
- Why does my pita bread not have a pocket?
- Why won’t my pita bread puff up?
- Which flour is used to make pita bread?
- Do you flip pita bread while baking?
- Is my dough ruined if it doesn’t rise?
- How do I get store-bought pita bread to puff up?
- Conclusion
What You Need
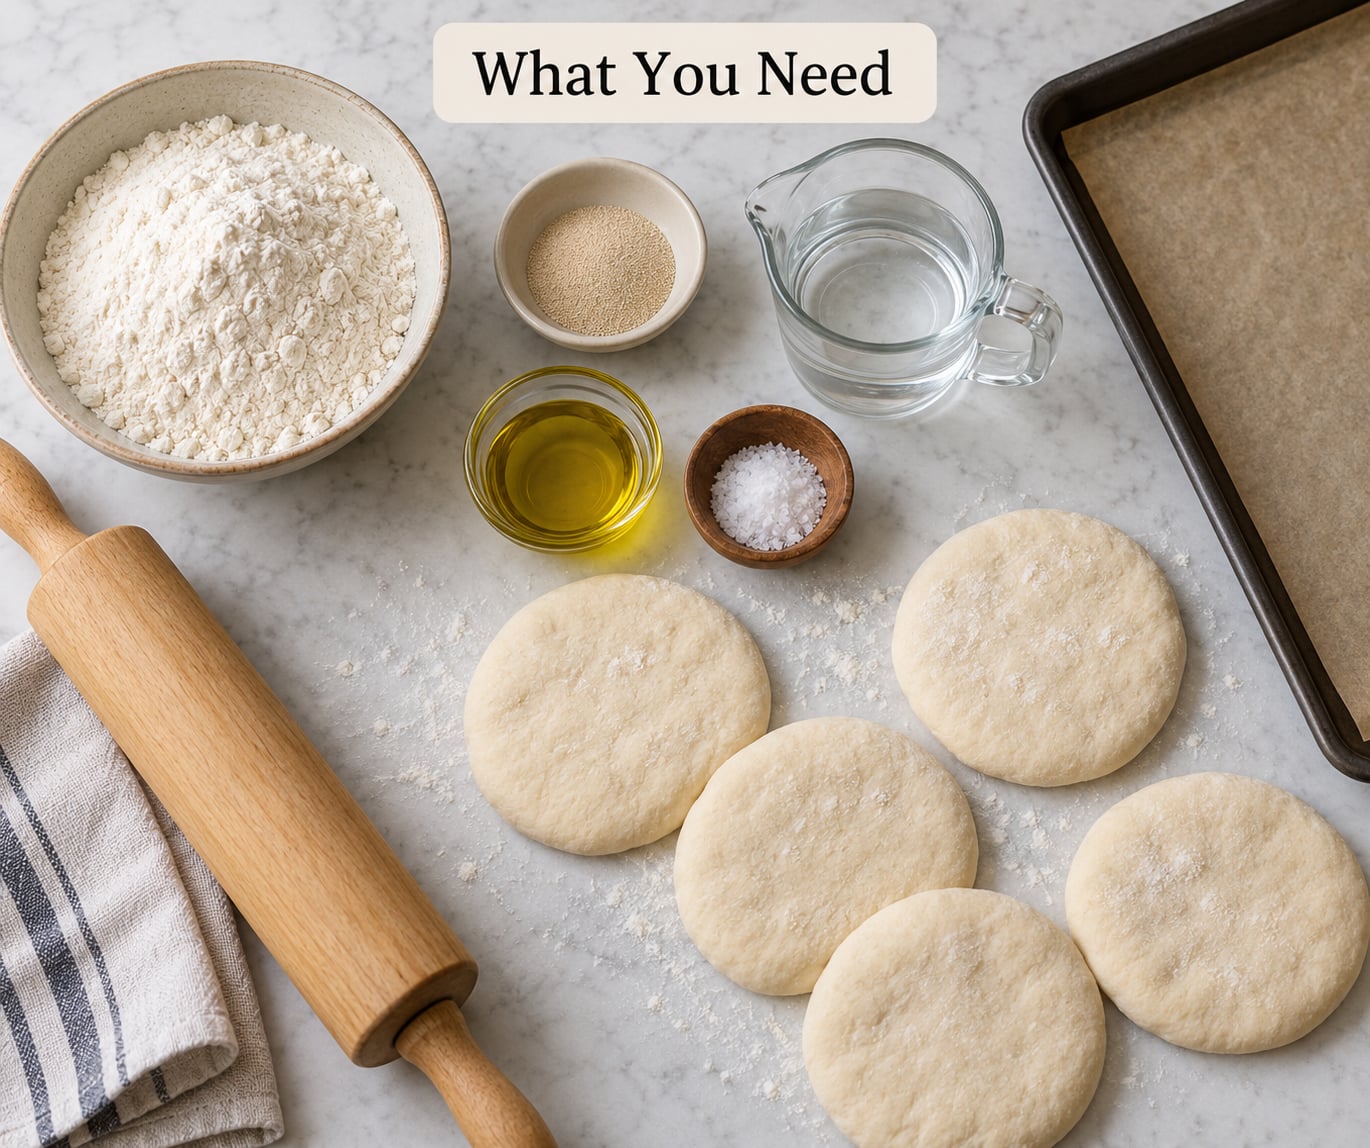
This recipe makes eight small pitas. If you are halving it, read the scaling note at the end of step 6, because a two-pita batch changes how the oven and surface behave.
- 300 g (2 1/2 cups) unbleached all-purpose flour, plus more for dusting
- 7 g (2 1/4 teaspoons) instant yeast, or 1 tablespoon active dry yeast
- 180 ml (3/4 cup) warm water, about 110F (43C)
- 2 tablespoons olive oil, plus a little for the bowl
- 1 teaspoon fine salt
Equipment matters more here than usual. You need a rolling pin, a bench scraper or knife for portioning, a clean towel or plastic wrap for proofing, and something to bake on: a baking steel, a pizza stone, a cast iron skillet, or a heavy rimmed sheet pan that has sat in the oven long enough to soak up heat.
A digital scale is worth using. Pita dough is a small, wet dough, and cups make it easy to be 10 percent off without noticing, which is usually the difference between a chewy round and a pillowy one.
Step-by-Step: How to Make Pita Bread That Puffs
1. Mix the Dough
Stir the yeast into the warm water and let it sit for five minutes if you are using active dry yeast. It should look cloudy and slightly foamy. If nothing happens, the water was too hot and killed the yeast, so start over with cooler water.
Add the flour, salt, and olive oil and mix with a spoon until no loose flour is left, then with your hands until a soft, slightly tacky dough forms. It should look like a shaggy mass at this point, not a smooth ball. Push it around for a full minute anyway, because the initial mix is what distributes the salt and oil evenly.
For a deeper flavor, mix 100 g of the flour with the water first, leave it covered for 20 minutes, then add the remaining flour, yeast, salt, and oil. That 20-minute sponge costs you nothing and gives the finished bread a rounder taste.
2. Knead Until Smooth
Knead on a lightly floured surface for 8 to 10 minutes. Set a timer, because most people stop at four minutes and that is why their dough tears when they roll it.
You are looking for a smooth, elastic ball that springs back when you poke it and no longer sticks to your palm. The gluten needs to be developed enough to hold steam pressure. Underdeveloped dough looks smooth on the outside but leaks air at the seams, so the pocket forms in two or three weak spots instead of one even dome.
3. Let the Dough Rise
Put the dough in a lightly oiled bowl, cover it, and leave it until it has roughly doubled and looks full of bubbles. At a cool room temperature around 70F (21C), that takes 90 minutes to two hours. In a warm kitchen it can be ready in 45 minutes, so watch it rather than the clock.
For a better flavor and easier shaping, put the covered bowl in the refrigerator overnight and let it rise there. Cold dough is firmer to handle and rolls out more evenly because the butter in the flour is solid.
Over-proofed dough collapses into a slack puddle and spreads when you roll it, so if the bowl is no longer domed and looks deflated, that is the problem. Pita puffs because of surface heat, not because of a big rise, so a moderate proof is enough.
4. Divide and Shape the Pitas
Turn the dough onto a lightly floured surface and cut it into eight equal pieces. For each piece, cup your hand over it and roll it into a smooth ball, then press it flat with your fingertips to about half an inch thick. Do not stretch it. Stretching thins the center and leaves a fat rim, and that uneven thickness is the usual reason a pocket forms on one side only.
Do not roll the rounds thin at this stage. You are just smoothing them and knocking out the large air pockets that would otherwise bloat irregularly. A quick, gentle press is right.
5. Rest the Shaped Pitas
Cover the rounds and rest them 15 to 30 minutes. This is the step most people skip, and it is the one that decides whether the dough fights you on the rolling pin.
While it rests, the gluten that was tightened by shaping relaxes back to an even state, and the surface re-wets. Rested dough rolls out smooth instead of springing back into a thick disc every time. It also holds an even thickness, which is the whole game, because steam inflates thin areas faster than thick ones.
They are ready when the rounds feel slack and slightly deflated rather than tight and bouncy. Touch the edge gently; if it dents easily, go ahead and roll.
6. Bake Until the Pitas Puff
Put your baking surface in the oven and set it to 500F (260C). Let it preheat fully, at least 45 minutes, and a full hour for a stone or steel. The oven is not ready when the light comes on; it is ready when the surface has soaked up heat and radiates it back at you when you open the door.
Roll each round to about 1/8 inch (3 mm) thick, which is roughly the width of two nickels. You should be able to see the shadow of your hand through it. Thicker than 1/8 inch and the middle cooks before it inflates. Thinner than 1/8 inch and the round dries out before the pocket forms. Most published recipes say somewhere between 1/8 and 1/4 inch, and that range is real: 1/4 inch works on a very hot surface, but it is the upper limit.
Do not dock the dough, poke holes in it, or add toppings. Every mark is a place for steam to escape.
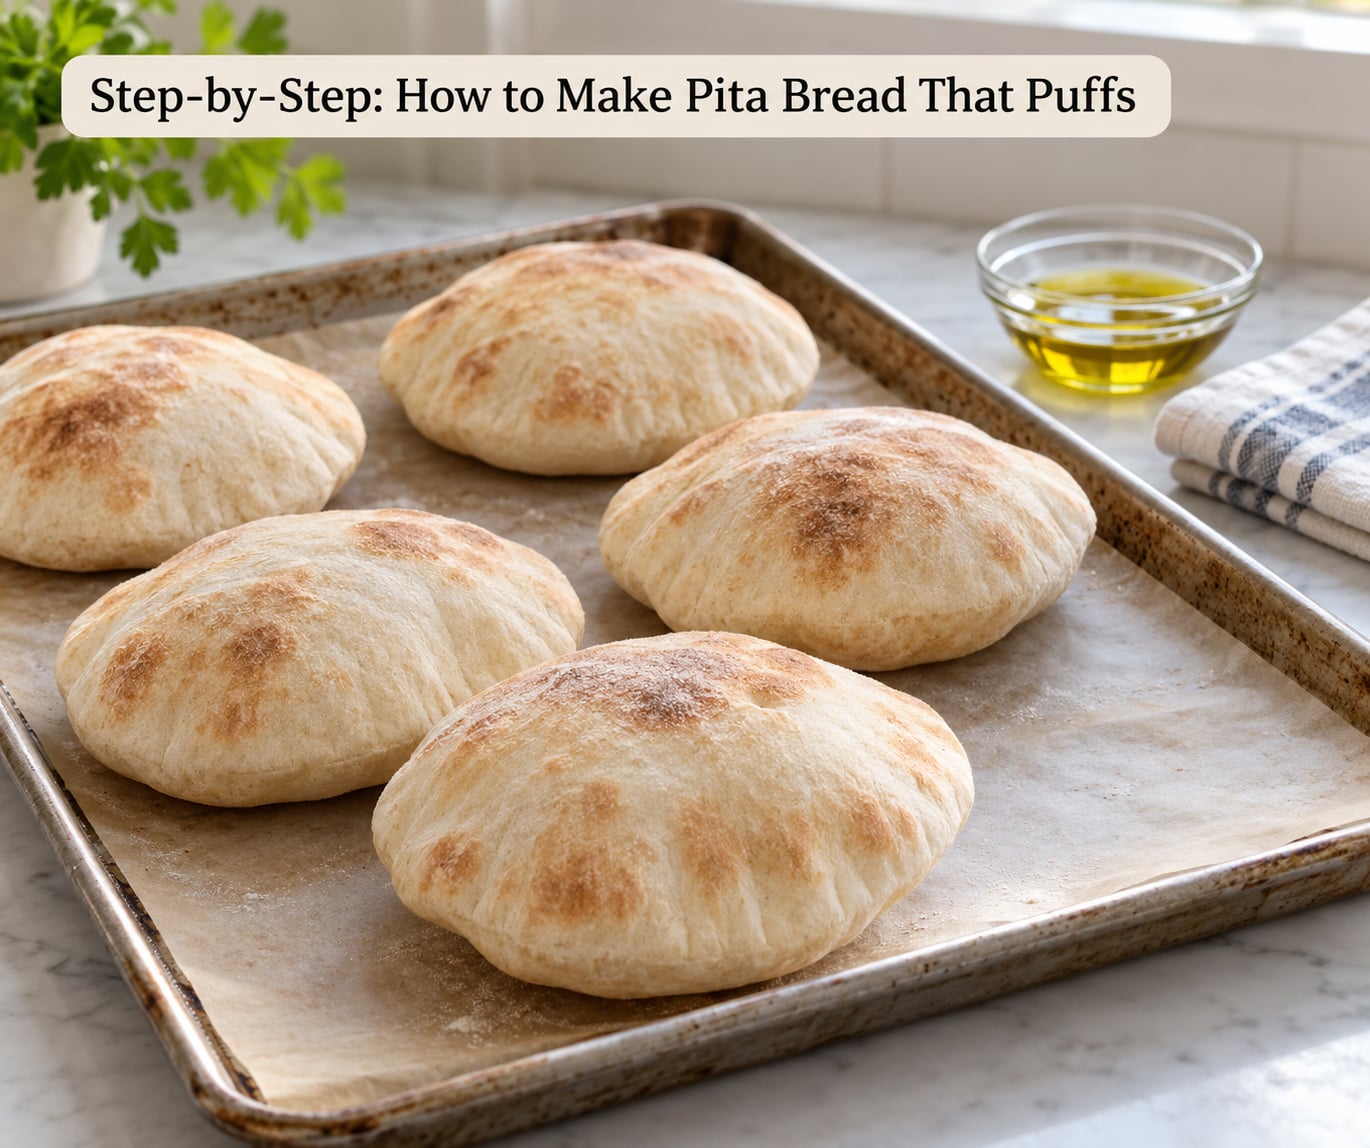
Pick the round up with a long peel or the underside of a sheet pan and lay it flat on the hot surface. It should start to lift within 15 to 30 seconds. When it does, leave the door shut and let it bake 2 to 3 minutes, until the top is domed and the underside is spotted brown.
Here is where the flip question comes up, because the advice online contradicts itself. The consensus among the bakers I read: do not flip while the pita is raw and on the surface, because the underside is still soft and a turn tears the seam that holds the pocket. Some bakers flip once after the first 30 seconds, which is harmless if the bottom has already set, but it is optional. If you flip, flip with tongs, once, quickly.
Move the baked pita to a clean towel and cover the whole batch while the rest bakes. Trapped steam softens the crust, and uncovered, the crust hardens and the pita goes cracker-crisp within minutes.
Which baking surface should you use?
| Surface | Puff quality | Preheat at 500F | Notes |
|---|---|---|---|
| Baking steel | Best, fastest and most even lift | 45 to 60 minutes | Stores more heat than stone, so rounds puff in seconds |
| Pizza stone | Very good | 45 to 60 minutes | The next best option; works a little less dramatically than steel |
| Cast iron skillet | Good on the stovetop | 10 to 15 minutes | Best browning, less puff. Great for the hybrid method |
| Heavy rimmed sheet pan | Good, the no-stone workaround | 20 to 30 minutes | Let the pan sit in the preheated oven before the first round |
| Direct oven rack | Weak and inconsistent | Full preheat | Works as a last resort, expect smaller pockets |
One caution on the sheet pan: preheating with the broiler does not work. The broiler drives surface temperature but does not saturate the metal with stored heat the way a full preheat does, and you end up with a hot pan that cools fast after the first round.
If you want a hybrid, cook the round in a cast iron skillet over medium-high heat for 20 to 30 seconds a side, then move it to the oven for about 90 seconds. The stovetop gives you caramelization, the oven gives you the puff, and neither does the whole job alone.
A note on scaling down: if you halve an eight-pita recipe to make two, the economics change. A smaller dough ball proofes faster and a single round cools the sheet pan faster, so reheat the pan between bakes. Capping the oven temperature to match a pan rating is also a bad trade, because the pan will not store enough heat for a puff. Cranking the heat and accepting the risk of warping a cheap pan is the better failure.
Common Mistakes
Start with the symptom. Most pita problems repeat across batches, and once you can name the failure you can stop guessing.
| Symptom | Likely cause | Fix |
|---|---|---|
| Flat, dense, hard as a rock | Dough did not proof long enough, or was rolled thick and baked long to compensate | Let the dough double before shaping, roll to 1/8 inch, and shorten the bake |
| Puffs, then collapses when you cut it | Under-proofed gluten cannot hold the steam pressure | Add 30 minutes to the bulk rise and check your yeast is alive |
| Browns and crisps before the center cooks | Oven or surface too hot for the thickness you rolled | Drop to 450F (230C) and roll thinner |
| Puffs in spots only | Uneven thickness, usually a heavy rolling pin pressing the center | Roll from the center out in every direction, rotating as you go |
| No pocket, but fluffy and thick | Rounded too thick, or the surface was too cool to create a shock | Roll thinner and give the surface a full preheat |
| One-sided, uneven pocket | The dough was stretched thin on one side when you shaped it | Press with fingertips, never pull, and rest the rounds before rolling |
| Chewy and tough | Baked too long, or a low-moisture dough | Take it off the heat as soon as it domes, and add about 5% more water next time |
| Oily or scrambled dough | Oil and salt added too early | Mix flour and water first, then add salt and oil with the second addition |
| Dough springs back when rolling | Shaped and rolled without the bench rest | Rest the rounds 15 to 30 minutes |
| Sticky, tearing dough while rolling | Dough too wet or the counter too floured | Dust lightly, and use a scraper instead of adding more flour |
The failure nobody explains well is the first row: pita that puffs and still eats hard. That outcome is not one problem, it is two. Puff comes from surface heat. Tenderness comes from fermentation. Push the heat hard enough for a dramatic pocket and you are also baking longer, which dries the crumb out. Under-proof the dough and you get a great puff with no structure behind it, because there is not enough gas and gluten to cushion the steam. Proof longer, roll thinner, and pull the pita the moment it domes.
Two more habits worth naming. Do not open the oven door during the first 60 seconds of a bake, because you dump the heat the puff depends on and the round often goes flat right in front of you. And do not oil the dough heavily before baking. Oil on the surface slows browning and can leave the top greasy rather than blistered, which weakens the seal that traps steam.
If you want a soft pita with a chewier, more flexible crumb, swap the oil for plain yogurt. Be aware that dairy weakens the gluten a little, so handle the dough gently and expect a slightly less dramatic pocket.
Frequently Asked Questions
Why does my pita bread not have a pocket?
Almost always thickness or surface heat. A pocket forms when a thin, moist layer of dough hits a surface hot enough to flash its water into steam, usually 500F (260C). If your rounds are thicker than 1/8 inch (3 mm), the center cooks before it can inflate. If the oven was not preheated long enough, the dough just bakes. Check both, and give the surface a full 45 minutes.
Why won’t my pita bread puff up?
The usual causes are dough rolled too thick, holes or punctures letting steam escape, an oven that was not fully preheated, and skipping the rest between shaping and rolling. Bake at 500F (260C) on a preheated steel, stone, or heavy sheet pan for 45 minutes before the first round. A 15-minute rest after shaping also matters, because relaxed dough rolls evenly.
Which flour is used to make pita bread?
Unbleached all-purpose flour is the standard, because its protein content gives enough gluten to hold steam without making the crumb tough. Bread flour works too and produces a slightly chewier pocket. Whole wheat flour can replace up to half the total, though it browns faster, so watch it closely near the end of the bake.
Do you flip pita bread while baking?
Usually not, and this is where most online advice contradicts itself. The underside is still soft in the first seconds, so flipping can tear the seam that holds the pocket. If your oven runs hot and you want an even bake, wait until the bottom has set, about 30 seconds, then flip once with tongs. Two flips will flatten the pocket.
Is my dough ruined if it doesn’t rise?
Not ruined, but it will not puff well. Under-proofed dough has weak gluten and little trapped gas, so the pocket forms in spots and the crumb stays tough. Give it another 30 to 60 minutes and watch it rather than the clock. If it has already over-expanded and gone slack and deflated, it will spread instead of holding a round, so that dough is better used for crackers.
How do I get store-bought pita bread to puff up?
Store-bought pita is usually baked and dried, so it will not balloon the way fresh dough does. Warm it in a 400F (205C) oven for 5 to 8 minutes, or 3 minutes in a dry skillet over medium heat, and wrap it in a damp towel for a minute. That softens it enough for hummus, and a light brush with olive oil before warming improves browning.
Conclusion
Reliable puffing comes down to three things you can actually control: fully proofed dough, an even 1/8 inch round with no punctures, and a baking surface that has preheated at 500F (260C) for 45 minutes or more.
Start there if your next batch fails. Proof the dough until it is doubled and full of bubbles, rest the shaped rounds for 15 minutes before rolling so they stay relaxed and even, and give the steel or the sheet pan a long, real preheat rather than the five minutes most people wait. Cover the baked batch in a towel so the crust stays soft while you bake the rest.
A flat batch is still bread, by the way. Cut it into wedges, brush with olive oil, salt, and za’atar, and bake it again until crisp. That is the one failure with a happy ending.