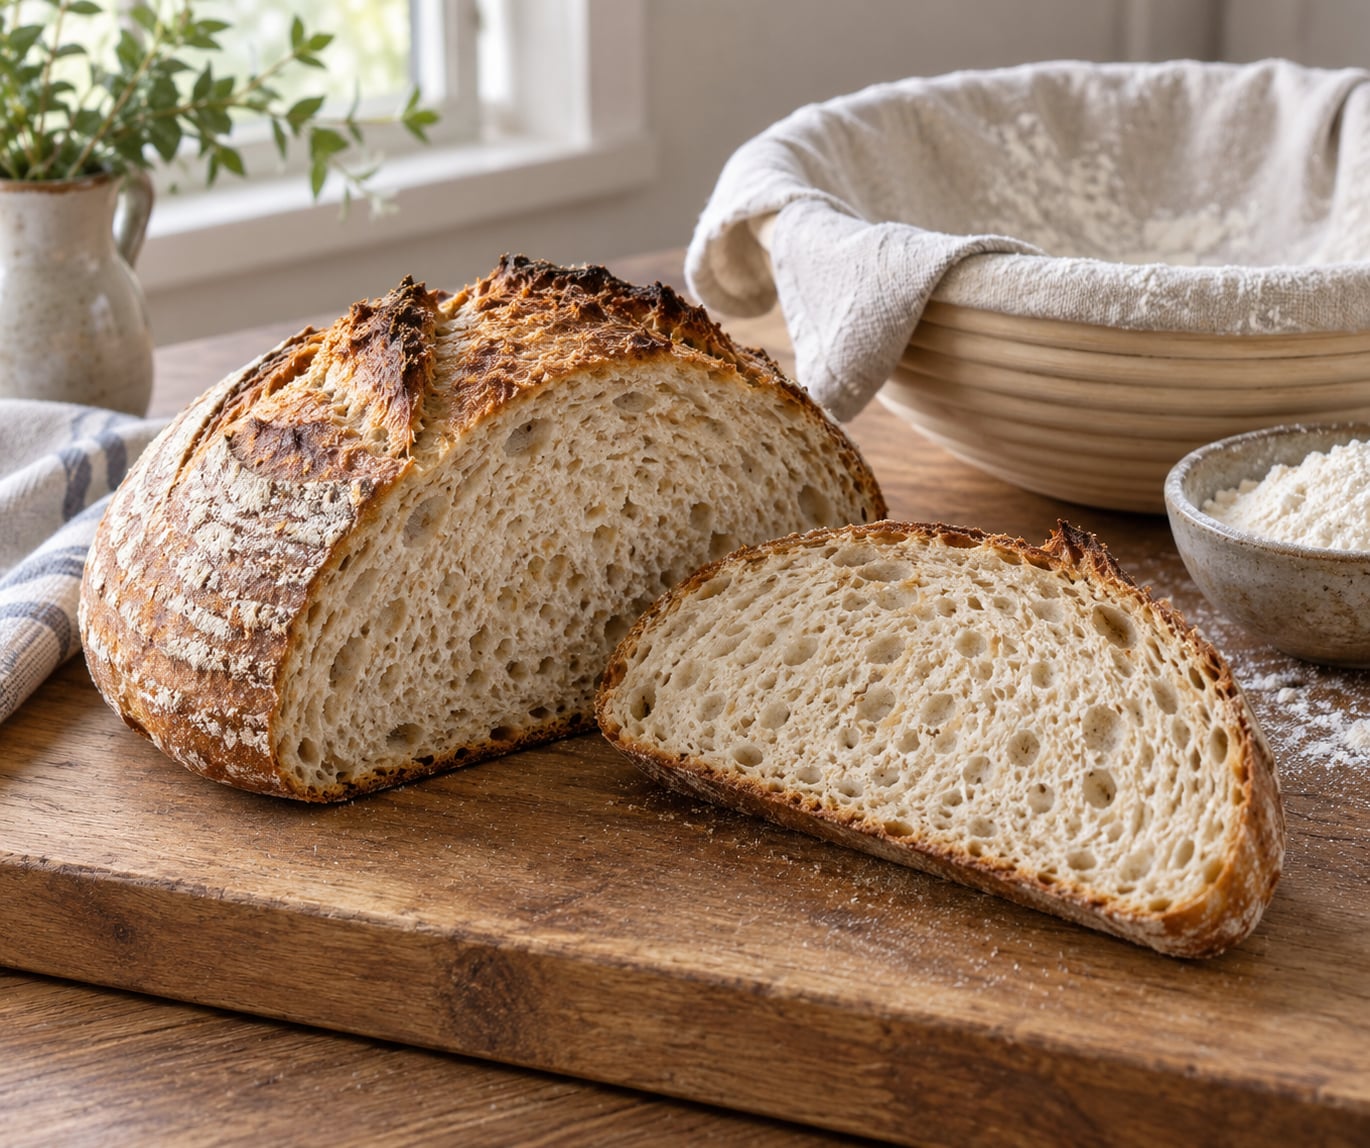
How to get an open crumb in sourdough comes down to three things: dough hydration in the 75 to 80 percent range, strong white bread flour at 11 to 13 percent protein, and gentle handling that traps the gas already in your dough. Bake with cooler fermentation and firmer flour and the crumb stays tight no matter what you do at the shaping table.
Most dense sourdough is not a failed bake. The loaf rises, scores beautifully, and even gets a good ear, then cuts into something closer to a brick. That pattern almost always traces back to one of four things, and you can find which one by the time you finish reading.
Last updated October 2026.
Table of Contents
- What You Need
- Step-by-Step
- 1. Choose Flour With Enough Structure
- 2. Set Hydration for a Manageable Dough
- 3. Build Strength With Sourdough Folds
- 4. Let Fermentation Create the Bubbles
- 5. Pre-shape and Shape for Even Expansion
- 6. Use a Cold Proof to Improve Handling
- 7. Score to Direct the Expansion
- 8. Bake to Preserve the Crumb Structure
- Common Mistakes
- Frequently Asked Questions
- Why is my sourdough bread dense?
- How much hydration should I use for an open sourdough crumb?
- Does a tight sourdough crumb mean I need to overferment the dough?
- Should I score sourdough deeply or shallowly for more open crumb?
- Can slicing sourdough too soon make it seem gummy?
- Should I use bread flour or all-purpose flour for an open crumb?
- Conclusion
What You Need
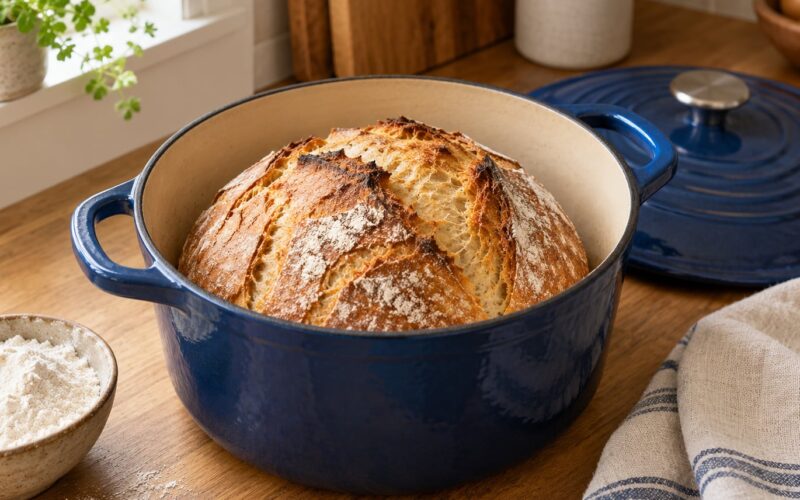
You need very little. A scale that reads to one gram, a large bowl, a banneton or any bowl lined with a floured towel, a lame or a very sharp knife, and an oven with a heavy pot that has a lid. That is the whole kit.
Skip the specialty bannetons, the lame with fourteen interchangeable blades, and the rice cooker. Shape matters more than the tool you shape into, and a cotton towel in a cereal bowl does exactly what an expensive basket does.
The ingredient that actually decides your crumb is flour protein. Protein forms the gluten network that holds carbon dioxide, and that network is what keeps a gas bubble from collapsing under its own weight before the starch sets in the oven.
- Bread flour at 11 to 13 percent protein for the open crumb you are chasing.
- All-purpose flour at roughly 10 percent protein, which needs a longer bulk to develop.
- Whole wheat flour adds bran and germ that cut into gas walls, so expect a tighter crumb.
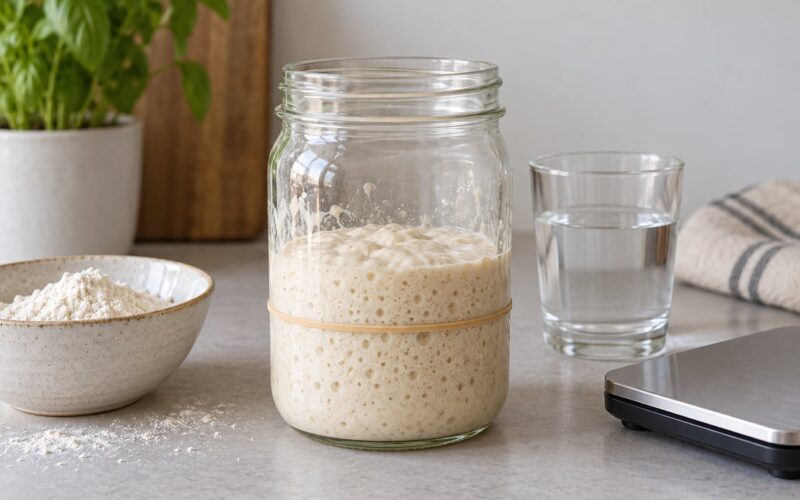
- A ripe starter or levain that doubles in volume and smells tangy, not arm-pit sour.
- Fine sea salt at about 2 percent of flour weight, for tighter gluten and better flavor.
Step-by-Step
The order below follows the bake itself. Each step names the checkpoint that tells you the stage worked, so you can see where a loaf went wrong instead of guessing after the fact.
1. Choose Flour With Enough Structure
Open crumb sourdough starts with flour that can stretch without tearing. Bread flour at 11 to 13 percent protein is the standard target, and the bag label is the only place that number appears.
All-purpose flour at 10 percent protein still works, but it needs more time and a longer autolyse to build strength. Type 85 extraction flours carry more bran and germ than standard bread flour, which is why bakers who switch to them report tighter, denser interiors.
For a weak flour, the practical fix is a blend: 70 percent bread flour with 30 percent whole wheat gives flavor and gas without the bran load of a 100 percent whole wheat loaf. Pure whole wheat will rise well and bake tight, and that outcome is normal rather than a mistake.
2. Set Hydration for a Manageable Dough
Hydration is water weight divided by flour weight, and 75 to 80 percent is the band that produces a visibly open interior. Hydration alone will not do it, so treat the number as a ceiling you grow into rather than a target you chase.
Start at 70 percent for a few bakes and raise by five points at a time. Judge the dough by feel: it should be slack and pourable in the bowl, tacky rather than sticky on your hands, and hold together when you gather it.
If it spreads across the counter the moment you tip it out, you went too far. If it holds a ball and tears rather than stretches when you pull it, you are a little under and can add water next bake.
3. Build Strength With Sourdough Folds
Folds build the gluten network without the mechanical punishment of kneading, which is why they tend to produce larger alveoli. Do four sets of stretch and folds spaced 30 minutes apart during the first two hours of bulk.
Look for the cues rather than the clock. A developed dough feels smooth and slightly bouncy, pulls into a thin membrane without tearing at the edges, and passes the windowpane test, where a stretched piece of dough lets light through as a translucent film.
There is a real argument for fewer folds. Professional bakers on The Fresh Loaf thread report that heavy fold schedules compress the crumb, on the reasoning that each fold expels carbon dioxide and re-divides the gas into smaller cells. Four gentle sets is a good middle.
4. Let Fermentation Create the Bubbles
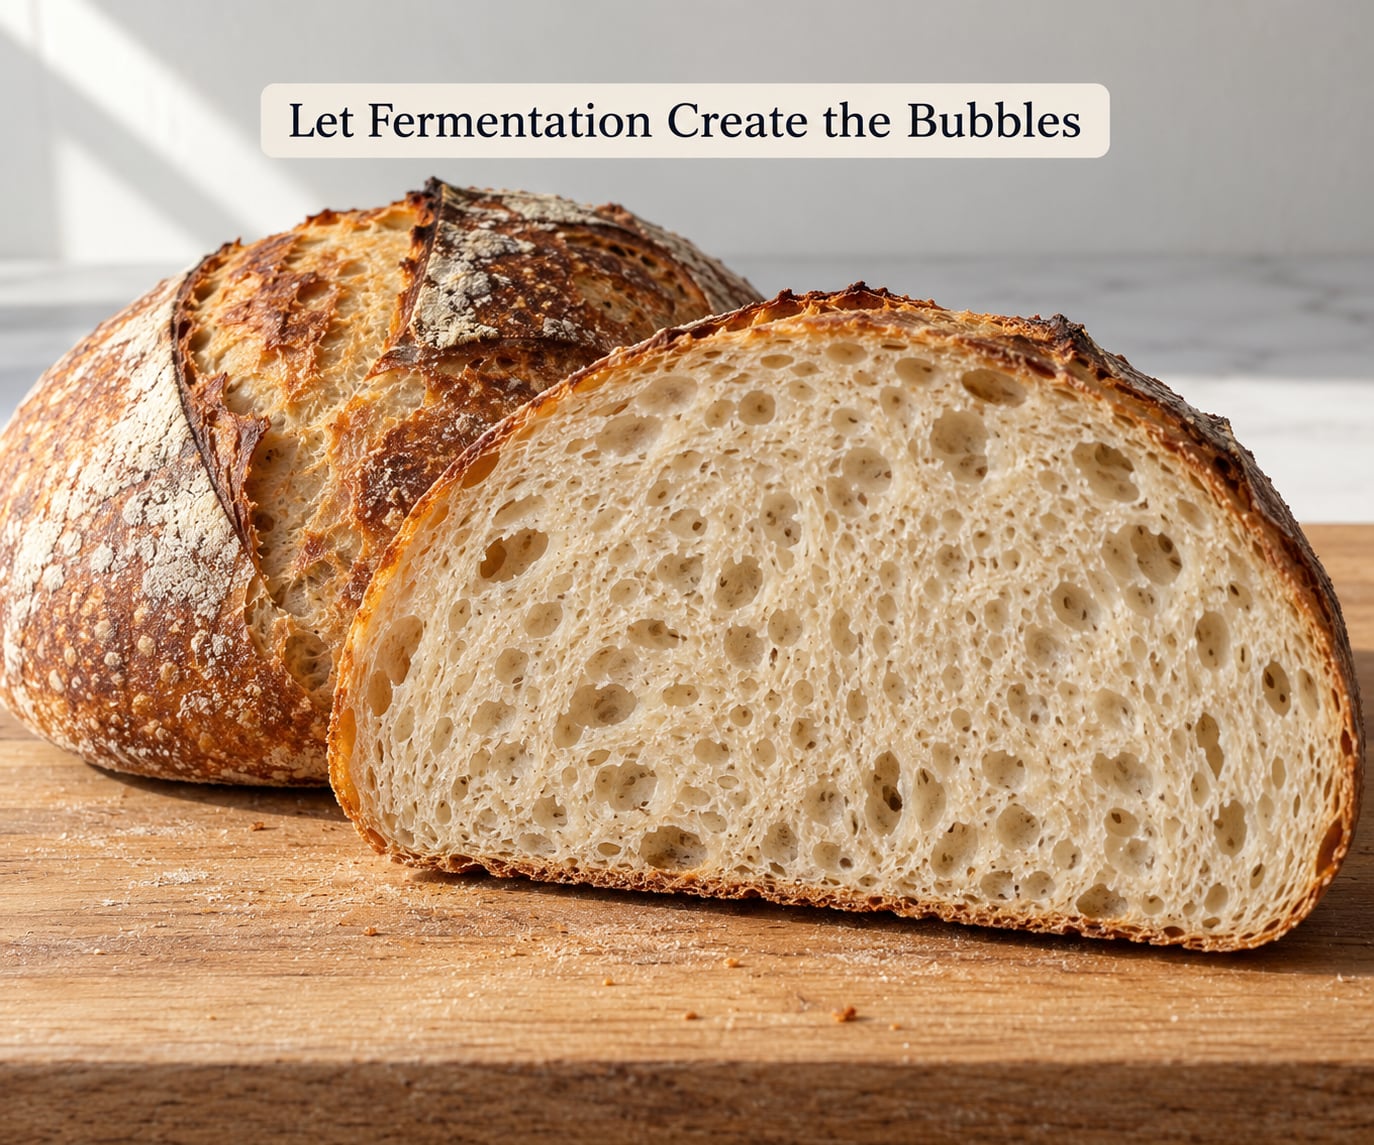
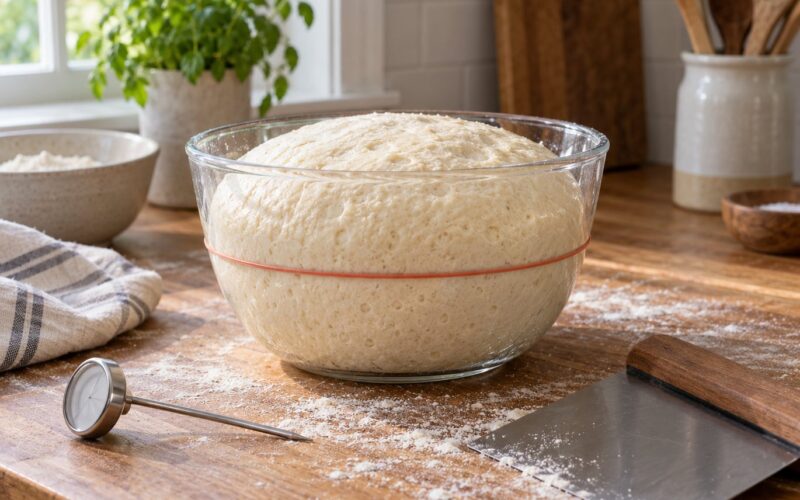
Bubbles come from fermentation, not from folding. Watch the dough temperature and the volume rather than counting hours, since a warm kitchen can double a dough in half the time.
An underfermented dough barely rises, feels tight and doughy, has few visible bubbles at the edge, and smells of raw flour. A well-fermented dough has roughly doubled or gone up 50 to 75 percent in volume, domes in the bowl, shows bubbles along the sides, and smells pleasantly tangy. An overfermented dough has more than doubled, deflated or torn at the edges, collapsed when you poke it, and smells of strong acid.
An overripe starter is the quiet version of the same problem. The lactic acid bacteria in a very acidic starter release protease, which cuts gluten strands, and dough made with it bakes tight even when the rise looks normal.
5. Pre-shape and Shape for Even Expansion
Pre-shape is a gentle first round that brings the dough into a loose ball without pressing gas out of it. Rest it 15 to 20 minutes so the gluten relaxes, then shape.
Surface tension is the goal. A taut skin holds the dough together, and when you cut the loaf the walls of the bubbles spring open instead of staying compressed. Work from the middle outward, pull the edges underneath, and stitch the seam.
Anything that ruptures bubbles leaves you with dense pockets, and the usual culprits are a rip from the bowl, a seam squeezed too hard during final shaping, and a bench rest so long that the dough cools and stiffens before you touch it.
6. Use a Cold Proof to Improve Handling
Two hours or more in the refrigerator slows the dough, firms the surface so it scores cleanly, and makes it far easier to handle without tearing. It also deepens the flavor.
Shape cold dough, straight from the fridge. Many bakers on baking forums report their crumb improved the day they stopped shaping warm dough and started shaping chilled dough. A 12 to 14 hour cold proof suits most home loaves; a shorter cool of 4 hours handles a dough that is already close to proofed.
Room-temperature proofing is worth keeping for a very active starter, where 4 to 6 hours of final rise on the counter finishes faster than the dough can chill.
7. Score to Direct the Expansion
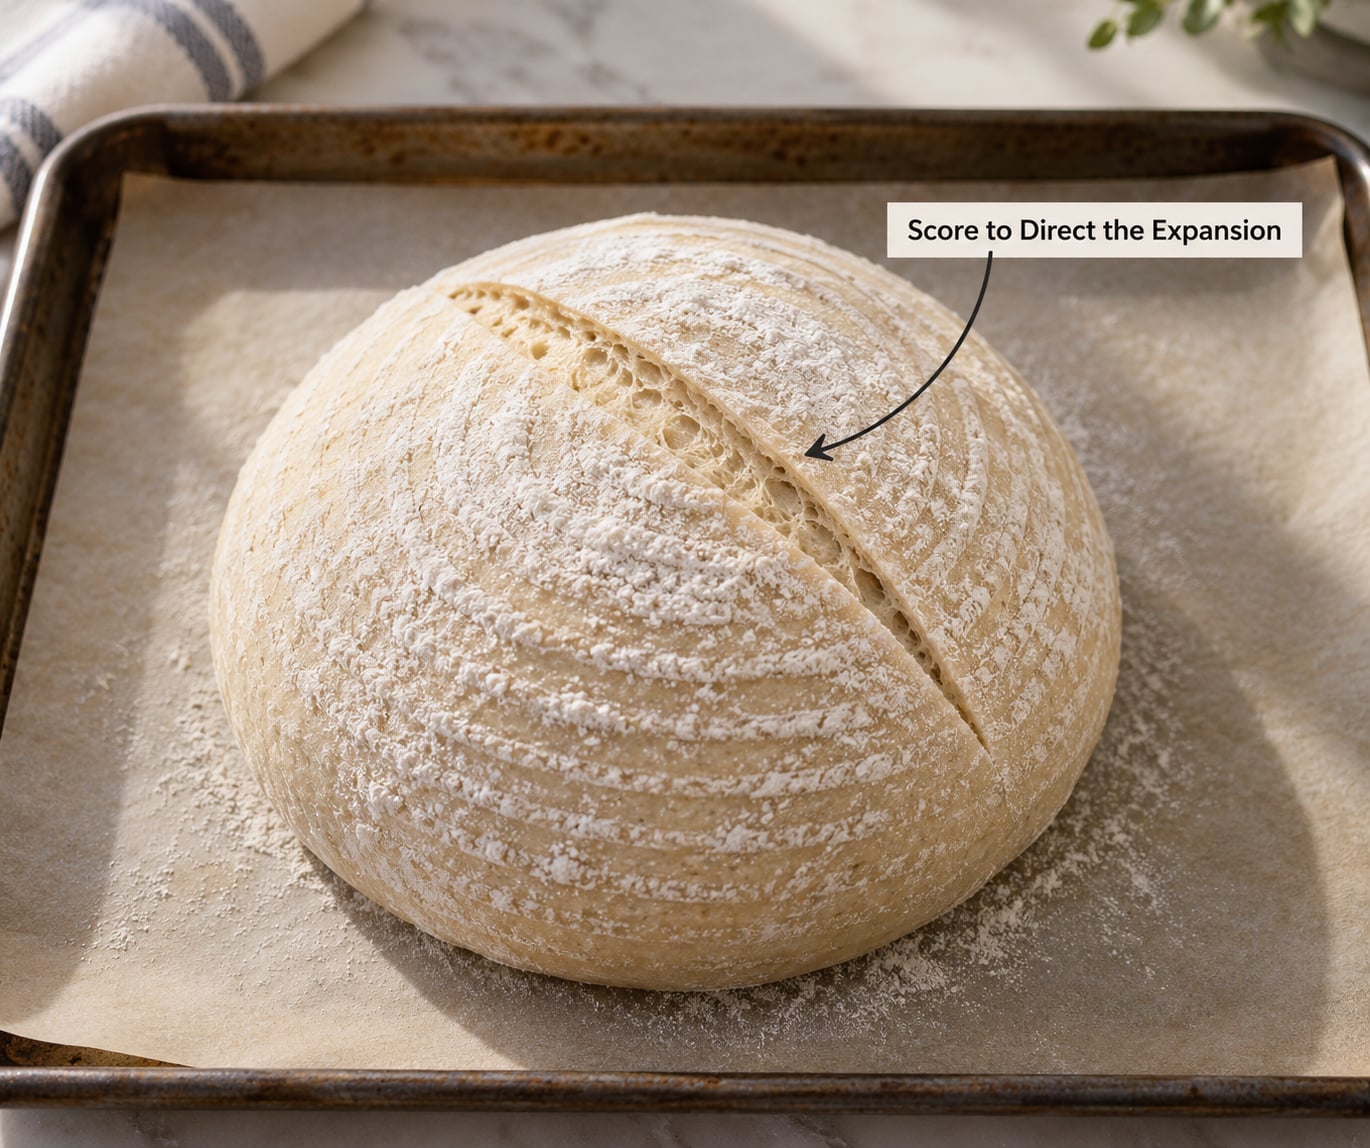
Scoring gives the expanding gas one designated exit. A single deep cut at roughly 45 degrees, about a quarter inch deep, opens into an ear and lets the crumb expand upward instead of splitting randomly at the side.
Depth matters more than decoration. A shallow score leaves the loaf to tear wherever it likes, and that uncontrolled tear often runs down the side, compressing the crumb near it. Score cold dough with a sharp blade in one confident motion.
8. Bake to Preserve the Crumb Structure
Preheat the oven and the pot together to 450 F for at least 45 minutes. A cold pot costs you 20 minutes of oven spring, which is the single window where gas expands and crumb structure sets.
Bake covered for 20 minutes, then uncover and drop to 450 F for another 15 to 25 minutes until the crust is dark and the loaf sounds hollow when tapped. Steam trapped under the lid keeps the crust soft so the loaf can expand before starch sets.
Cool the loaf on a rack for at least two hours before slicing. Starch finishes setting as it cools, so a cut too early reads gummy and can fool you into thinking the crumb was underbaked. That is a reading error, not a baking error.
Common Mistakes
Match what you see to the cause below, then change one thing. Two changes at once tell you nothing about which one worked.
| Symptom | Likely cause | Fix |
|---|---|---|
| Dense crumb but a great ear and good rise | Dough handled too roughly, or folds given too often late in bulk | Cut to four gentle fold sets, and use a floured hand to lift the dough instead of a bowl scraper |
| Tight, tight crumb throughout with weak flavor | Underfermented dough or a very acidic, overripe starter | Bulk until the dough has risen 50 to 75 percent, and use a starter that doubles in about four to six hours |
| Open top half, dense bottom half | Bake ran out of heat partway, or the loaf was underbaked at the base | Add 5 to 10 minutes uncovered and check the base color before pulling the loaf |
| Big irregular holes near the top, tight everywhere else | Underproofed rather than open. The loaf split at weak points during oven spring | Proof 20 to 30 percent longer and confirm with the poke test before baking |
| Holes look good but the crumb is gummy and dense | Sliced while hot, or underbaked in the center | Cool a full two hours and add 5 minutes to the uncovered bake |
| One side compressed, one side fine | Overproofed on one side of the banneton, or shaped with a loose seam | Stitch the seam tightly and center the dough in the basket |
| Crumb is uneven, denser near one edge | Dough pressed against the banneton wall during proof | Dust the basket well and use a bowl smaller than the dough so it holds its shape |
Four habits fix more loaves than any recipe change. Weigh everything, including the starter, rather than measuring by volume. Write down the flour, hydration, bulk time, dough temperature, shaping time, and bake time after every loaf. Change one variable per bake, and give it two attempts before you decide it failed.
A tight crumb is still good bread. Flavor comes from fermentation and baking time, not from hole size, and plenty of excellent loaves slice with a crumb tighter than anything you will find on a bakery blog.
Frequently Asked Questions
Why is my sourdough bread dense?
Dense sourdough usually comes from one of four causes: underfermented dough, flour too weak to hold gas, dough handled roughly so bubbles ruptured, or an overripe starter whose acids have weakened the gluten. Judge by the loaf, not the clock. Check the bulk rise, aim for 50 to 75 percent, then look at the crumb pattern. Dense with a good ear points to handling. Dense with a weak crust points to fermentation.
How much hydration should I use for an open sourdough crumb?
Most open crumb sourdough lands between 75 and 80 percent hydration. That range gives the gas room to expand without the dough losing all structure. Work up to it gradually, starting at 70 percent and adding five points at a time. If the dough spreads into a puddle when you tip it out, you have gone past what your flour and shaping can handle, and a lower number with a longer autolyse will beat it.
Does a tight sourdough crumb mean I need to overferment the dough?
No. Pushing bulk fermentation past the point where the dough is domed, bubbly and doubled can tighten the crumb, because long fermentation lets acids break down gluten. Read the dough instead of the timer. Rise, doming, bubbles at the edges, and a pleasant tangy smell mean it is ready. A collapsed dough that smells strongly acidic has already gone past ready.
Should I score sourdough deeply or shallowly for more open crumb?
Score fairly deep, around a quarter inch, in one confident movement across chilled dough. A shallow score gives the expanding loaf no designated path, so it tears wherever it is weakest, often down the side where it then compresses the crumb beneath. A single 45 degree cut opens into a clean ear and lets the loaf rise evenly rather than splitting unpredictably.
Can slicing sourdough too soon make it seem gummy?
Yes, and it is one of the most common false alarms. Starch continues setting as the loaf cools, so a cut made within the first hour will look gummy and dense even when the crumb underneath is fine. Wait at least two hours, and closer to three for a large loaf, before judging the interior. Cool it out of any draft so the crust stays crisp while the crumb finishes.
Should I use bread flour or all-purpose flour for an open crumb?
Bread flour at 11 to 13 percent protein, because stronger gluten holds gas cells open through the bake. All-purpose flour at roughly 10 percent protein still works if you give it a longer autolyse and bulk to build strength. Blending 70 percent bread flour with 30 percent whole wheat adds flavor and color while keeping the structure that an open crumb needs.
Conclusion
Flour strength, hydration, fermentation, and gentle shaping decide almost every open crumb loaf, in that order of impact. Fix one of them at a time, and give each change two bakes before you judge it.
On your next loaf, write down the flour, hydration, bulk time, dough temperature, shaping time, cold proof hours, and bake times before you start. After two hours of cooling, slice it and photograph the crumb. That single habit will tell you more than any recipe, and it turns open crumb sourdough from luck into something you can do on purpose.