Pie crust shrinks because gluten that got overworked tightens and contracts as it heats, pulling the shell away from the sides of the pan. To make pie crust that does not shrink, keep the fat cold, add as little water as the dough will take, stop mixing while it still looks shaggy, and chill it before you roll. Blind bake the shell weighted and it will hold its shape while the filling goes in.
The whole thing takes about 20 minutes of active work plus an hour of chilling, and the technique is forgiving once you stop fighting the dough. Most of what gets blamed on the oven is really a mixing or handling problem that happened ten minutes earlier.
If you have read conflicting advice, you are not alone. One source says rest the dough overnight, the next says never refrigerate pastry, a third swears by vinegar. Almost all of it is reasonable, and the reason it feels contradictory is that every one of those tips attacks the same root cause from a different angle.
Table of Contents
- What You Need to Make Pie Crust That Does Not Shrink
- Step-by-Step: How to Make Pie Crust That Does Not Shrink
- 1. Keep the Fat Cold and Measure the Flour Correctly
- 2. Mix Until the Dough Just Holds Together
- 3. Chill and Rest the Dough Before Rolling
- 4. Roll Without Stretching or Pressing It Into the Pan
- 5. Blind-Bake the Crust Before Adding the Filling
- Common Mistakes That Make Pie Crust Shrink
- Frequently Asked Questions
- How can I stop my pie crust from shrinking?
- Why are my pie crusts shrinking?
- How to keep pie crust from shrinking when blind baking?
- Can I blind bake a pie crust without using pie weights?
- What does adding vinegar to pie crust do?
- Is pie crust better with Crisco or butter?
- The First Thing to Do for a Shrink-Proof Pie Crust
What You Need to Make Pie Crust That Does Not Shrink
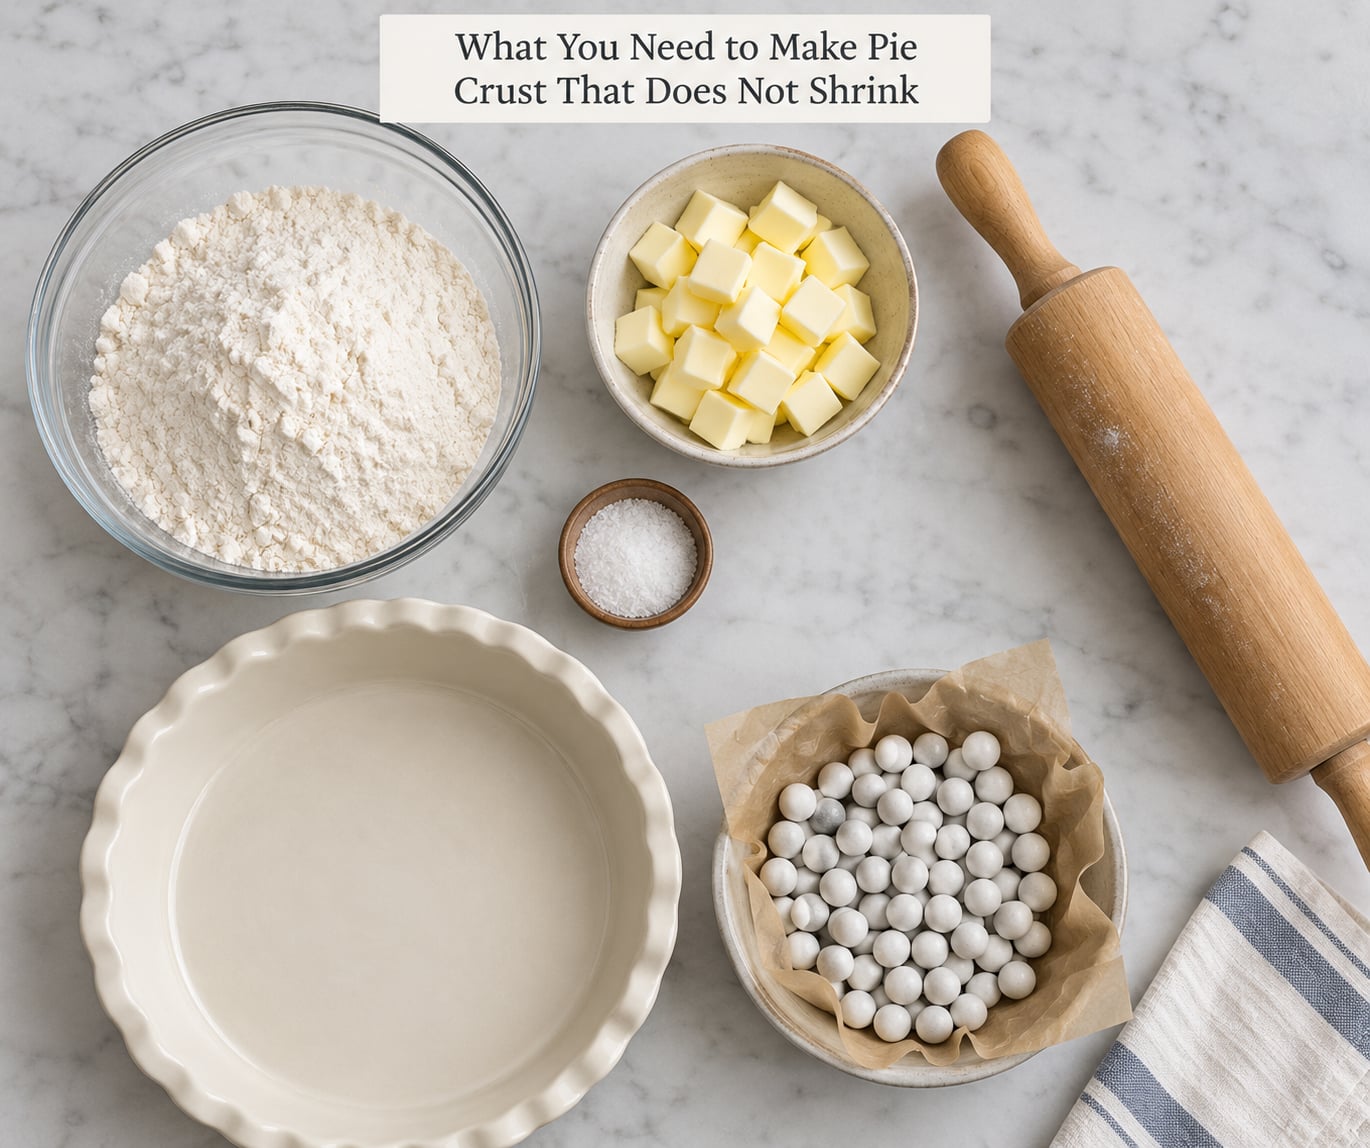
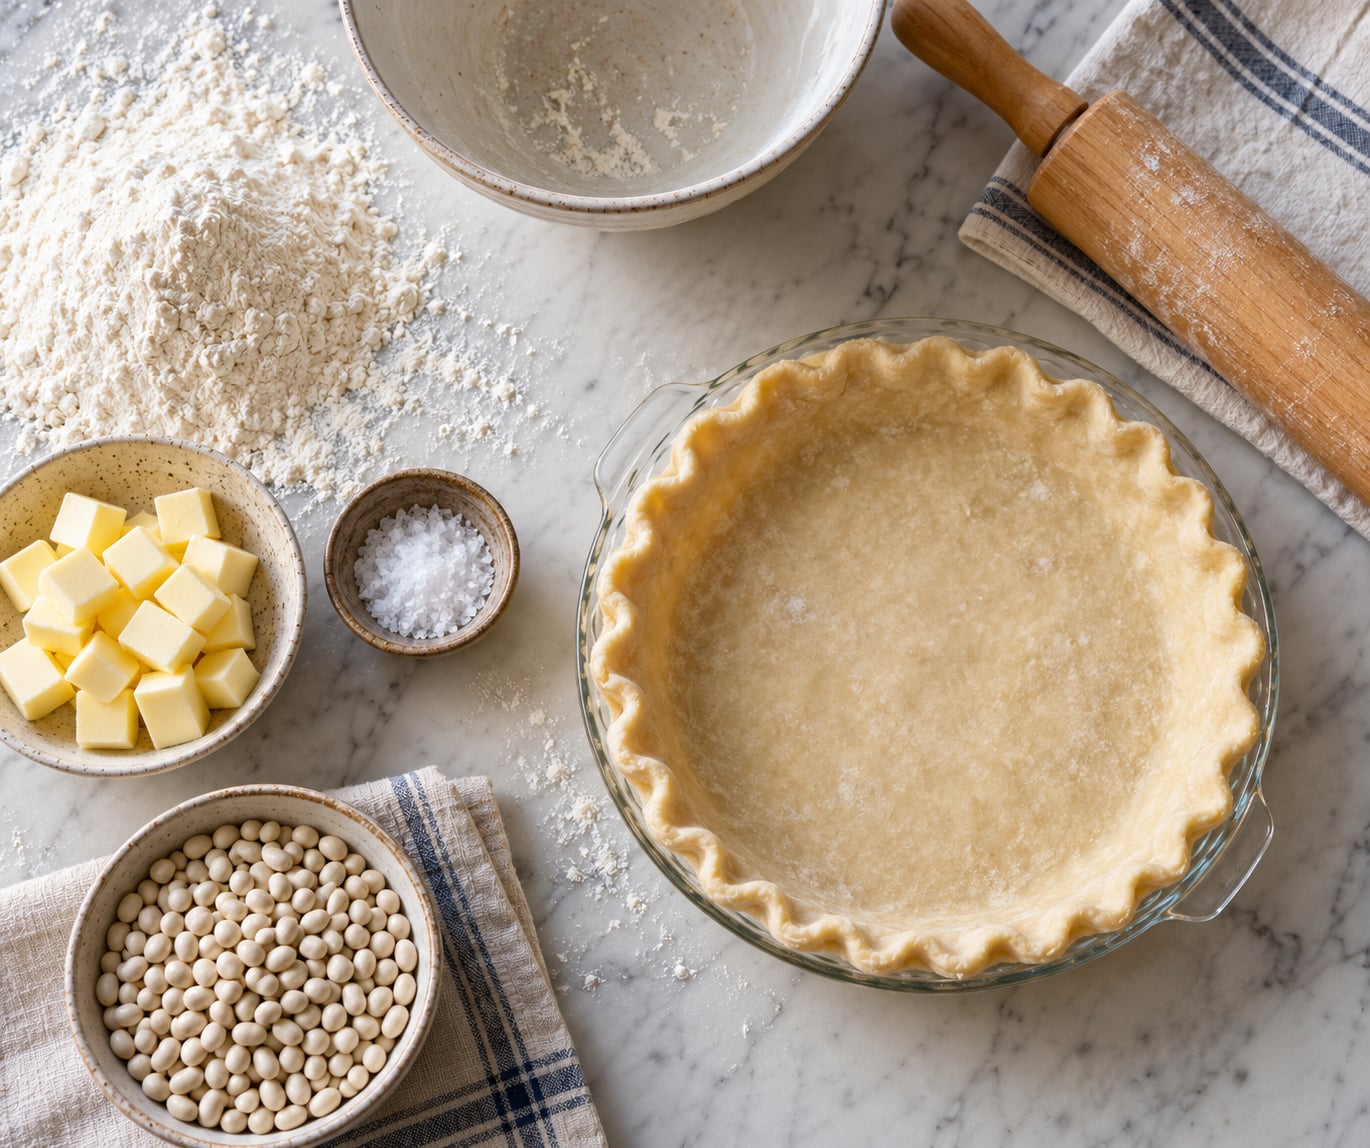
You need very little. A can of all-purpose flour, cold butter or shortening, a little salt, and ice water make the dough itself. Everything else on this list exists to keep the dough cold or to hold its shape in the oven.
Why cold fat matters: fat that starts cold stays in small pieces through mixing, and those pieces separate the flour into layers. Fat that starts warm melts into the flour, coats the gluten, and lets you knead without resistance, which is exactly how overworked dough happens. Cut the butter into cubes, put them back in the fridge while you measure everything else, and grate it straight from the freezer if you want to move fast.
Equipment that earns its space:
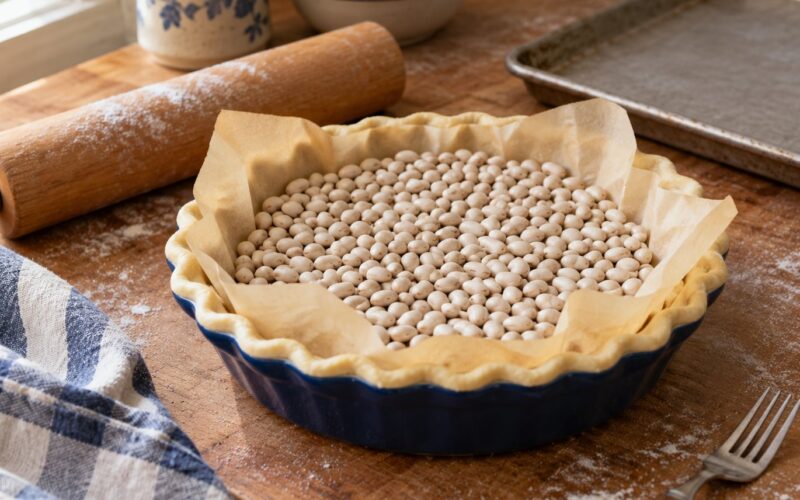
- Pie weights or two pounds of dry beans or dry rice. Dry beans work as well as anything sold for the purpose and can be reused for years. For a 9-inch pie you want roughly 2 pounds of weight filling the shell edge to edge.
- Parchment paper. One large sheet for rolling on, one circle for lining the shell, and a spare for patches.
- A metal pie plate for single-crust pies. Metal conducts heat more evenly than glass, so the base and the sides set at the same rate. Glass works fine, it just asks for a few more minutes on the bottom.
- A rolling pin and a bench scraper. The scraper lifts dough that has welded itself to the counter without stretching it.
- A mixing bowl, a fork, a measuring scale if you have one, and a sharp knife for venting.
A pastry blender or a food processor works too, and a silicone dough bag is a genuinely useful alternative to rolling between two sheets of paper. None of it is required. Cold hands and a light touch are.
Step-by-Step: How to Make Pie Crust That Does Not Shrink
1. Keep the Fat Cold and Measure the Flour Correctly
Set out your flour, then cut the fat into cubes and chill them. Weigh the flour if your scale can do grams, because volume measuring is where a lot of quiet water ends up.
A basic all-butter crust sits near a 2:2:1 ratio by weight: two parts flour, two parts fat, one part water. That is 8 ounces flour, 8 ounces butter, 4 ounces ice water for a 9-inch single crust. If your flour is bread flour, swap in all-purpose, because higher protein means more gluten means more contraction.
How to tell it worked: the fat pieces are still visibly separate when you tip the bowl, and the flour looks like damp sand rather than breadcrumbs.
2. Mix Until the Dough Just Holds Together
Cut the fat into the flour with a pastry blender, your fingertips, or the food processor. Stop while the lumps are still pea-sized and the dough looks shaggy, then add ice water one teaspoon at a time, pressing the dough with a fork, until it clumps when you squeeze a handful.
This is the step that decides everything downstream. Water you cannot see is the enemy here, and a dough that feels slightly tacky is usually correct. A dough that feels wet and dense has more water in it than it can hold, and it will shrink twice as hard as the recipe asked for.
How to tell it worked: when you press a pinch, it holds together without crumbling and without sticking to your palm. If it is dry, add another teaspoon of ice water rather than reaching for more flour, because extra flour on the surface is what makes a crust tough.
Then flatten the dough into a disc, wrap it, and move on. Do not knead it. Do not roll it now and refrigerate the rolled sheet, because rolling works the dough all over again.
3. Chill and Rest the Dough Before Rolling
Refrigerate the wrapped disc for at least an hour, or leave it overnight. Resting and chilling are two different jobs that happen at the same time: resting lets the flour hydrate fully and the gluten strands relax instead of springing back, and chilling keeps the fat solid enough to resist melting into the flour.
If you want to skip the shaping step entirely, put the disc straight in the freezer for 20 to 60 minutes and roll it from frozen. Cold-hard butter shaves off beautifully and the dough fights you less.
How to tell it worked: the disc is firm to the touch and bends without cracking. If it cracks in half when you lift it, it needs another 20 minutes. If it slumps into a puddle, it is too warm and needs more time, not more flour.
4. Roll Without Stretching or Pressing It Into the Pan
Roll between two sheets of parchment. Turn the dough a quarter turn after every few passes, and push with the heel of your hand rather than dragging the pin, so the thickness stays even from the center out. Aim for an even 1/8 inch, roughly 3 mm.
For a 9-inch pie plate, roll a 13- to 14-inch circle. Most instructions under-size this, and an undersized disc gets pressed down the sides of the pan, which thins the walls, and thin walls shrink twice as fast as thick ones.
Lift the dough by the parchment, center it over the plate, and lower it straight down. Then ease it into the corners from the center outward with your knuckle, and walk around the rim pressing the dough against the side. You want the dough seated, not stretched down the walls. Pressing is fine. Pulling is not.
How to tell it worked: the crust sits flush against the bottom with no gap at the edge, and the wall thickness looks the same all the way around. If you can see daylight between the dough and the pan, patch it with a torn piece of dough and a drop of water before you move on.
Trim, then dock the base with a fork, working all the way to the edges. Docking lets steam escape so the bottom stays flat instead of bubbling up and warping. Do not pierce through the side walls, because those holes are exactly where the shell vents and slumps.
For single-crust pies, chill the shaped shell again for 20 to 60 minutes, in the pan this time, before it goes anywhere near heat. That final rest is the step people skip, and it is the one that most often saves a shrinking quiche or tart shell.
5. Blind-Bake the Crust Before Adding the Filling
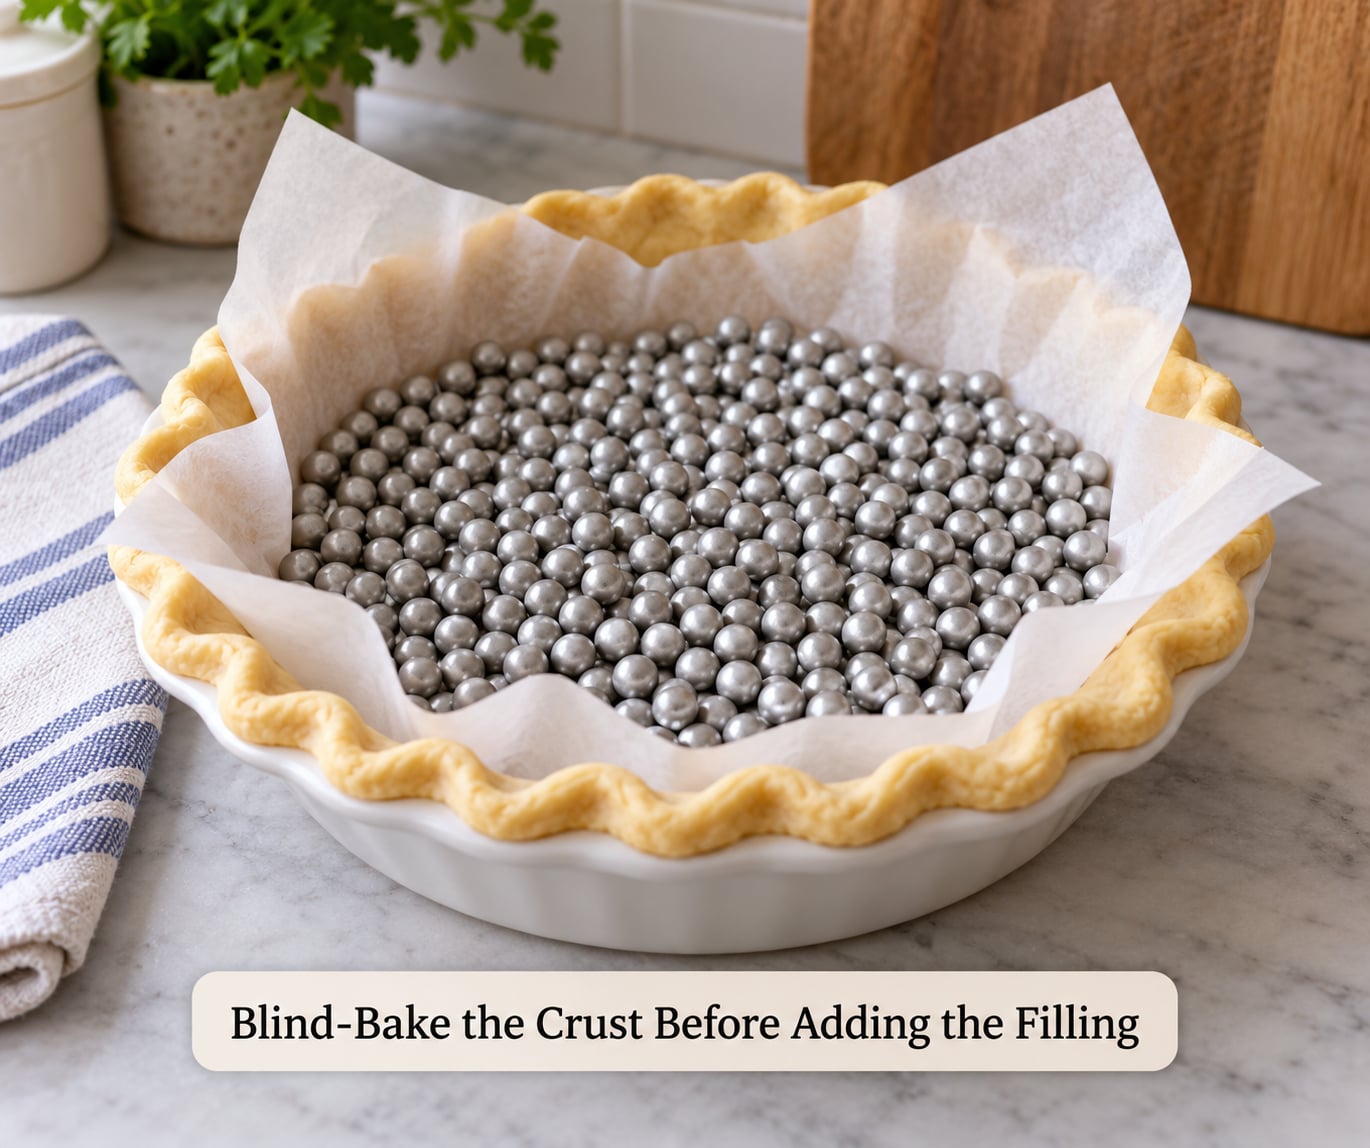
Heat the oven to 375F with the rack in the lower third. Tuck the parchment circle into the chilled shell, leaving an inch of paper above the rim so it does not scorch. Fill right to the top edge with weights, beans, or rice, and weigh down the parchment so it lies flat against the dough.
Back for 15 to 20 minutes, until the edges of the shell look dry and set. Pull the pan out, remove the weights and the parchment carefully, dock the base again if it puffed, and return it for another 10 to 15 minutes until the bottom is dry and pale golden. Cool the shell on a rack for a few minutes before filling it, since a hot shell will melt the butter in a cold filling.
How to tell it worked: the walls are still standing at full height and the base is dry to the touch. If the sides have already started sliding down the pan, the weights did not fill to the top edge or the shell was not cold enough going in.
If you do not own weights, blind baking still works, just differently. Bake the empty shell at 375F for 10 to 12 minutes, when it is set enough to hold its own shape but still pale, then pull it out, dock the base all over again, and finish for 20 to 25 minutes. A second empty plate set inside the shell for the first 10 minutes buys you more insurance. Or go low and slow: 350F for 25 to 30 minutes gives the gluten longer to relax before the fat renders.
One more option worth knowing: bake a shaped shell straight from the freezer. Set the pan on a baking sheet, go from freezer to oven, and give it 5 extra minutes. The dough is already cold and already relaxed, so the oven has less to squeeze out of it.
Common Mistakes That Make Pie Crust Shrink
Almost every shrinking crust comes down to one of eight things. Here is what goes wrong and what to change.
- Overmixing. Dough that gets kneaded, or mixed in a food processor too long, develops gluten that contracts hard when heated. Stop at the shaggy stage.
- Too much water. Every extra teaspoon makes the crust denser and more prone to contracting. Add ice water one teaspoon at a time.
- Warm ingredients and warm hands. Warm fat smears instead of shingling, and a warm kitchen does the same thing to the dough in your hands. Chill the fat and rinse your hands cold.
- Skipping the rest. Dough rolled straight after mixing springs back and gets stretched to fit the pan, and stretching is shrinkage waiting to happen. Give it an hour.
- Rolling too small. An undersized circle has to be pressed down the walls to fit, thinning them. Roll 13 to 14 inches for a 9-inch plate.
- Dry pan edges. Grease the plate lightly, especially the rim, so the dough does not grip and hang on. Cornstarch works if you prefer to avoid grease.
- Uneven rolling pressure. Thin spots cook and set before thick ones, and the thin spots move first. Use a quarter-turn pattern and check the thickness at four compass points.
- Not enough blind baking. A shell that goes into the oven still soft and pale slumps under its own weight and under the weight of the filling. Finish it until the base is dry and golden.
When you are not sure which one hit you, match the symptom to the cause:
| What you see after baking | Most likely cause | The fix |
|---|---|---|
| A gap between the crust edge and the rim, the filling leaking out | Dough was stretched or undersized, or the shell was not cold when it went in | Chill the shaped shell 20 to 60 minutes, roll 13 to 14 inches, and never pull the dough down the sides |
| Sides sunk down the pan, shell sitting below the rim | Gluten was overworked, or the shell was not weighted | Mix less, add less water, and fill weights to the top edge of the shell |
| Bubbly, warped base, raw patches underneath | Not docked well enough, or the weights were not sitting flat | Dock the whole base to the edges and weigh the parchment down before baking |
| Rim cracked or split away from the side wall | Dough too dry, or the side wall too thin from pressing | Add a teaspoon of ice water at mixing, and patch cracks with a wet dough disc before chilling |
| Pale, soft base with grey spots, sides fine | Not baked long enough at the bottom, common with glass plates | Add 5 to 10 minutes, or switch to a metal plate for even browning |
| Crust shrank but the filling set fine | Shape was lost in the pan before baking | Blind bake the shell completely and cool it before filling |
Two more notes people find useful. Double-crust pies are far less prone to shrinking, because the filling and the top crust brace the sides, so if you have an apple or cherry pie on the calendar, the pressure is lower there. And vinegar, which shows up in a lot of pie dough recipes, is not a shrinkage fix. It mildly inhibits gluten formation so the dough stays tender, which reduces toughness, but it does not stop contraction and it will not rescue overworked dough.
Frequently Asked Questions
How can I stop my pie crust from shrinking?
Shrinkage comes from gluten tightening as it heats, so counter it at four points: keep the fat cold, add the minimum water, stop mixing while the dough is still shaggy, and chill the shaped shell for 20 to 60 minutes before baking. Blind bake the crust with weights filled to the top edge, then cool it before filling. Rolling 13 to 14 inches for a 9-inch plate keeps the walls thick enough to hold.
Why are my pie crusts shrinking?
Pie dough shrinks when its gluten network contracts in the heat, especially once that network has been overworked by extra water or extra mixing. The sides then pull away from the pan and the shell drops below the rim. Resting the dough relaxes the gluten, weighing the shell stops it slumping, and docking keeps the base flat. Docking alone will not fix a side-wall gap, because the walls are the part that contracts.
How to keep pie crust from shrinking when blind baking?
Blind bake at 375F with the shell well chilled and the weights packed to the top edge so nothing can move. Bake 15 to 20 minutes weighted, then remove the weights and parchment, dock again, and bake 10 to 15 minutes more until the base is dry and golden. Filling the pan to the rim is the detail people miss, and it is what stops the walls sliding down.
Can I blind bake a pie crust without using pie weights?
Yes, use a two-stage bake. Bake the empty chilled shell at 375F for 10 to 12 minutes until it is set but still pale, pull it out, dock the base again, and finish for 20 to 25 minutes. Setting an empty pie plate inside the shell for the first stage adds support, and baking low and slow at 350F for 25 to 30 minutes also works. A slab of crust, a layer of foil, or a flat metal lid set on top does much the same job as weights.
What does adding vinegar to pie crust do?
A teaspoon of vinegar or lemon juice mildly inhibits gluten development, which keeps the finished crust tender and slightly less likely to crack as it bakes. It is not a shrinkage remedy, and it will not save dough that was overmixed or overwatered. Use it for tenderness, not for shape, and do not expect to taste it at all in a properly baked crust.
Is pie crust better with Crisco or butter?
Butter gives you the flakiest, best-tasting crust because it melts in layers and leaves pockets behind. Vegetable shortening gives a more tender, more even crumb and resists shrinkage a little better, since it stays solid longer and contains no water. Lard sits between the two and is excellent for savory pies like quiche. A 50-50 mix is a good middle ground when you want flavor and reliability together.
The First Thing to Do for a Shrink-Proof Pie Crust
If you change one thing, change the mixing. Cold fat, the least water the dough will accept, and stopping while the dough still looks shaggy is what keeps the gluten from developing enough to contract.
Everything else supports that decision. Rest the disc an hour, roll it large, press it into the pan without pulling, chill the shaped shell again, and blind bake it weighted to the top edge. Get those five right and the pie crust that comes out of your oven in 2026 will be sitting flush with the rim instead of down inside the pan.