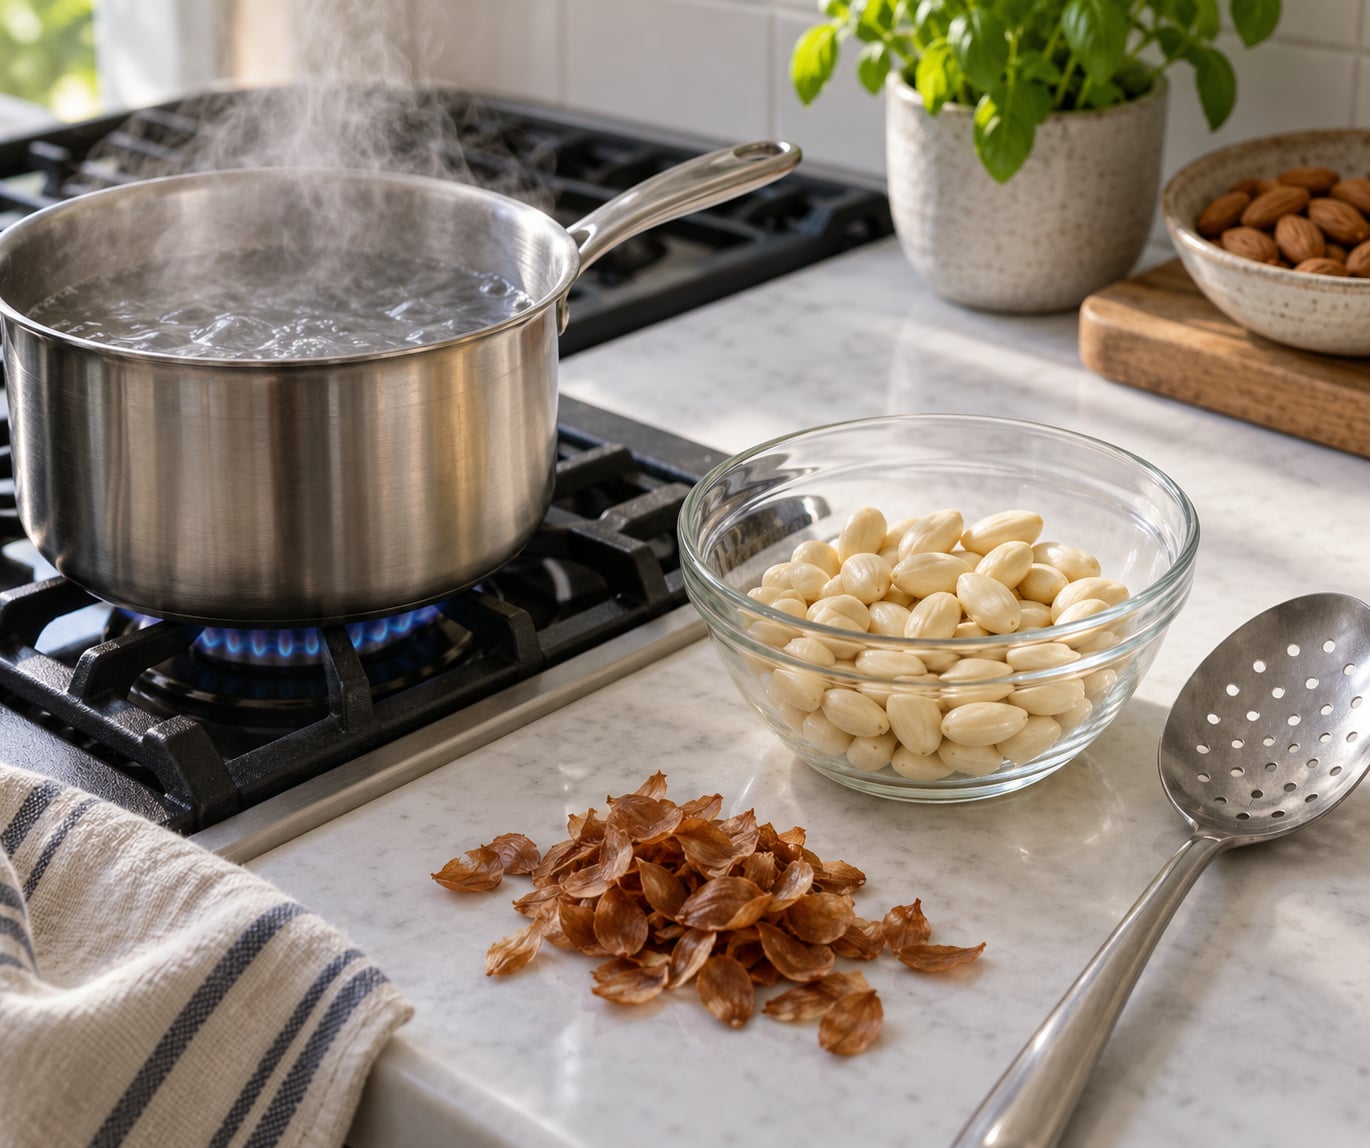
How to blanch almonds and remove the skins takes about ten minutes of work and only 30 to 60 seconds of actual boiling. Drop whole raw almonds into rapidly boiling water, time it, shock them in ice water, then squeeze each one between thumb and forefinger until the papery brown skin pops off. No special equipment, and the nuts stay firm and usable.
Blanched almonds are whole raw almonds that have had their skins removed through a quick boiling process. You do it for texture and flavor: the skin carries tannins, which read as a mild bitterness, and the pale nut underneath blends smoothly into purées, flours and marzipan without brown flecks showing through.
The one thing that trips people up is timing. You will find 30 seconds, 60 seconds, even a couple of minutes quoted across the internet, and the reason for the spread is the nut, not the recipe. Whole almonds need the short end of the window, slivered ones sit at the fast end, and anything left in hot water past about a minute turns soft and useless for roasting. Test a single almond before you commit a whole batch.
Table of Contents
- What You Need
- Step-by-Step
- 1. Check and prepare the almonds
- 2. Heat the water and blanch the almonds
- 3. Stop the cooking with an ice bath
- 4. Rub off the loosened skins
- 5. Rinse, dry, and use or store the almonds
- Common Mistakes
- Frequently Asked Questions
- How long should almonds be blanched to remove their skins?
- Do blanched almonds need to be blanched again?
- Can I blanch almonds without an ice bath?
- Why are my almonds still hard after blanching?
- How should blanched almonds be stored?
- Can I blanch salted or roasted almonds?
- Conclusion
What You Need
Blanching almonds and removing the skins needs very little:
- 1 cup (about 140 g) raw whole almonds, skin on — unroasted, unsalted, unprocessed.
- 3 cups water — enough to cover the almonds with room to move.
- A medium saucepan with a lid set within reach.
- A colander or small sieve, plus a heatproof bowl or a second pan for the ice bath.
- A bowl of ice and cold water, prepared before you start the blanch.
- Clean paper towels or a kitchen towel for drying.
Two checks before the water goes on. First, the almonds must be dry — wet nuts go into the water unevenly and the timing stops meaning anything. Second, work with a rolling boil rather than a lazy simmer, because a simmer is a slower, gentler cook and you will land in mush territory.
Handling boiling water is the only real safety concern here. Use a slotted spoon or the colander rather than tipping the pan, and keep the ice bath bowl within arm’s reach so the transfer takes a second.
Step-by-Step
1. Check and prepare the almonds
Start with raw whole almonds that still have their skins. Store-bought blanched or slivered nuts are already skinned, so blanching them again accomplishes nothing except softening them.
Spread them on a plate and pick out anything dark, shriveled or rubbery, then roll the lot between your palms to knock off loose dust. If you bought them already salted or roasted, skip this recipe and read the note further down.
2. Heat the water and blanch the almonds
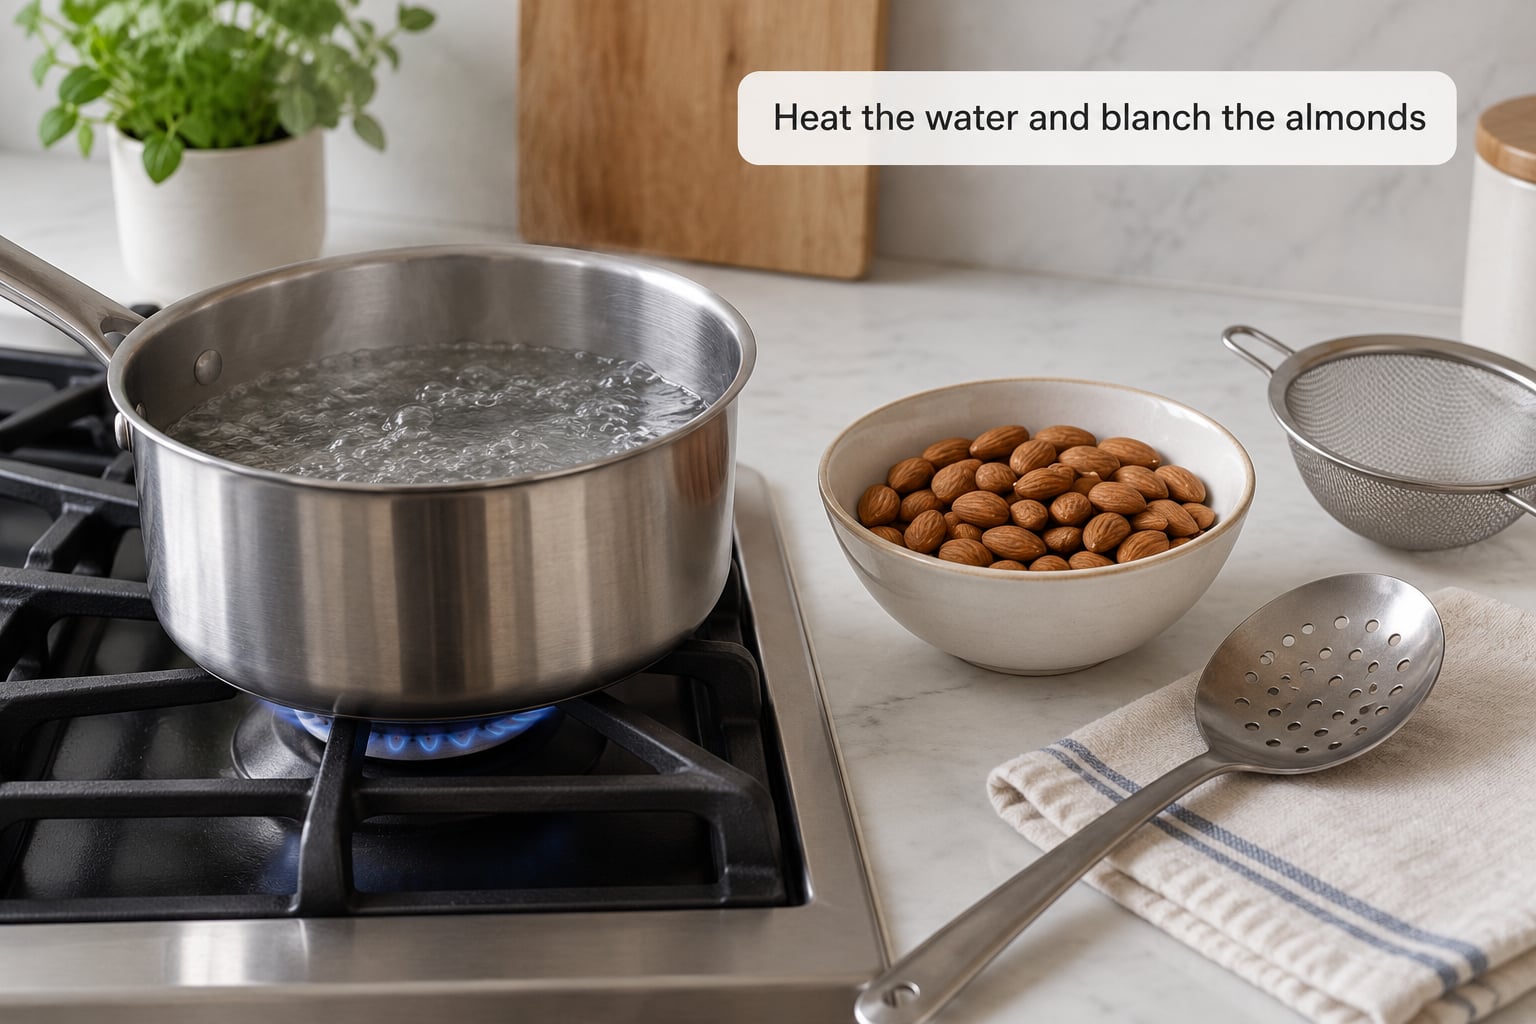
Fill the saucepan with 3 cups of water and bring it to a full rolling boil over high heat. While it climbs, get the ice bath ready.
Lower the dry almonds into the boiling water and start the clock the moment they go in. Give them a stir so every nut is wetted, then keep the heat on high and let them ride.
| Almond form | Blanching time | What you want to see |
|---|---|---|
| Slivered | 15 to 20 seconds | Skins pale and curling at the edges |
| Sliced | 20 to 30 seconds | Skin visibly wrinkled |
| Whole, raw (the standard) | 30 to 60 seconds | Skin puckered, nut still hard when you squeeze it |
| Whole, then roasted afterward | 30 to 45 seconds | Skin loose; nut still firm all the way through |
The visual cue is wrinkling. When the brown skin loses its smooth, tight look and puckers, the pellicle has let go of the nut. Lift one out at the end of your window and press the skin with a fingernail — if it dents and lifts, you are done.
The tactile cue is firmness. Squeeze the warm nut between your fingers: it should feel hard and solid, like a nut. A nut that gives way at all has gone too far, and extra boiling time will not bring it back.
3. Stop the cooking with an ice bath
Dump the almonds straight from the saucepan into the bowl of ice and cold water. The temperature shock stops the heat moving from the skin into the nut body, which is exactly what keeps the texture firm.
Leave them submerged for two to three minutes, then drain them in the colander. Skipping this step is the second most common mistake, and it explains a lot of mushy results.
4. Rub off the loosened skins
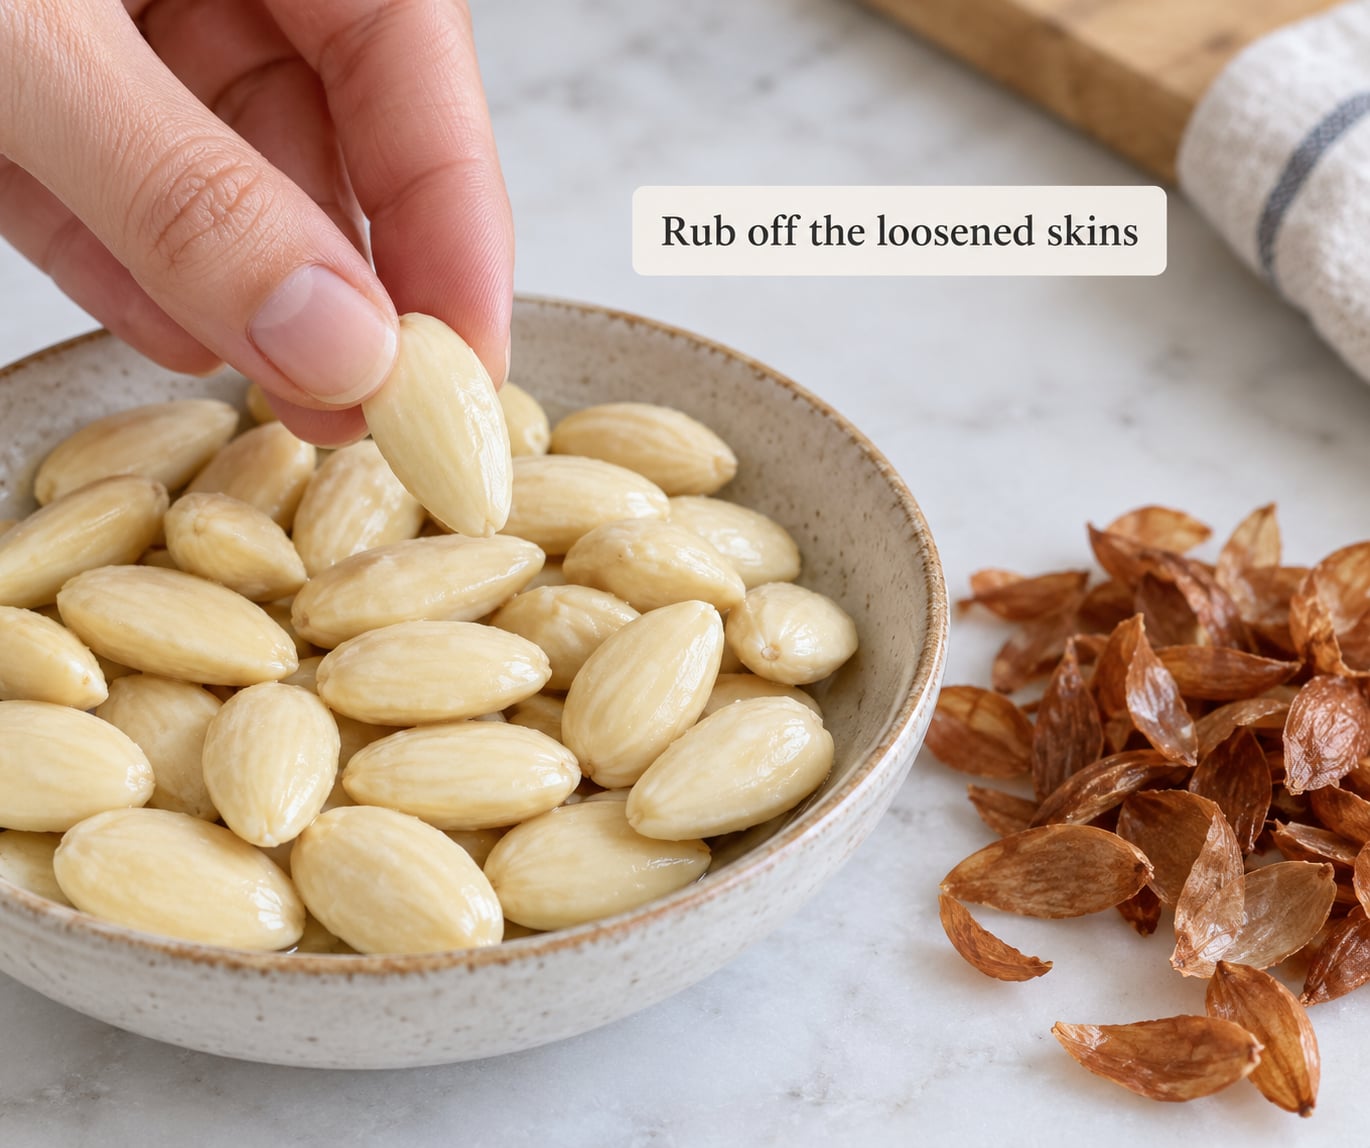
Pick up one almond and press it between the pad of your thumb and your index finger. The skin compresses and slides off in a single piece, the way a wet shell comes off a pea.
Start at the wide end and work down toward the tip, where the skin grips hardest. If a patch clings, rub the nut directly on the counter or use the edge of a spoon to lift the corner, then peel. Do not dig in with a knife — you will chip the nut.
For more than about half a cup of almonds at a time, put them in a clean towel, gather the ends, and rub the bundle between your palms. Most of the skins drop into the towel in seconds. That trick, along with working in batches instead of one nut at a time, is the answer to the single most common complaint from home cooks about this job: it is slow and monotonous.
Expect a few stubborn fragments. Those are fine; pick them out as you go.
5. Rinse, dry, and use or store the almonds
Give the peeled nuts one quick rinse in cold water, then spread them on a clean towel or paper towel and roll gently to dry the surface. Getting them properly dry is the step people skip, and it is why some blanched batches turn musty in the fridge.
From there they go straight into almond flour or almond meal in a processor, into a jar of almond milk, or into slivers for a salad. Dry them fully first — about 30 minutes spread out — before grinding, or the flour clumps.
For roasting, they go on a parchment-lined tray at 350°F (175°C) until lightly colored, usually 10 to 12 minutes, watching them closely because blanched nuts brown faster than raw ones.
Storage depends entirely on how dry they are. Fully dry blanched almonds keep about two weeks in an airtight container in the fridge, or up to three months frozen; blanching shortens their shelf life because the nut has already absorbed water.
Common Mistakes
The skins still won’t budge. Nine times out of ten the blanch was too short. Return the nuts to boiling water for 20 more seconds, then shock and test again. If you are blanching nuts that soaked overnight in cool water, the soak has swollen the nut more than the brief heat can account for, so those need a longer soak rather than a longer blanch.
The skin tears instead of peeling cleanly. That means the nuts sat too long. The pellicle swells, sticks to itself, and shreds. Shorten the next batch by 15 seconds.
The almonds are soft or squishy. Over-blanching, and too slow a boil. There is no rescue — a soft almond will not firm back up. Blanching is the last thing a soft nut should be used for, so pull them early and err on the side of undercooking; a nut with a stubborn patch of skin is a much smaller problem than a batch you cannot roast or grind.
Bits of skin stay behind. Sort the batch while drying. Fragments that survive into almond flour make it grey and slightly bitter, so pick them out rather than grinding straight through.
You cannot get a boil going. Forget the saucepan and pour boiling water from a kettle over the almonds in a heat-safe bowl. It is the simplest version of the same method and works well for a cup of nuts.
A microwave works too, in the same spirit: cover the almonds with water in a microwave-safe bowl, heat on high in 30-second bursts, and stop the moment the skin looks wrinkled. It is faster than a saucepan for small quantities and less forgiving for large ones.
The no-heat route exists as well. Cover the almonds with cool water, leave them overnight, drain, and rub the skins off — they come away, just more slowly and messily. The overnight soak is not blanching, but it answers the “without boiling” version of the question, and for baking purposes it works.
If you want to push this to other nuts, the timings run shorter for everything except pistachios.
| Nut | Method | Time |
|---|---|---|
| Pistachios | Boil, then soak in cold water | 5 minutes in boiling water, then 1 to 2 minutes cold |
| Walnuts | Boil, rub skin off in a towel | About 2 minutes |
| Hazelnuts | Roast first, then blanch | 10 minutes at 350°F, then 2 to 3 minutes in water |
| Peanuts (skinned) | Boil or steam | About 5 minutes |
Do not throw the skins away. They go into the compost, they thicken a skin-on almond flour if you want the speckled version, and a cup of them soaked overnight makes a simple almond extract that leans bitter and good in baking.
Frequently Asked Questions
How long should almonds be blanched to remove their skins?
Whole raw almonds need 30 to 60 seconds in rapidly boiling water. Slivered almonds are done in 15 to 20 seconds and sliced ones in 20 to 30. Watch for the skin to pucker and wrinkle rather than trusting the clock alone, then move them straight to ice water to stop the heat.
Do blanched almonds need to be blanched again?
No. If the nuts are already blanched, the skin is gone and there is nothing left for boiling to loosen. Heating them a second time only softens the nut and shortens its shelf life. Use them as they are, or toast them briefly if a deeper flavor is what you are after.
Can I blanch almonds without an ice bath?
You can, but the nuts usually end up softer than you want. The ice bath stops heat moving from the skin into the nut, which is what keeps the texture firm. If you have no ice, running them under cold tap water for a full minute works, though you will lose a little crispness.
Why are my almonds still hard after blanching?
Hard is the goal — you should still be able to dent the nut with a fingernail. What you do not want is skin that will not move. If the skin is tight, the blanch was too short: try another 20 seconds in boiling water. If the nut itself feels soft, you over-blanched and that cannot be undone.
How should blanched almonds be stored?
Dry them thoroughly, then keep them in an airtight container in the fridge for about two weeks, or freeze them for up to three months. Blanched almonds keep less well than skin-on ones because blanching has already let water into the nut, so a fridge smell test is worth doing before you cook with a batch.
Can I blanch salted or roasted almonds?
Neither works well. Salt does not wash off cleanly from a blanched surface and can taste harsh on a bare nut, while roasting drives off the moisture blanching needs to loosen the skin. If you want that combination, blanch raw unsalted nuts first, dry them thoroughly, then roast and salt them afterwards.
Conclusion
Blanching almonds is three moves: a brief boil at a rolling heat, an immediate plunge into ice water, and a firm squeeze from the wide end toward the tip until the skin drops off. Get the timing right and the nuts stay hard, mild and bright white.
Before you blanch the full batch, drop one almond in for 30 seconds, shock it, and try the squeeze. If the skin pops off and the nut is still firm, you have found your timing for that particular nut and can scale up with confidence.