How to braise short ribs in the oven works like this: sear the ribs until deeply browned, soften onions, carrots and celery in the same pot, deglaze with wine or beer, add broth until the liquid reaches about halfway up the meat, then cover and bake at 325°F for 2.5 to 3 hours until the meat gives way to a fork.
Short ribs are a thick, collagen-heavy cut that is unpleasant to eat if you only roast or grill them. The long covered cook at low heat is what turns that connective tissue into something you can cut with a spoon, and it is why almost every restaurant braise spends hours on very little heat.
Plan for three to four hours from cutting board to table, and most of that is oven time. You are active for roughly the first 30 minutes.
Table of Contents
- What You Need
- Step-by-Step: How to Braise Short Ribs in the Oven
- Step 1: Prepare and Season the Short Ribs
- Step 2: Sear the Ribs Until Deeply Browned
- Step 3: Build the Braising Liquid
- Step 4: How to Braise Short Ribs in the Oven at 325°F
- Step 5: Check Tenderness, Finish the Sauce, and Rest
- Common Mistakes
- Frequently Asked Questions
- What temperature should short ribs be braised at in the oven?
- How long does it take to braise short ribs in the oven?
- Should I cover the pan when braising short ribs?
- Do bone-in or boneless short ribs take the same time to braise?
- How do I know when oven-braised short ribs are done?
- Can I make oven-braised short ribs ahead of time?
- Conclusion
What You Need
The core list is short, and most cooks already own it.
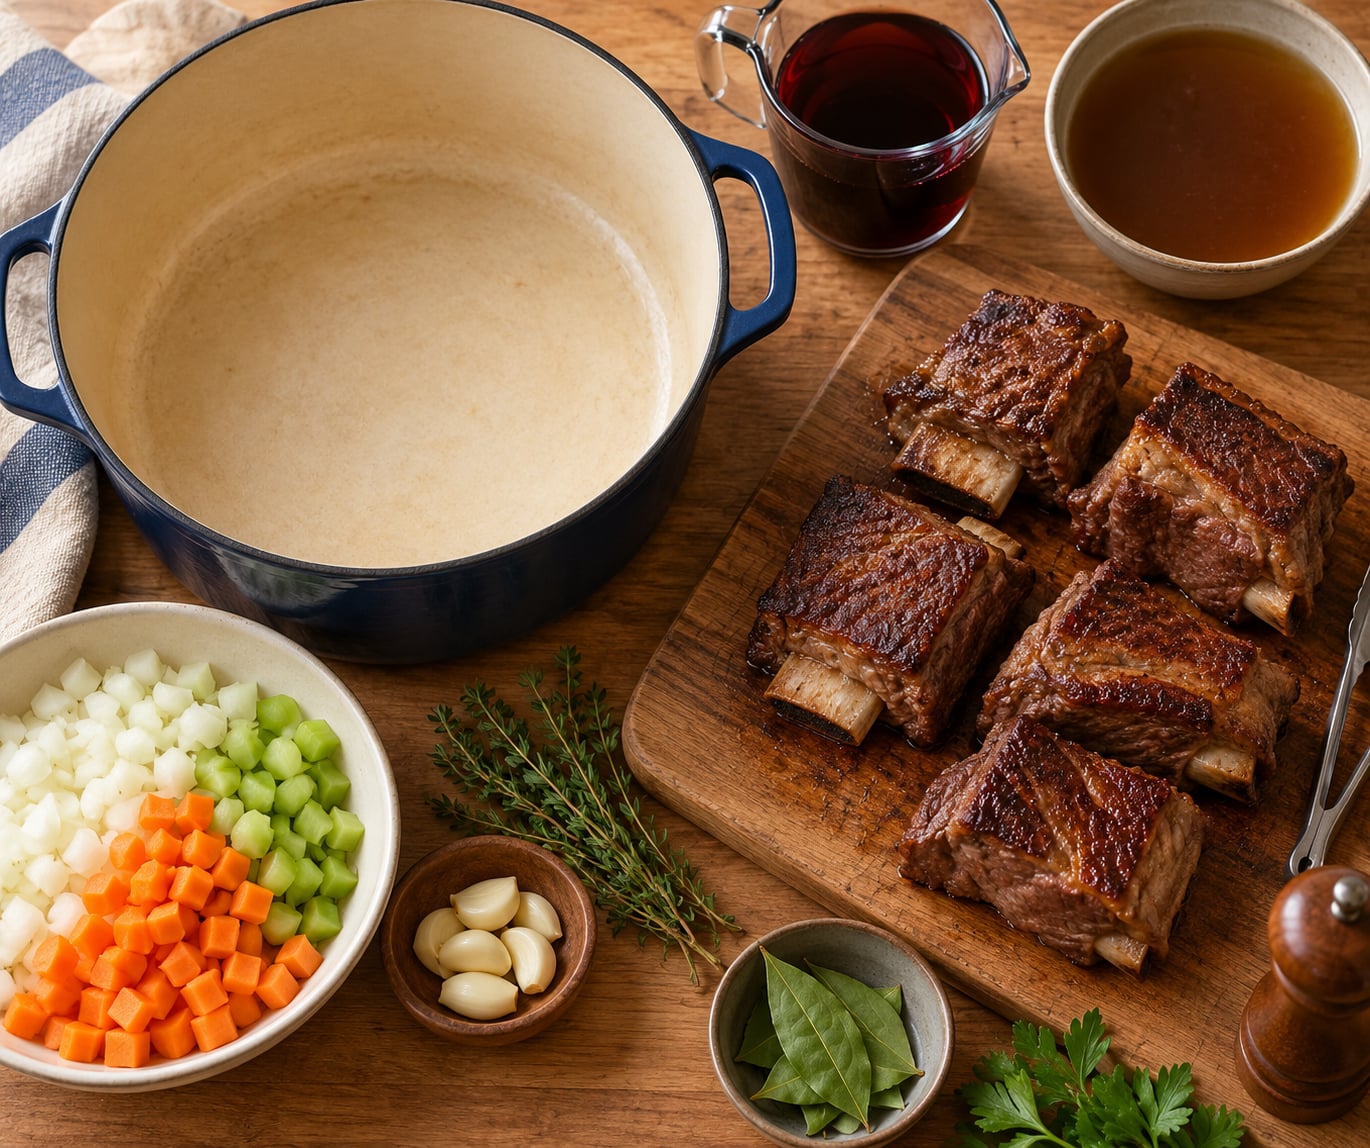
- The ribs: 3 to 4 pounds of bone-in short ribs, well marbled. English-cut ribs run along the rib bone and are meatier, so budget closer to half a pound per person. Chicago-cut ribs are cut across the bone, cheaper, and a little more forgiving of long cooking.
- The pot: a 6- to 8-quart Dutch oven with a tight-fitting lid. A covered roasting pan works if you seal the foil really well, and a foil packet on a sheet pan is fine for a small batch, though the liquid is easier to lose.
- Aromatics: one yellow onion, two carrots, two celery stalks, and four or five garlic cloves. Parsnip and a few sprigs of thyme are good additions; so is a Parmesan rind if you have one.
- Liquid: 1 cup of dry red wine plus about 3 cups of low-sodium beef or chicken broth, or a dark beer plus broth, or broth alone with a splash of Worcestershire sauce.
- Seasoning: kosher salt, coarse black pepper, and a small amount of tomato paste for depth.
- Tools: tongs, a large cutting board, and an instant-read thermometer if you own one.
Boneless short ribs work in the same method and usually need about 45 to 60 minutes less. You lose a little of the flavor that comes from the bone, and they shred rather than slide off.
Step-by-Step: How to Braise Short Ribs in the Oven
Step 1: Prepare and Season the Short Ribs
Trim the ribs a bit, cutting away any thick cap of hard fat that will not turn tender, then pat every piece dry with paper towels. Dry surface is the single biggest factor in getting a real crust instead of a grey, steamed one.
Season on all sides with salt and pepper right before they go in the pan. Short ribs are usually brined or dry-rubbed rather than marinated in anything acidic, and salting hours ahead is not needed here since the braise itself seasons the meat over three hours.
Step 2: Sear the Ribs Until Deeply Browned
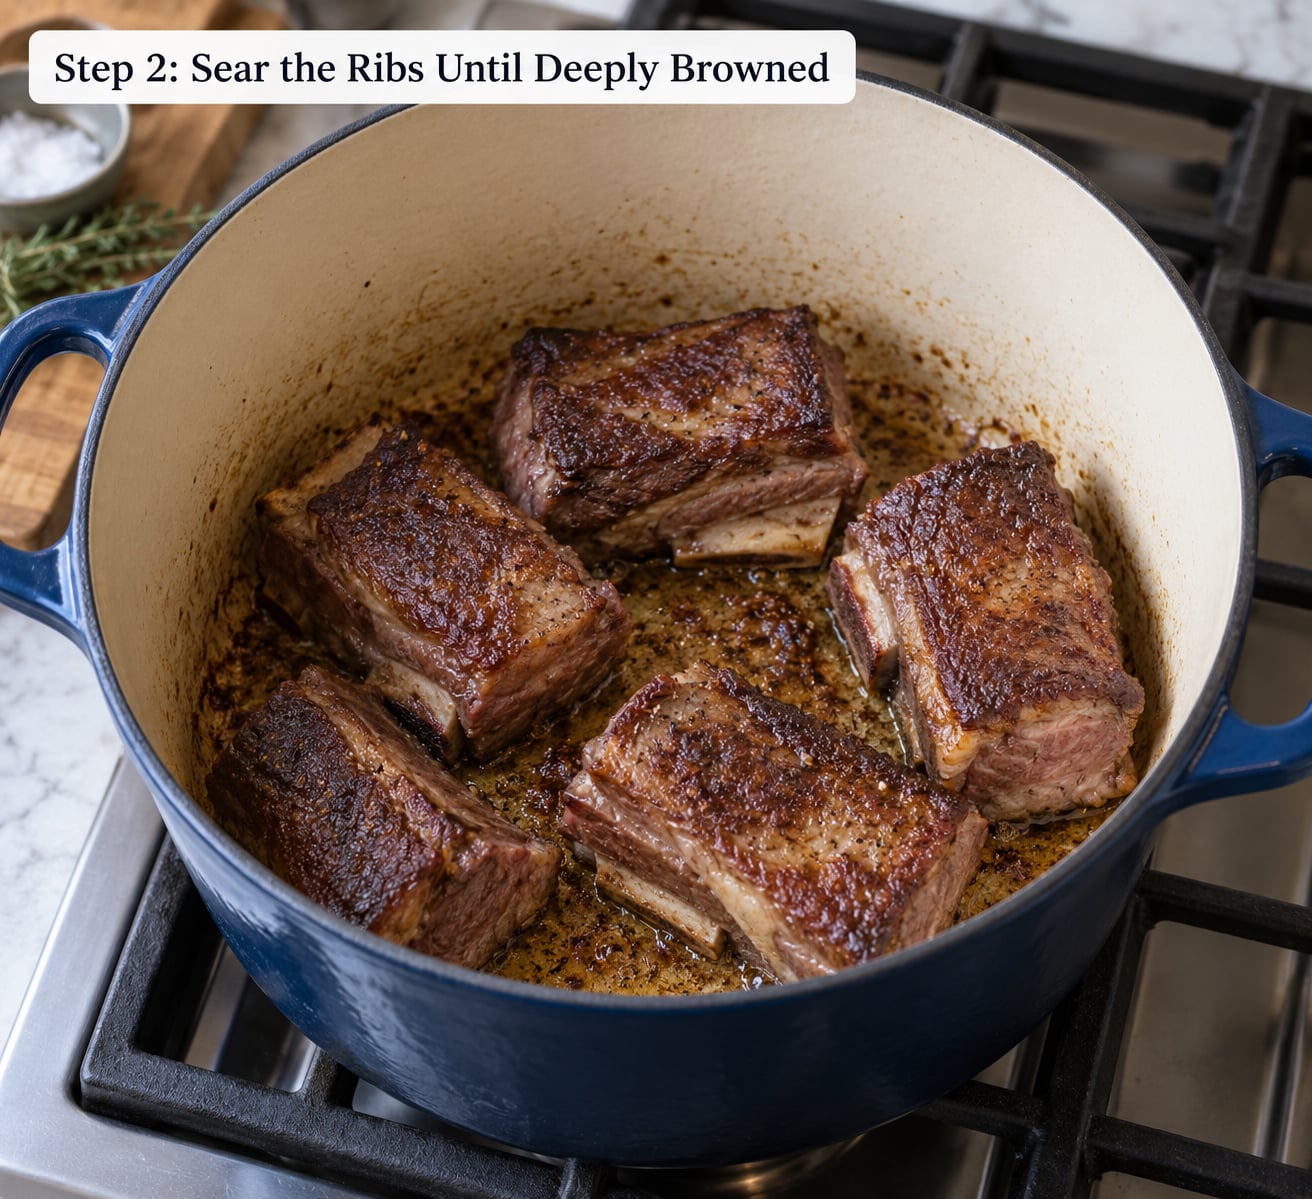
Heat a heavy Dutch oven over medium-high heat with a thin layer of oil. Sear the ribs in batches so the pieces sit in a single layer with space around each one. A crowded pot drops the temperature and steams the meat, which is the exact opposite of what you want.
Give each side 3 to 5 minutes without moving it. You are looking for a deep chestnut brown crust, not a light tan one, and you should hear a real sizzle rather than a quiet hiss. Pull the ribs out and set them on a plate while you build the liquid.
Step 3: Build the Braising Liquid
Turn the heat down to medium. You will probably want to pour off most of the rendered fat, though I leave a tablespoon or two for flavor. Cook the diced onion, carrot and celery in that fat for 6 to 8 minutes until soft and starting to color.
Stir in the tomato paste and let it cook for about a minute until it darkens. Add garlic and the herbs for 30 seconds, then pour in the wine or beer and scrape the bottom of the pot to loosen every browned bit. Let the liquid reduce by about half, which takes 2 to 3 minutes and concentrates it.
Here is the part that decides the texture. Home cooks on Reddit and on recipe forums keep landing on the same rule: keep the liquid low, coming roughly halfway to two-thirds of the way up the meat. The submerged portion poaches gently and the exposed portion cooks in trapped steam, so you get tender meat without losing the crust. Fully submerging the ribs gives you even, moist meat but a soft exterior. Either works, and it is a choice rather than a mistake.
If you want a comparison for the liquid itself, red wine gives you acidity and tannin that cuts the richness, stout or porter adds roasted malt sweetness and body, and straight beef broth with a splash of Worcestershire gives you the cleanest, most savory result. Avoid pale lager and IPA for a braise; the bitterness has nowhere to hide over three hours.
Step 4: How to Braise Short Ribs in the Oven at 325°F
Nestle the ribs back into the pot, add the broth so it reaches about halfway up the meat, and bring it to a simmer on the stovetop. Put the lid on, move the pot into a 325°F oven, and set the timer for 2.5 to 3 hours. If you have convection, drop the temperature about 15°F.
Why this works: a conventional oven at 325°F does not cook the meat to 325°F. The liquid, the lid and the bone all buffer the temperature, and the meat spends hours in the low 190s to low 200s, which is where collagen turns to gelatin. That is also why a moderate oven is safe for a pot sitting in liquid.
Published recipes disagree wildly on time and temperature, so here is a single reference. Treat these as starting points and start checking tenderness early.
| Oven temperature | Approximate time | What you get | Good for |
|---|---|---|---|
| 225°F | 4 to 6 hours | Very soft, gelatin-rich texture | English-cut ribs when you have all afternoon |
| 250°F | 3.5 to 5 hours | Soft and forgiving | Large bone-in racks, very cool ovens |
| 300°F | 3 to 3.5 hours | Tender with a slightly firmer texture | Boneless ribs and thinner pieces |
| 325°F | 2.5 to 3 hours | The standard balance | Most home kitchens |
| 350°F | 2 to 2.5 hours | Tender, more reduced sauce | Already-tender cuts, tighter schedules |
| 375°F | 2 to 3 hours | Sauce reduces faster, watch it closely | Cooks who want a darker finish |
Around the halfway point, open the lid and check the liquid level. Long oven braises lose more liquid than people expect, and the top of the meat will dry and tighten if it sits above the liquid for the last hour.
Step 5: Check Tenderness, Finish the Sauce, and Rest
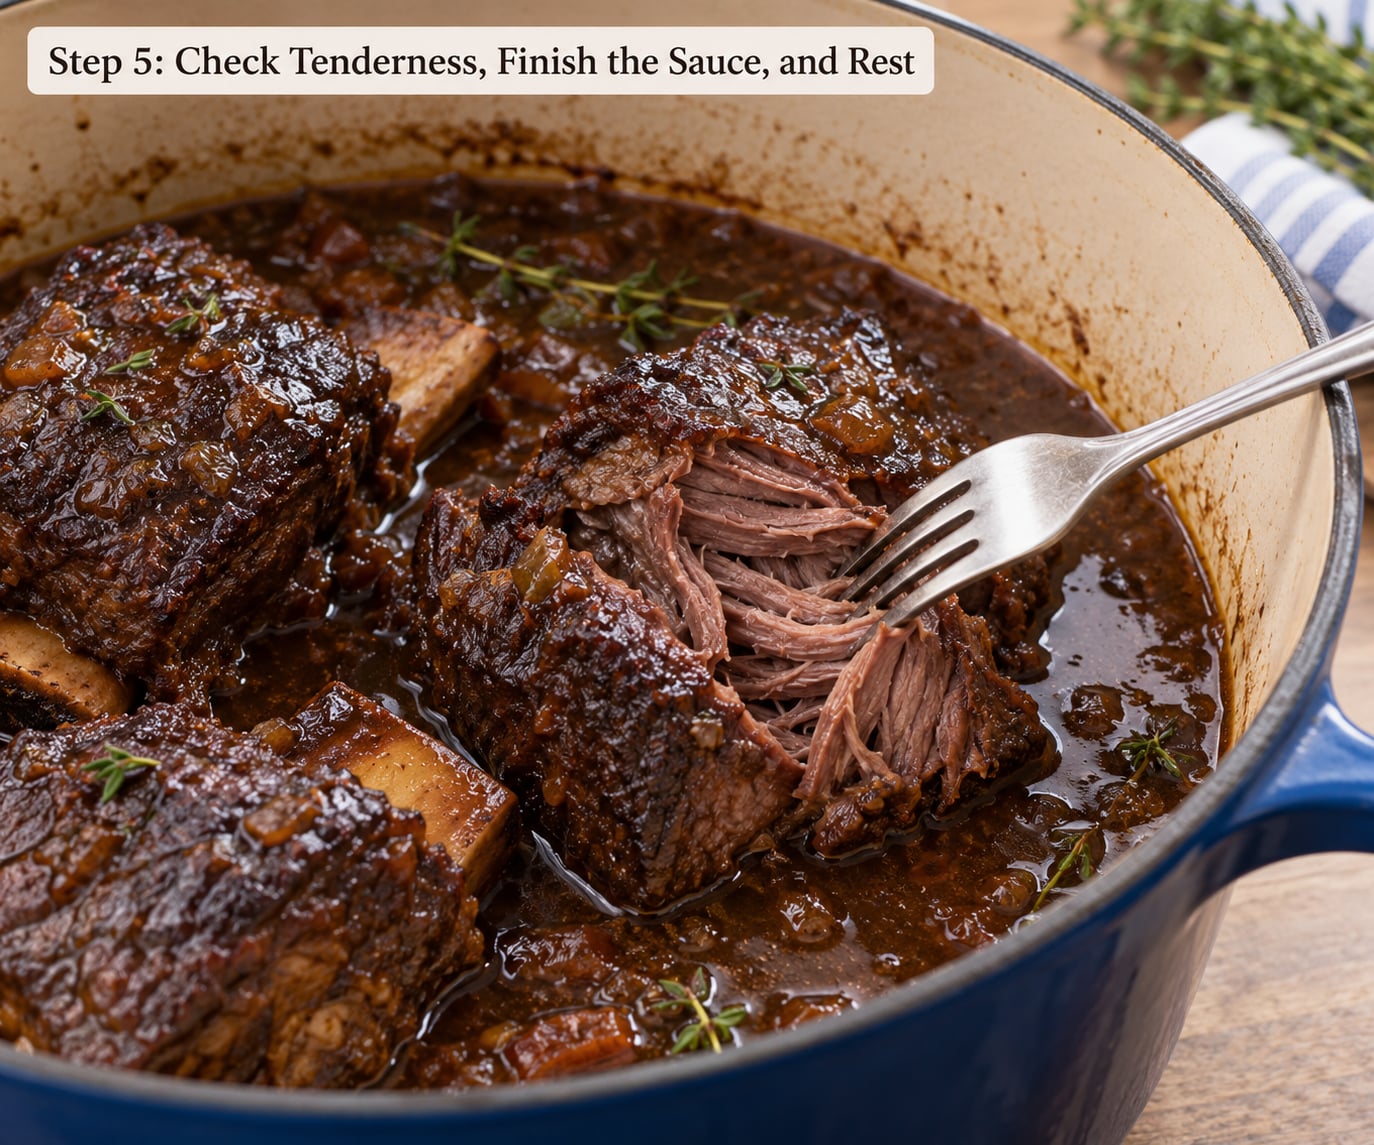
Start checking at 2 hours. Slide a fork into the thickest part with almost no pressure. If it goes through with no resistance and the meat starts to separate along the grain, it is done. If the fork meets clear resistance, give it another 20 to 30 minutes.
There is no oven temperature at which ribs fall apart. Tenderness is a function of time at temperature and of the cut, which is why recipes that claim 350°F for two hours and 200°F for four hours can both be right. If you own a probe thermometer, the meat registers in the low 200s while still tough, and connective tissue is properly broken down somewhere in the 200 to 205°F range on the way to shredding.
Take the pot out of the oven and lift the ribs onto a plate. Skim the solid fat off the top of the sauce, then set the pot over medium heat uncovered and reduce by a third or a half. You want it to coat the back of a spoon.
For a thicker sauce without a slurry, take the cooked carrots, onions and celery and blend them with some of the liquid, then stir them back in. That is the move restaurants use, and it gives you body plus extra vegetable in one step.
Rest the ribs 15 to 20 minutes before serving. The meat firms up slightly as the juices redistribute, and the sauce thickens enough to cling.
Common Mistakes
Most disappointing braises come down to a handful of problems, and every one of them is fixable.
| Symptom | Cause | Fix |
|---|---|---|
| Ribs are tough | Not enough time, a hot oven, or too little liquid | Cover and return at 300°F for 30-minute intervals until a fork passes through. Time, not temperature, does the work |
| Ribs are mushy and falling apart | Left over far too long, usually 4 hours or more at a high heat | Pull them at the first sign of give. Pulling early costs you nothing; pulling late cannot be undone |
| No browning | Crowded pot, wet meat, or a pan that was not hot enough | Pat the meat dry, sear in batches with space between pieces, and wait the full 3 to 5 minutes per side |
| Sauce is thin | Liquid evaporated through a loose lid, or you did not reduce at the end | Uncover on the stovetop and reduce, or blend the braising vegetables back in |
| Sauce is greasy | Rendered fat has pooled on top | Chill the pot overnight and lift off the solid fat, or spoon it off carefully while warm |
| Fond is burnt | The pot was overfilled or the liquid came in too late | Lower the heat, pour in the liquid while the pot is still hot, and expect a darker sauce rather than a bitter one |
| Meat shrivels on top | Liquid level fell below the meat for too long | Add hot broth when you check at the halfway point and press the meat down gently |
A couple of tips worth keeping.
Make ahead. Short ribs are better the next day. Cool the meat and sauce in the pan, cover, and refrigerate within two hours. They keep 3 to 4 days in the fridge, and the sauce and meat freeze together well for up to 2 to 3 months.
Reheat gently. Warm them in a covered pot over low heat with a splash of broth, or in the oven at 275°F until hot all the way through. A microwave reheats the sauce unevenly and dries the edges, so I avoid it. USDA guidance for reheating cooked leftovers is 165°F, and whole cuts of beef should have reached at least 145°F during cooking.
Serving. Spoon the sauce and braising vegetables over polenta, mashed potatoes, or wide pasta and let people serve themselves. A fruity red such as Pinot Noir or a lightly chilled Gamay sits better against the richness than a heavy Cabernet, and a dark beer works just as well if that is what the pot was built with.
If you want hands-off time. A slow cooker does the same covered, low-temperature job in 8 to 10 hours on low, and a pressure cooker gets you there in about an hour plus a natural release. The oven wins on flavor because of the hard sear and the way the fond browns in the same pot, and it wins on control because you can adjust the liquid halfway through.
Frequently Asked Questions
What temperature should short ribs be braised at in the oven?
Use 325°F for most situations, covered, for 2.5 to 3 hours. Drop to 300°F if your oven runs hot or you have large English-cut ribs, and drop to 250°F if you have all afternoon. Anything above 375°F reduces the sauce faster and dries the exposed tops. Remember the meat will not reach the oven temperature, so a moderate setting is plenty.
How long does it take to braise short ribs in the oven?
Two and a half to three hours at 325°F covers most bone-in short ribs. Boneless ribs usually need 45 to 60 minutes less, and Chicago-cut ribs tend to go faster than English-cut. Start testing with a fork at the two-hour mark rather than trusting the clock, since pot size, how tightly the ribs are packed, and your oven all shift the timing.
Should I cover the pan when braising short ribs?
Yes, for most of the cook. The lid traps steam so the meat stays moist and the liquid keeps climbing the sides of the pot, which is what softens the connective tissue evenly. Take the lid off for the last 15 to 30 minutes only if you want the sauce to thicken and the tops to darken.
Do bone-in or boneless short ribs take the same time to braise?
No. Boneless ribs are usually 45 to 60 minutes faster because there is no bone to heat through and less connective tissue in each piece. Bone-in ribs also hold their shape better, while boneless pieces tend to shred. Use the same method for both, just check the boneless batch about an hour earlier.
How do I know when oven-braised short ribs are done?
Push a fork into the thickest part with very little pressure. It should slide through with no resistance and the meat should begin to separate into strands along the grain. No oven temperature makes ribs fall apart, so time at temperature is the real test. If the fork meets clear resistance, give it another 20 to 30 minutes.
Can I make oven-braised short ribs ahead of time?
Yes, and the flavor improves. Cool the meat and sauce in the covered pot, refrigerate within two hours, and keep for 3 to 4 days. Freeze in an airtight container for up to 2 to 3 months. Reheat covered over low heat on the stovetop or at 275°F in the oven with a splash of broth until heated through to 165°F.
Conclusion
Braising short ribs in the oven is a 30-minute job wrapped around a 3-hour wait. Start by getting a real crust: pat the meat dry, sear it in batches without crowding the pot, and wait the full few minutes per side.
Next, build the braising liquid in that same pot so the fond is part of the sauce, add enough broth to reach about halfway up the meat, cover it, and set it at 325°F. Then check for tenderness before the timer runs out rather than after. Pull the ribs the moment a fork passes through with no resistance.
Reduce the sauce, rest the meat, and serve it over something that soaks it up. Cook it once and you will never need the recipe again.