Yes, you can temper chocolate at home without a tempering machine, and the seed method is the one most people end up using. You melt about two thirds of the chocolate, cool it back down with finely chopped unmelted chocolate, then bring the whole batch up to its working temperature. With a bowl, a spatula and either a microwave or a saucepan of warm water, a couple of pounds of chocolate takes 15 to 20 minutes.
Tempering matters because real chocolate has to end up with the right cocoa butter crystals locked in place. Get it right and your truffles set glossy with a hard snap and release from the mold cleanly. Get it wrong and they come out of the fridge dull, streaky and crumbly. The tolerance is narrow, but the technique is simple enough that you can repeat it until it works every time.
This guide covers the full hand-tempering process, the temperatures for dark, milk and white chocolate, and the fix for every problem that comes up often. Test a small batch first. Nothing here is difficult once you can see what the chocolate is doing.
Table of Contents
- What You Need
- Step-by-Step
- How to Temper Chocolate Without a Machine Using the Seed Method
- Step 1: Prepare the Chocolate
- Step 2: Melt Two-Thirds of the Chocolate
- Step 3: Add the Seed Chocolate
- Step 4: Warm the Chocolate to Working Temperature
- Step 5: Test and Use the Chocolate
- Common Mistakes
- Frequently Asked Questions
- What is the easiest way to temper chocolate at home?
- Is it possible to temper chocolate without a thermometer?
- Is it possible to temper chocolate in the microwave?
- Can you temper chocolate without seeding it?
- How long will chocolate stay tempered?
- Conclusion
What You Need
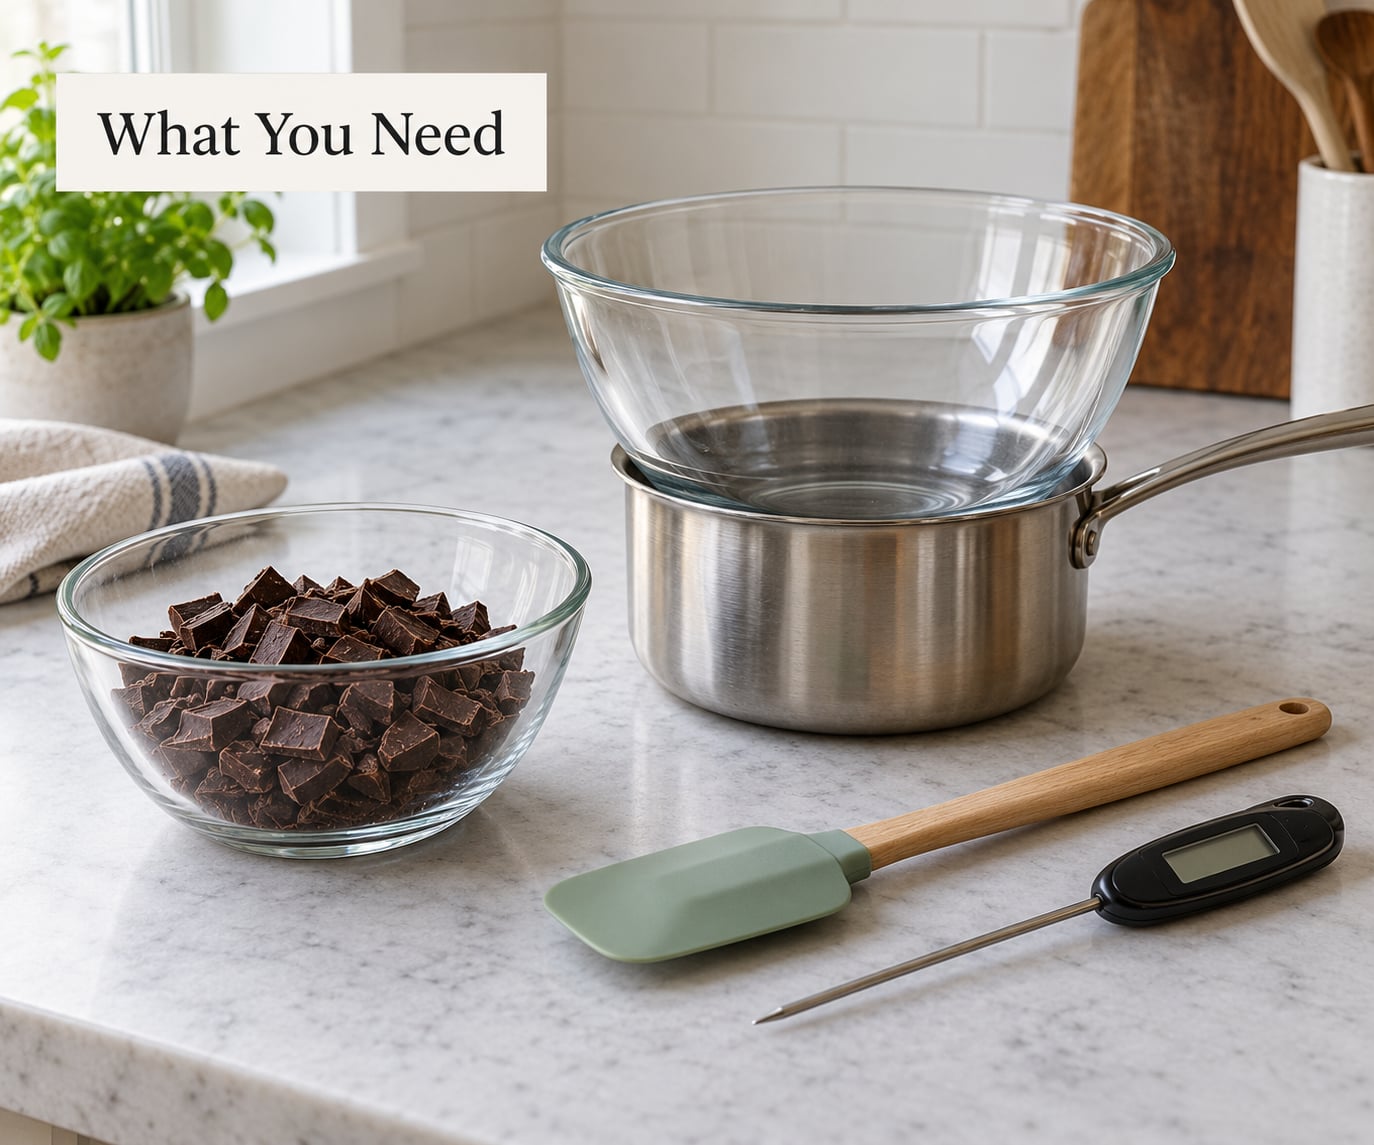
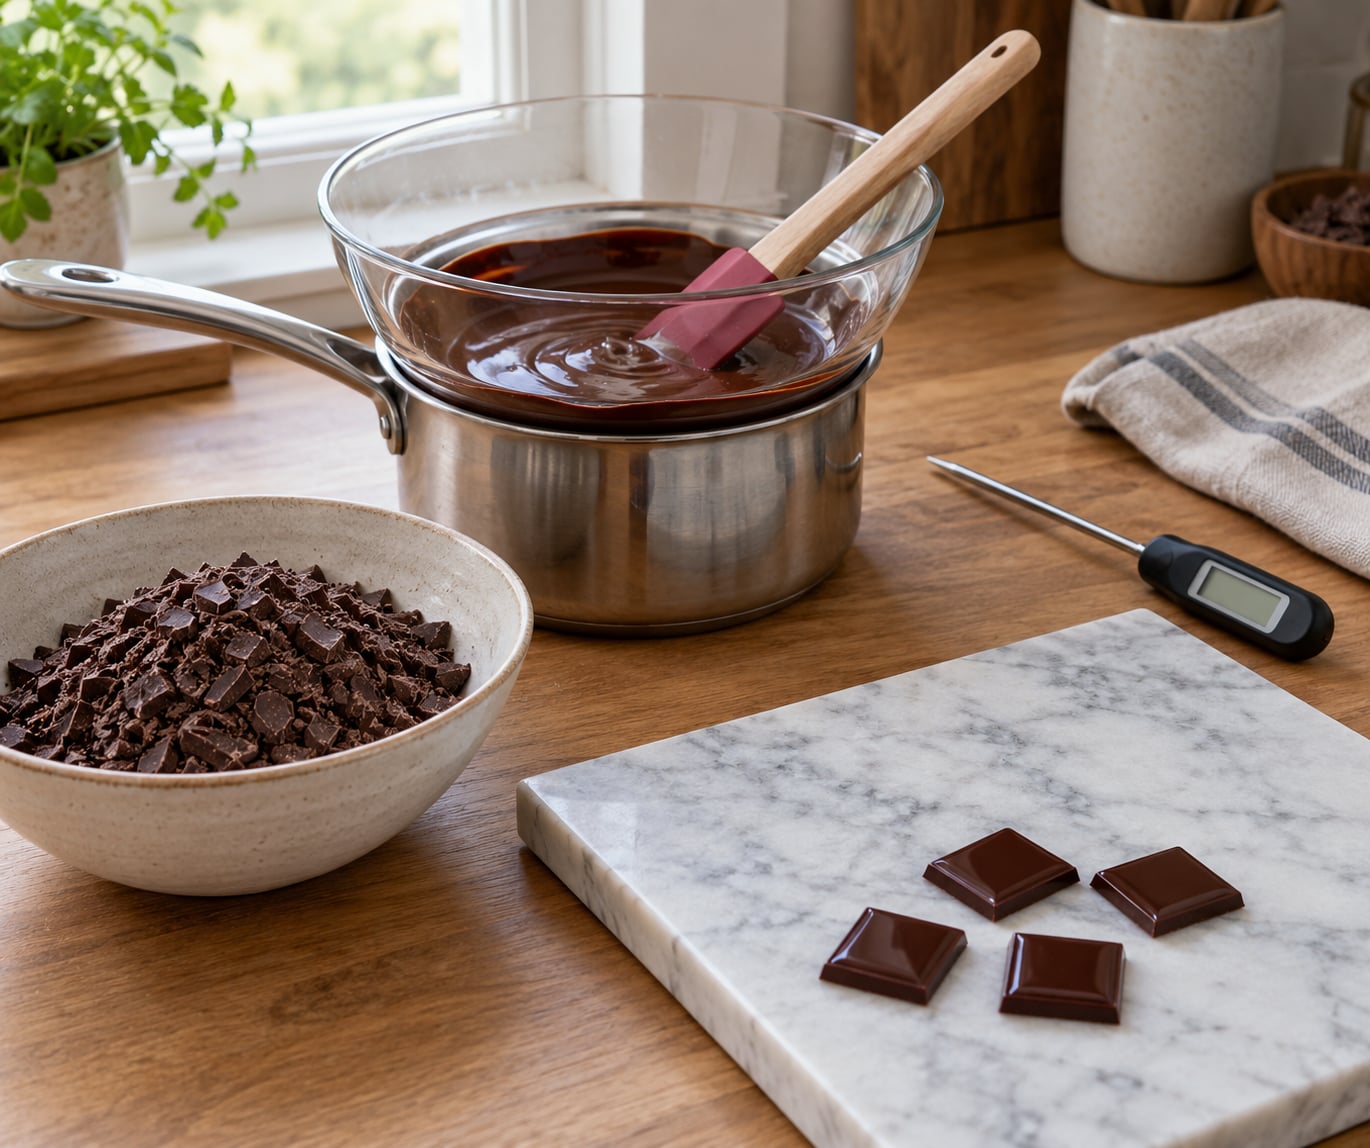
Tempering needs almost nothing. Most of what people buy as accessories is optional, and the one tool that changes everything is a heatproof bowl that is completely dry.
- Real chocolate or couverture in dark, milk or white. Compound chocolate is different, more on that below.
- A heatproof bowl that fits over a saucepan without touching the water.
- A silicone spatula or palette knife for scraping the sides and the bottom.
- A digital thermometer with a probe you can leave in the chocolate. Helpful, not required.
- Seed chocolate, roughly 20 to 25 percent of your total weight, kept out of the heat until you need it.
- A saucepan of water, a microwave, or both for gentle, controlled heat.
- A marble or granite slab if you have one. Useful for cooling a small batch quickly, though it is not required.
The role of the seed chocolate is worth understanding before you start, because it is the whole trick. Untouched chocolate already sits in temper: its cocoa butter is made of Form V crystals, the stable form that gives snap and shine. Good chocolate you buy in a bar arrives that way. What you are doing is destroying those crystals with heat and then inviting them back, either by holding a low temperature so the survivors stay alive, or by melting everything and seeding it fresh.
That is also why a pinch of water ruins the whole thing. Water and cocoa butter do not mix. A drop, a splash of steam from the double boiler, or condensation on a cold bowl makes the sugar and fat clump into a stiff paste that will not flow again. Dry equipment is not fussy detail; it is the single most common way a batch dies.
Step-by-Step
How to Temper Chocolate Without a Machine Using the Seed Method
The seed method is the core technique behind learning how to temper chocolate without a machine, and it is the one most home chocolatiers rely on. Melt two thirds of the chocolate until no crystals survive. Add the remaining third, finely chopped and still cool, in small additions while you stir. Those unmelted pieces dissolve at 34°C (94°F), and the moment they do, the crystal structure they carry spreads through the batch. You then let the residual heat bring the whole thing back up to working temperature, where it sits fluid and glossy until you are ready to dip, mould or pipe.
Two other things decide whether the batch works. The first is heat: melt the first two thirds, then never push the seeded chocolate past about 35°C (95°F) again. The second is movement. Chocolate is thixotropic, meaning it thickens when it stands still and loosens when it is sheared. Unstirred chocolate holds air, and air in a shell means a hollow bonbon. Continuous, scraping-to-the-bottom stirring is not a habit here, it is part of the process.
Step 1: Prepare the Chocolate
Chop your chocolate into small, even pieces with a sharp knife. Small pieces melt at the same rate, which is how you avoid a bowl with hot and cold pockets that ends up half-seeded and half-not. Weigh out roughly a quarter of the total and chop that separately finer than the rest; this is your seed.
Let your bowl, spatula and thermometer sit at room temperature first. A chilled bowl drops the temperature faster than you can read or correct, and it is a common reason seeding feels like it takes forever. Wipe the work surface, dry the thermometer probe, and keep the seed chocolate in a sealed bowl away from the stove.
Step 2: Melt Two-Thirds of the Chocolate
Put two thirds of the chopped chocolate in the heatproof bowl. Over a saucepan of barely simmering water, stir steadily until every piece disappears. The bowl should never touch the water, and no steam should rise into it.
Alternatively, use the microwave at 800 to 1000 W in 15 to 20 second bursts, stirring thoroughly between each one. Both approaches have the same job: heat every piece past its melt-out point so the existing crystals are gone. Dark chocolate usually melts cleanly around 45°C (113°F), milk around 30°C (86°F) and white around 29°C (84°F).
You will know it is done when the bowl is smooth and the chocolate pours like thick paint, with no lumps or flecks of seed left. Do not push this stage with full microwave power. Chocolate has almost no water in it, so it scorches long before the bowl feels hot to your hand.
Step 3: Add the Seed Chocolate
Add your reserved chocolate a small handful at a time, stirring continuously, scraping the sides and the bottom on every pass. Everything you add must melt completely before the next addition goes in.
Watch the texture rather than the clock. As the batch cools toward 34°C (94°F), the melt-out point of the seed crystals, the pieces shrink and vanish. Then the chocolate turns noticeably thick, glossy and slightly resistant, the way slow-moving lava behaves. That thick, shiny stage is crystal formation happening in front of you.
If the seed simply melts away and the chocolate stays thin and runny, your pieces were too big or too few. Chop finer, add more, and carry on. Small corrections here cost nothing because the method is built to absorb them.
Step 4: Warm the Chocolate to Working Temperature
Stir while the residual heat brings the batch back up. Each chocolate type has its own working band, and the number that matters for moulding is the point at which the mass is fluid, glossy and pours in a slow ribbon off the spatula.
| Chocolate | Melt fully | Working temperature | Notes |
|---|---|---|---|
| Dark | 45°C / 113°F | 31–32°C / 88–90°F | Widest window and the most forgiving to seed |
| Milk | 30°C / 86°F | 29–31°C / 84–88°F | Holds heat longer, so stir down sooner |
| White | 29°C / 84°F | 29°C / 84°F | Narrowest window and easiest to overshoot |
There is no point going above about 35°C (95°F) once the seed is in. That temperature dissolves the crystals you have just built, and you are back to melted chocolate with a colder start than before.
Step 5: Test and Use the Chocolate
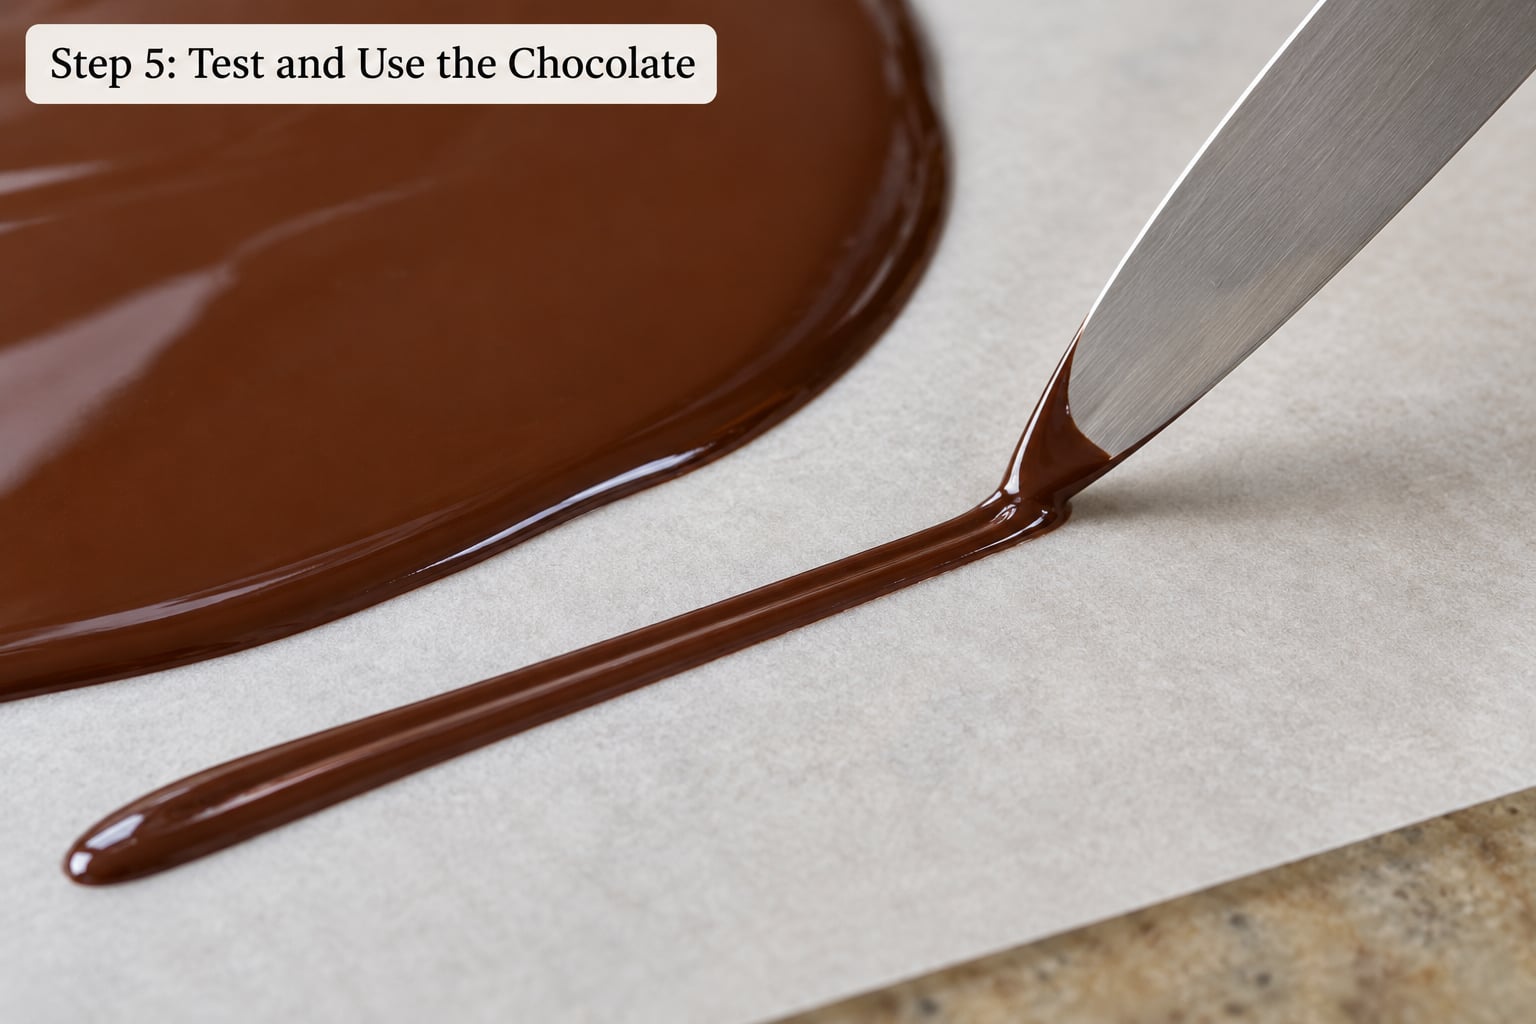
Dab a little chocolate on the back of a cold knife, a teaspoon, or a folded strip of acetate, and leave it at room temperature. Properly tempered chocolate sets in about five minutes into an even matte finish with no streaks. Out of temper, it stays glossy and smeared, or turns grainy and crumbly where it sits.
Press a fingertip to the set piece. It should feel firm and very slightly tacky, then lift away leaving a clean break. That single test tells you far more than staring into the bowl does.
Keep the bowl at roughly 30°C (86°F) while you work. If it thickens, warm it again in 5 second microwave bursts, or with a hair dryer held at a distance while you stir, and never let it boil. A home setup comfortably handles a couple of pounds in 15 to 20 minutes of active work, so a machine only earns its place if you run batch after batch in a session.
Before you pour, wipe the molds clean and let them come to room temperature. Cold or damp molds are the fastest route to a chocolate that sticks, streaks and breaks instead of releasing with a tap.
Common Mistakes
Most failed batches come down to water, heat or under-seeding, and each one has a recognisable look. Match what you see in the table below to what happened in the bowl, then fix it and re-seed rather than starting the whole batch again.
| What you see | What happened | How to fix it |
|---|---|---|
| Seized, stiff paste | A drop of water or steam got in | Water cannot be reversed. The chocolate will not coat or mould, but it is still usable in a rustic filling or baked into a loaf |
| Dull, matte finish with no shine | Under-seeded, or taken too far above working temperature | Cool to 34°C (94°F), add finely chopped tempered chocolate, stir down to working temperature |
| Grey streaks and patches | Overheated at the end, often after a long stir at high heat | Re-seed with about 5 percent fresh chocolate and warm slowly back to 31–32°C |
| Grainy or gritty texture | Seed pieces were too large, or the batch rose above working temperature while they melted | Cool to 34°C, add finely chopped seed, and stir to working temperature without extra heat |
| Sets in 20 minutes instead of 2 or 3 | Chocolate was moulded too cool, or the room is cold | Warm back to working temperature and try again somewhere warmer |
| Never sets at all | Out of temper, or air whipped into a thick batch | Re-temper, stir slowly, and tap the bowl on the counter to release trapped bubbles |
| Grey film after a week | Fat bloom from heat or storage, not a failure at moulding | Re-melt and re-seed; the original temper was fine |
| Hollow shells | Air folded in while the chocolate was too thick | Loosen with a little more seed and stir gently, without whipping air in |
| Too thick to pour | Held above 34°C too long and lost its crystals | Re-seed at 34°C and stir back down; keep heat guns away from the bowl |
One caution about temperature charts, including this one. Producers formulate differently, so dark chocolate from one maker may sit happily at 31°C while another wants 32°C. Treat the numbers as a starting point and let the texture of the batch, the ribbon off the spatula and the knife test decide when you are there.
There is also chocolate that never needs any of this. Compound chocolate, sold for dipping and often containing palm or sunflower oil instead of cocoa butter, is formulated to set without tempering. Melt it gently and use it. Running it through a tempering curve adds work and buys you nothing.
Frequently Asked Questions
What is the easiest way to temper chocolate at home?
The seed method is the easiest and most repeatable: melt two thirds of the chocolate, cool it with finely chopped unmelted chocolate while stirring, then warm the batch back to working temperature. It needs one bowl, one saucepan and a spatula, and a couple of pounds takes 15 to 20 minutes of active work.
Is it possible to temper chocolate without a thermometer?
Yes, and most home chocolatiers start that way. Watch three cues: fully melted chocolate pours like thick paint, the seeded batch turns thick, glossy and resistant near 34°C, and at working temperature it falls off the spatula in a slow ribbon. Cooling a small batch on a cold marble slab gives you more margin than heating it.
Is it possible to temper chocolate in the microwave?
Yes, and it is faster than any other home method. Use 800 to 1000 W in 15 to 20 second bursts, stirring thoroughly between each one, and stop while a few small pieces remain. That remaining heat finishes the job. Full power for a minute is the single most common way chocolate scorches.
Can you temper chocolate without seeding it?
You can, but it is much harder to control. Holding the crystals means heating gently and never exceeding 34°C (94°F), which is difficult because you cannot easily see the temperature. Adding a small amount of pure cocoa butter works like seeding and is the usual shortcut when you have no seed chocolate.
How long will chocolate stay tempered?
Properly tempered dark, milk and white chocolate stays in temper for months, usually longer than you will keep it. If it slips out, or if a piece has bloomed, melt it again to 45°C (113°F) for dark and re-seed at 34°C. Store finished pieces cool and dry, away from strong smells and sunlight.
Conclusion
Start with 200 grams of chocolate, not a kilogram. Chop it finely, weigh out about 50 grams as seed, and dry everything before the bowl comes out. Run the whole curve once at that small size and you will see the thick, glossy stage happen with nothing at risk.
Two checks do most of the work from then on. The thick and resistant texture as the seed melts at 34°C (94°F), and the matte set with a clean break after five minutes on a cold knife. Get those two right and the working temperatures in the table above take care of themselves.
Once a small batch behaves, scale up. Two pounds is a comfortable amount for a bowl and a spatula, and you will be making bonbons faster than any machine would have helped.