A smooth frosting finish comes down to four things: a cold cake, a thin crumb coat to trap the crumbs, a generous final layer scraped flat with a straight edge held upright, and a short chill at the end. Get those right and you can frost a cake smoothly at home with a bench scraper and a spatula, no professional equipment and no turntable required. The whole process takes about 45 minutes plus chilling time, and the hardest part is genuinely the pressure in your hand, not the technique.
I learned this the slow way. My first few layer cakes looked like they had been attacked with a butter knife, mostly because I pressed hard and scraped everything back off again. Softening the pressure and adding a second very thin coat after a chill fixed more than any gadget did.
Table of Contents
- What You Need
- How to Frost a Cake Smoothly Step by Step
- How to frost a cake smoothly: Chill and prepare the layers
- How to frost a cake smoothly: Apply a thin crumb coat
- How to frost a cake smoothly: Spread an even final layer
- How to frost a cake smoothly: Finish the sides and edges
- How to frost a cake smoothly: Add simple finishing touches
- Common Mistakes and How to Fix Them
- Frequently Asked Questions
- How do I frost a cake smoothly without a crumb coat?
- Why is my cake frosting pulling up crumbs?
- What is the best frosting for a smooth cake finish?
- Should I chill a cake before frosting it?
- How do I keep frosting from melting on the sides?
- How long should a frosted cake chill before serving?
- Conclusion
What You Need
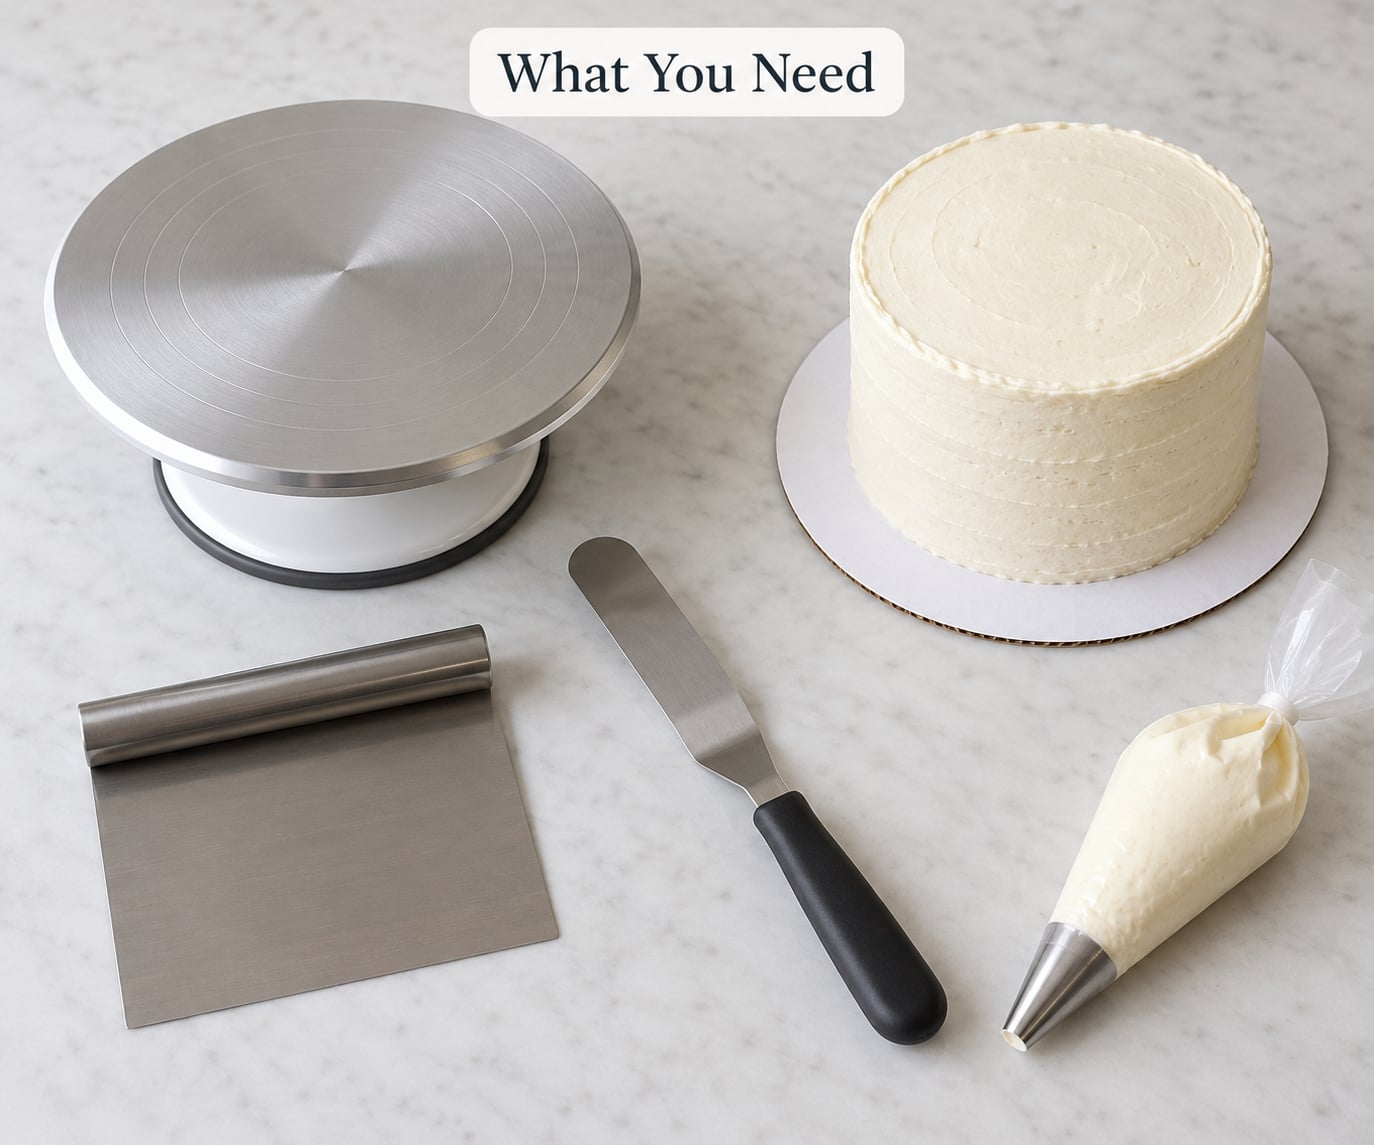
You need less than most people buy. Every tool below has a household stand-in, so nothing here is a blocker.
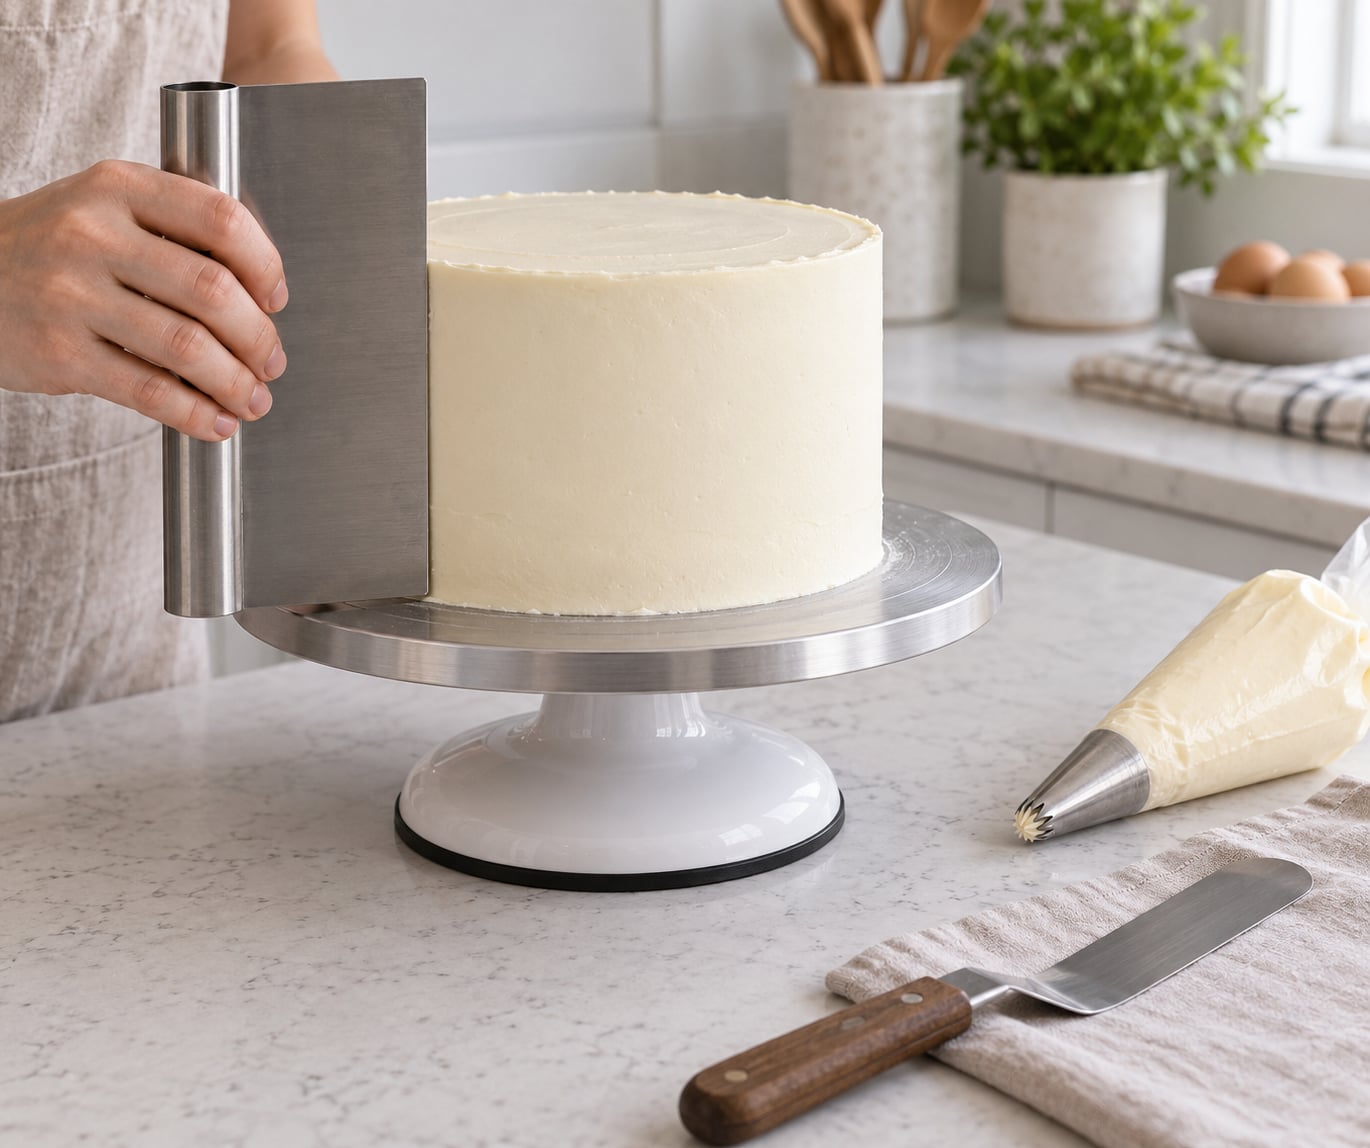
- A straight-edged bench scraper or icing smoother. This is the tool that actually makes the finish. A stiff plastic card, the back of a butter knife, or a thin plastic straight edge all work in a pinch.
- An offset spatula or a small palette knife. For spreading and for lifting frosting off the bowl. An angled spatula keeps your knuckles away from the cake, which is why decorators like them.
- A turntable or a cake circle on a non-slip mat. Genuinely helpful, genuinely optional. A lazy Susan works. Failing that, set the cake on a damp towel on a flat counter and rotate the whole plate a few degrees at a time.
- A piping bag and an open notch tip. Only for finishing. A zip-top bag with one corner snipped off does the same job.
- A pastry brush and a pastry cutter or long serrated knife. For sweeping crumbs and for levelling a domed top before you frost.
- Parchment strips. Four rectangles tucked under the cake so frosting that lands on the plate never touches it.
- A refrigerator with room for the cake. The single most useful piece of equipment in this whole process.
On frosting, consistency matters more than recipe. The test is simple: a finger swipe leaves a clean indent that holds its shape, but the frosting slumps off the spatula under its own weight rather than sitting in a stiff peak. American buttercream and Swiss meringue buttercream are the easiest to smooth. Cream cheese frosting smooths beautifully but is soft and needs a cool room. Stabilised whipped cream is light and silky but collapses if it is not thickened. Store-bought frosting can be smoothed, though it is often too soft to hold a sharp edge and will slide down the sides in a warm kitchen.
How to Frost a Cake Smoothly Step by Step
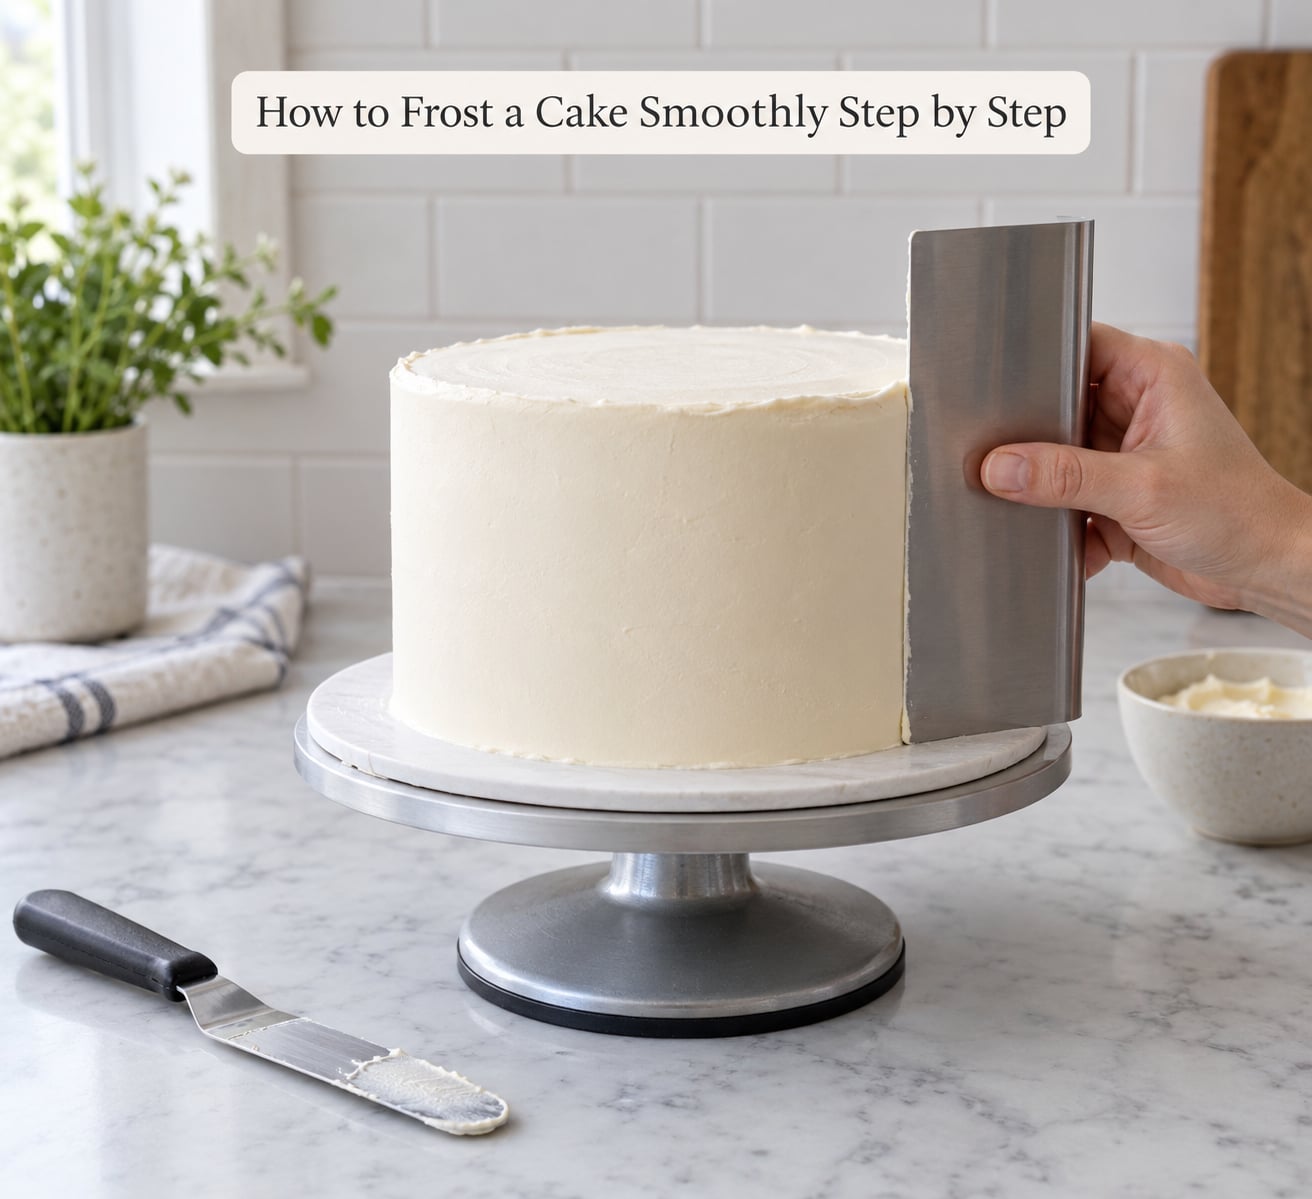
Do you frost the top or the sides first? Frost the top first. The top is the flat surface everything else is measured against, so it gets levelled while the cake is still easy to reach and the frosting underneath stays soft. Once the top is dead level, the sides go on in one pass, then the edges are sharpened last.
How to frost a cake smoothly: Chill and prepare the layers
Cool the layers completely. Any residual warmth melts the frosting on contact and the whole thing slumps within a minute, so this step cannot be skipped or hurried.
Level each layer with a long serrated knife, cutting from the outside in with the blade kept level. Then torte: shave a thin slice off the dome on each layer so the stack sits straight. A 1 cm cut is usually plenty.
Brush or wipe away every loose crumb, then chill the layers for 20 to 30 minutes. A cold, firm sponge resists the spatula, and crumbs stay put instead of being dragged into your frosting.
How to frost a cake smoothly: Apply a thin crumb coat
A crumb coat is a very thin layer of frosting applied to trap loose crumbs and seal in moisture before the real coat goes on. It should be thin enough that you can still see the cake and a few crumbs through it. Bakers squirt a thin buttercream dam over a cake before icing for exactly this reason.
Use a firm frosting for the crumb coat, stiffer than what you will use for finishing. Spread it with the spatula, thin and even, over the top and the sides. Then chill for 20 to 30 minutes until the surface feels set and dry rather than tacky.
The ready test is simple: touch the surface lightly. If it feels like a soft set, it is ready. If it leaves a fingerprint that stays wet, give it another 10 minutes.
How to frost a cake smoothly: Spread an even final layer
Add more finishing frosting than you think you need. Practising on a chilled layer means you should be able to spread a generous 1 to 1.5 cm layer and then scrape a lot of it back off. People who apply too little spend the whole job chasing bare patches.
Start with the top. Place frosting on the centre, press it flat with the straight edge, and push the excess outward toward the rim in a few long strokes. Rotate as you go.
Scrape the top level: hold the straight edge flat on the surface and pull it toward you while turning the turntable. Even out any hollows by adding a little more frosting to the low spot rather than scraping harder at the high spot.
How to frost a cake smoothly: Finish the sides and edges
Now the sides. Lay frosting on with the spatula, then stand the straight edge against the cake at a 90 degree angle, with the bottom edge touching the cake board. Turn the turntable while you pull the scraper upward and around. Wipe the scraper every few passes, otherwise you lay down a spiral of ridges instead of a flat wall.
Start and finish at the same seam. Keep one hand in front of the cake as a marker so you can see where you began, and keep returning to that line.
For the top edge, the scraper leaves a ridge of frosting above the rim, a crown. Pull that crown inward with the scraper held at roughly 45 degrees, in one smooth motion. The edge turns crisp as the excess moves to the centre, where you re-scrape it flat.
If the frosting is leaving a rough, torn surface, the pressure is too heavy. A light glide finishes the job; a press gouges the cake and drags frosting back off.
The warm-scraper trick is worth knowing. Run the straight edge under hot water, dry it thoroughly, and make a few passes. The warm metal melts the top millimetre of buttercream so it re-flows into the grooves, which is why a warm pass looks silkier than a cold one.
How to frost a cake smoothly: Add simple finishing touches
Chill the finished cake for 20 to 30 minutes. The frosting firms, the edges sharpen, and any faint marks from the scraper mostly disappear.
Keep decoration restrained on a smooth base. A piped border around the base, a few swoops on top, or a small scatter of sprinkles all sit cleanly. A ganache drip also works well if you chill the cake first and pour the ganache when it is still fluid.
Store the cake covered at room temperature for up to a day, or in the fridge for up to four days. From the fridge, let it sit out for 20 minutes before serving so the frosting relaxes.
One last warning: do not over-smooth. Once the sides are flat and the edges are crisp, stop. Repeated long passes melt more frosting with each one and you end up removing more than you fix.
Common Mistakes and How to Fix Them
Frosting pulls up crumbs. The cake was too warm, too fragile, or not crumb coated. Fix it by brushing the bare patch, chilling the cake, and pressing a thin layer of frosting into the hole to patch it, then chilling again.
The scraper strips off everything, leaving see-through patches. You are pressing too hard. Drop the pressure to almost nothing, wipe the scraper more often, and take another thin coat after a short chill rather than forcing one thick coat.
Ridges and a spiral pattern on the sides. The scraper needs wiping between passes, and the cake needs to be rotating while you pull. Keep the edge touching the board the whole time it travels.
Frosting melts and slides down the sides. The frosting is too warm or the room is too hot. Put the bowl in the fridge for 10 minutes and remix on low, then frost in short bursts. In a hot kitchen, stabilise cream cheese frosting with a little extra powdered sugar, or switch to American buttercream, which is far more heat-tolerant.
The top is lopsided or dips on one side. The layers were not level, or the cake was stacked on a tilted surface. Level with a serrated knife while the cake is chilled, which is far easier than correcting it under frosting.
Air bubbles and small holes appear after chilling. Bubbles form when a cold cake meets a warm room or when trapped air gets worked into stiff buttercream. Rest the finished buttercream in an airtight container at room temperature for 30 minutes, then remix on low. Also let a chilled cake come to room temperature gradually before you frost it.
The frosting cracks after chilling. It was too stiff when you finished. Warm the bowl with your hands for a minute, or microwave in five second bursts, and add a little more frosting to the thin spots before the final coat.
Colour gel will not hold a finish. Dark gel colours are mostly water and they thin the frosting. Mix colour into a small portion of frosting first, then stir that back in, and use American buttercream as the base.
Frequently Asked Questions
How do I frost a cake smoothly without a crumb coat?
You can, but expect a slightly less polished result. Frost a cold, crumb-free cake with a very stiff frosting, apply a thin first layer anyway, and let it set in the fridge for 15 minutes before the finishing coat. That quick set does most of what a full crumb coat does. The crumb coat is not magic, it is mostly just time spent letting the first layer firm up.
Why is my cake frosting pulling up crumbs?
Almost always because the cake was warm, fragile, or frosted without a crumb coat. Chill the layers for 20 to 30 minutes first, brush off loose crumbs, and seal the surface with a thin crumb coat that you chill until set. If the sponge is very crumbly, a syrup brushed on and allowed to soak in for an hour will firm it up considerably.
What is the best frosting for a smooth cake finish?
American buttercream is the easiest for beginners because it holds a sharp edge and forgives mistakes. Swiss meringue buttercream is lighter and tastes less sweet, and it smooths well once you are used to it. Cream cheese frosting gives the smoothest surface of all but stays soft and needs a cool room. Avoid glazes and royal icing for finishing a cake you intend to smooth.
Should I chill a cake before frosting it?
Yes, always. A chilled layer is firmer, so crumbs stay where they are and the frosting stays at the temperature you worked it to. Twenty to 30 minutes in the fridge is enough for a room temperature cake. Overnight chilling makes layers firmer still, but a frozen layer will tear as the spatula passes through, so let it soften slightly first.
How do I keep frosting from melting on the sides?
Work in a cool room and keep the frosting cold. If it is too soft to hold a peak, chill the bowl for 10 minutes and remix on low, or add powdered sugar a spoonful at a time. American buttercream and ganache-based frostings hold up far better in warm weather than cream cheese or whipped cream frosting. Avoid the fridge door, which is the warmest spot inside it.
How long should a frosted cake chill before serving?
Twenty to 30 minutes sets the frosting and sharpens the edges, which is enough for most cakes. Chilling overnight before a celebration gives the cleanest finish because the surface firms completely. Take the cake out of the fridge 20 minutes before serving so the frosting relaxes and stops tasting cold, and keep it in the box with the lid on while it comes to room temperature.
Conclusion
To frost a cake smoothly at home, the order is everything: cool and level the layers, chill them, apply a thin crumb coat and chill that, then spread a generous final layer and scrape it flat with a straight edge held upright as the cake turns. Start by doing those first three things on your next cake, and treat the light-hand rule as the one that matters most.