How to organize a small kitchen for real cooking comes down to one idea: everything you need for a meal you actually make should be within a step of your hands. You cut what you do not use, split the room into prep, cooking, seasoning and cleanup zones, move storage up onto the walls and cabinet doors, then build a two-minute reset so it stays that way. It takes an afternoon and costs almost nothing if you do the audit before buying anything.
I live with about 45 square feet of kitchen and two people who both cook, so this is a working system rather than a showroom. My earlier attempt was a matching-container display that looked lovely and meant I could never find the whisk. The version below is the one that survived.
Table of Contents
- What You Need
- Step-by-Step: How to Organize a Small Kitchen for Real Cooking
- Audit Your Cooking and Storage Space
- Create Zones Around Real Meals
- Put Everyday Ingredients Within Reach
- Make Tools Visible and Easy to Return
- Clear and Protect the Main Work Surfaces
- Build a Simple Reset and Shopping Routine
- Common Mistakes
- Frequently Asked Questions
- What should I organize first in a small kitchen?
- Are kitchen organizers worth buying for a small space?
- Where should I store a microwave or air fryer in a small kitchen?
- How do I organize a kitchen with little or no cabinet space?
- How do I keep a small kitchen organized after cooking?
- Conclusion: Start With One Real Meal
What You Need
You need far less than the organizer aisle suggests. Here is the short list that did most of the work in my kitchen:
- A notebook or a phone note for the audit: what you cook, what you own, what you actually reach for.
- A tape measure and a pencil to mark your counter runs and cabinet openings.
- Painter’s tape or markers for labelling cabinet doors and shelf edges while you test a layout.
- Two or three clear bins or baskets for dry goods, one per task grouping.
- Shelf risers to double a cabinet shelf, and a divider for one awkward drawer.
- Hooks and a rail for the backs of cabinet doors and the wall by the stove.
- A small kitchen scale if you cook from recipes, because volume measures fail you the moment you scale a dough.
What you do not need is a matching container set, a spice rack with a fixed tier count, or anything advertised as a space saver that just adds a frame around your plates. Those solve appearance problems you probably do not have.
One more thing worth having is a box. An empty shoebox or a cardboard carton is the cheapest decluttering tool in the house: anything you have not used in a month goes in, and you do not decide its final home until the box empties out somewhere else.
Step-by-Step: How to Organize a Small Kitchen for Real Cooking
Audit Your Cooking and Storage Space
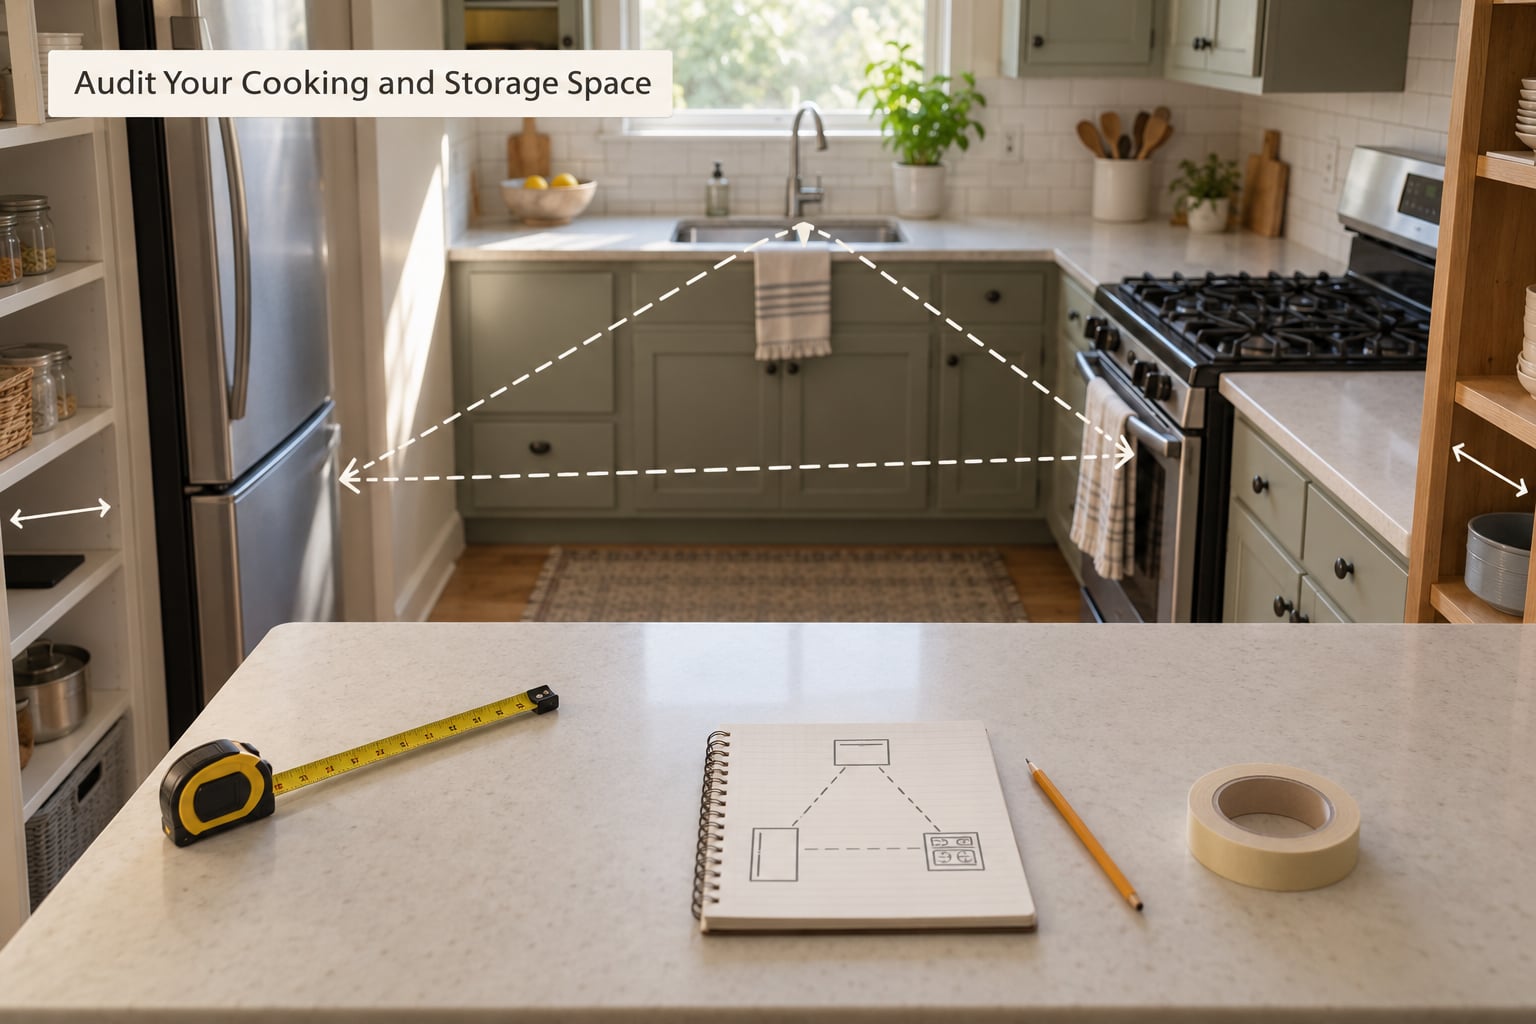
Before anything moves, write down the meals you cook on repeat. In our case that is a weeknight stir-fry, a Sunday roast chicken, pasta twice a week, coffee every morning and a cocktail most Saturdays. Five workflows, not a general idea of cooking. Then inventory the tools those meals require and the tools you own, and mark the difference. That gap is your decluttering list.
Measure while you are there. A counter run under 30 inches wide is genuinely tight, and anything between 36 and 42 inches gives you a workable prep zone with a sheet pan on one side and a bowl for scraps on the other. Note the depth too, since most small kitchens are deep rather than narrow, and the back third of that depth is usually wasted.
Count the surfaces you can actually stand at, and the cabinets you can open without moving something else first. Look for wasted zones: the top of the fridge, the blank wall above the stove, the inside of cabinet doors, the deep blind corner. That is storage you already pay rent on and never use.
How much cookware you actually need scales with the household, and nobody ever publishes the numbers, so here are mine. For one person, two pans, two pots, one knife, one peeler and a short list of utensils is genuinely enough. For two, add a second pan and a large pot. For three or four, you want a 10-inch skillet, a 12-inch skillet, a 4-quart pot and an 8-quart pot, and you can skip nearly everything else. Buying the big set on a sale fills a cabinet with pans you use twice a year.
You will know the audit worked when you can name your five meals and you have physically removed or relocated at least a quarter of what you own.
Create Zones Around Real Meals
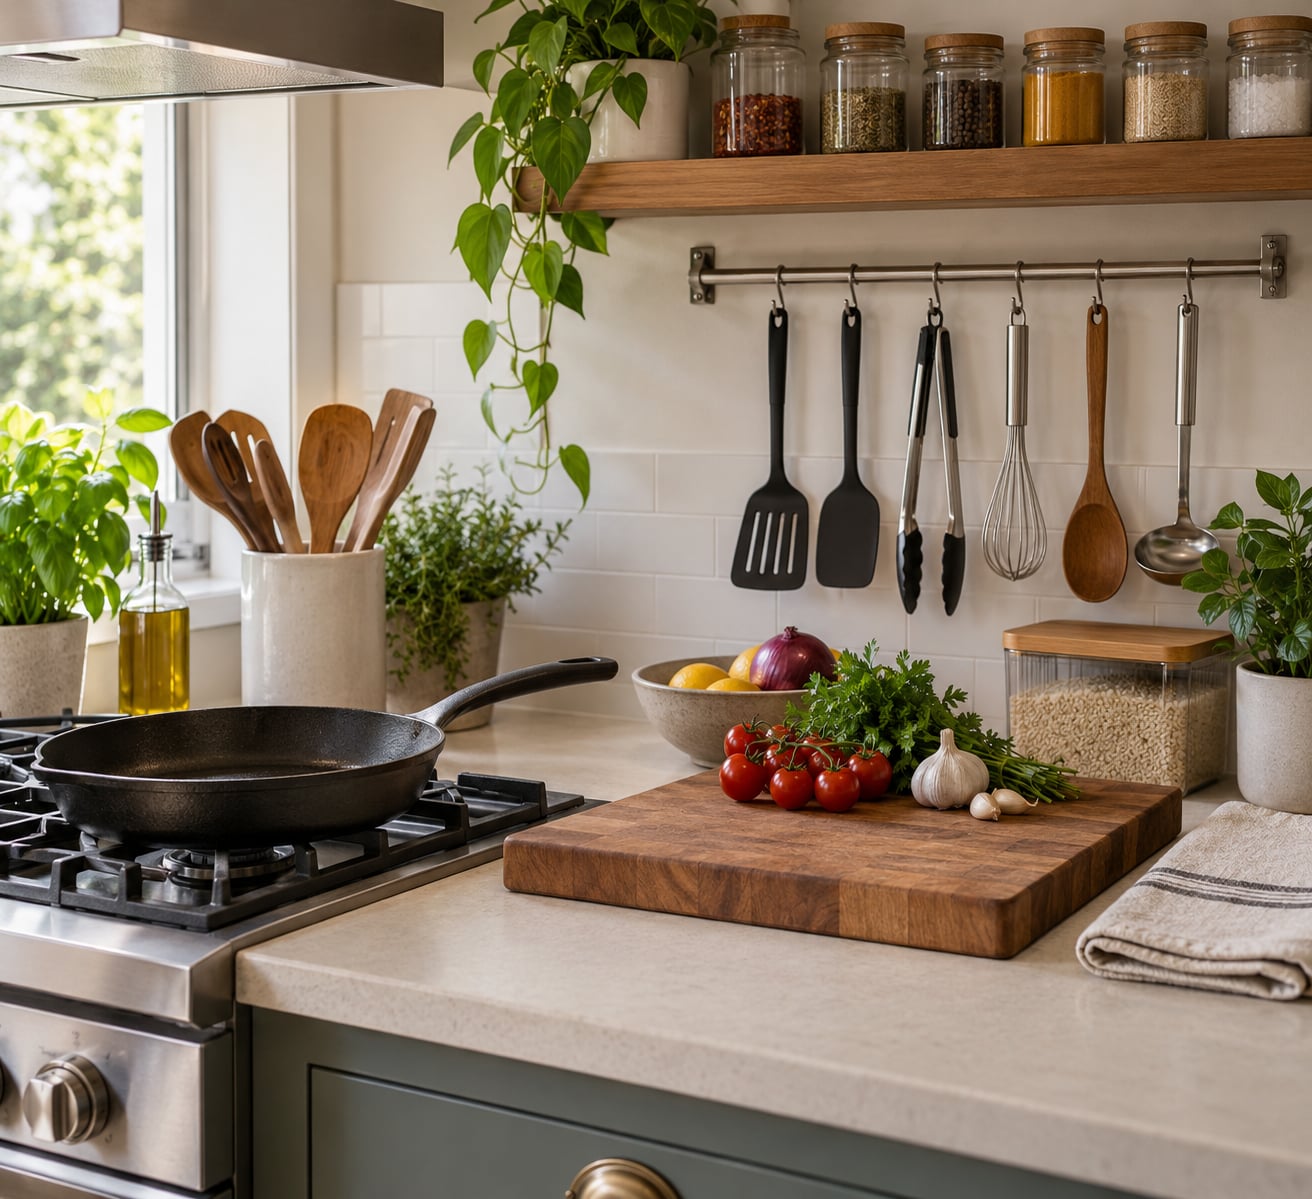
Zones are how you organize a small kitchen for real cooking, because they turn a room into a sequence of steps. Most guides list four; I use five, and the fifth is a drink zone because that is where our kitchen traffic used to pile up.
| Zone | What lives there | Keep out of it | Where it usually sits |
|---|---|---|---|
| Prep | Cutting board, knives, peeler, towels, colander, mixing bowls, your garbage bowl | Small appliances, fruit bowls, toasters, anything decorative | The longest uninterrupted counter run |
| Cooking | Pans you use weekly, pot, lids, tongs, heatproof mitts | Every pan you own, specialty bakeware, the waffle maker you used once | Cabinet or vertical rack directly beside the burners |
| Seasoning | Oils, vinegars, spices used in the last month, salt | Duplicate grinders, spice jars past their best date, sugary blends you never make food with | Wall rail or shelf beside the stove, not across the room |
| Cleanup | Dish soap, sponge, trash and recycling, drying rack if you have no dishwasher | Food, cutting boards, prep bowls still in progress | Between the sink and wherever you put things away |
| Dry goods | Pasta, rice, oils, canned goods, baking staples in labeled bins | Cleaning products, paper goods, anything heavy you use weekly | Cabinets away from the stove, grouped by task |
Work one workflow at a time. For the stir-fry, the wok and its lid, the rice cooker, the soy sauce, the sesame oil, a knife and the chopping board should form a single reachable path from fridge to burner to sink with nothing crossed. Now do the roast chicken: the cutting board, the roasting pan, the meat thermometer, the paprika and the thyme. If a zone arrangement serves both, it is probably right.
Coffee and cocktails get their own corner because they are the workflows that pull other people into the kitchen while you are trying to cook. Ours lives on a small shelf outside the prep run, and the kitchen gets noticeably calmer.
You will know zoning worked when you can cook a familiar meal without walking anywhere to ask where something is.
Put Everyday Ingredients Within Reach
Group pantry staples by the meal they belong to, not by type. One bin for pasta nights, one for curries, one for baking. When you reach into the pasta bin you get pasta, sauce and dried herbs together, which is faster than hunting three shelves.
Keep heavy items low. A bag of rice at shoulder height is a nuisance and a risk; at the bottom of the same cabinet it is fine. Keep tall items at the back of deep shelves and short, frequent-use items at the front so nothing has to be dug past.
Protect against spills by keeping liquids in lidded containers and off shelves above the ones you care about. Do not put a vinegar bottle directly over a bag of flour.
Separate the chemistry. Cleaning products belong under the sink or in a utility cupboard, ideally not the same cabinet as open dry goods, and never above a food shelf. If you have small children, that separation is not optional.
In the fridge and freezer, use first in, first out so older food gets used before newer food hides behind it. Keep your fridge at 40°F or below and your freezer at 0°F, leave air circulating around containers rather than packing them wall to wall, and remember the safety numbers when you cook: 165°F for poultry, 160°F for ground meat, 145°F for whole cuts and fish.
The test here is simple: put back three things you use most and check whether you can reach each one without moving anything.
Make Tools Visible and Easy to Return
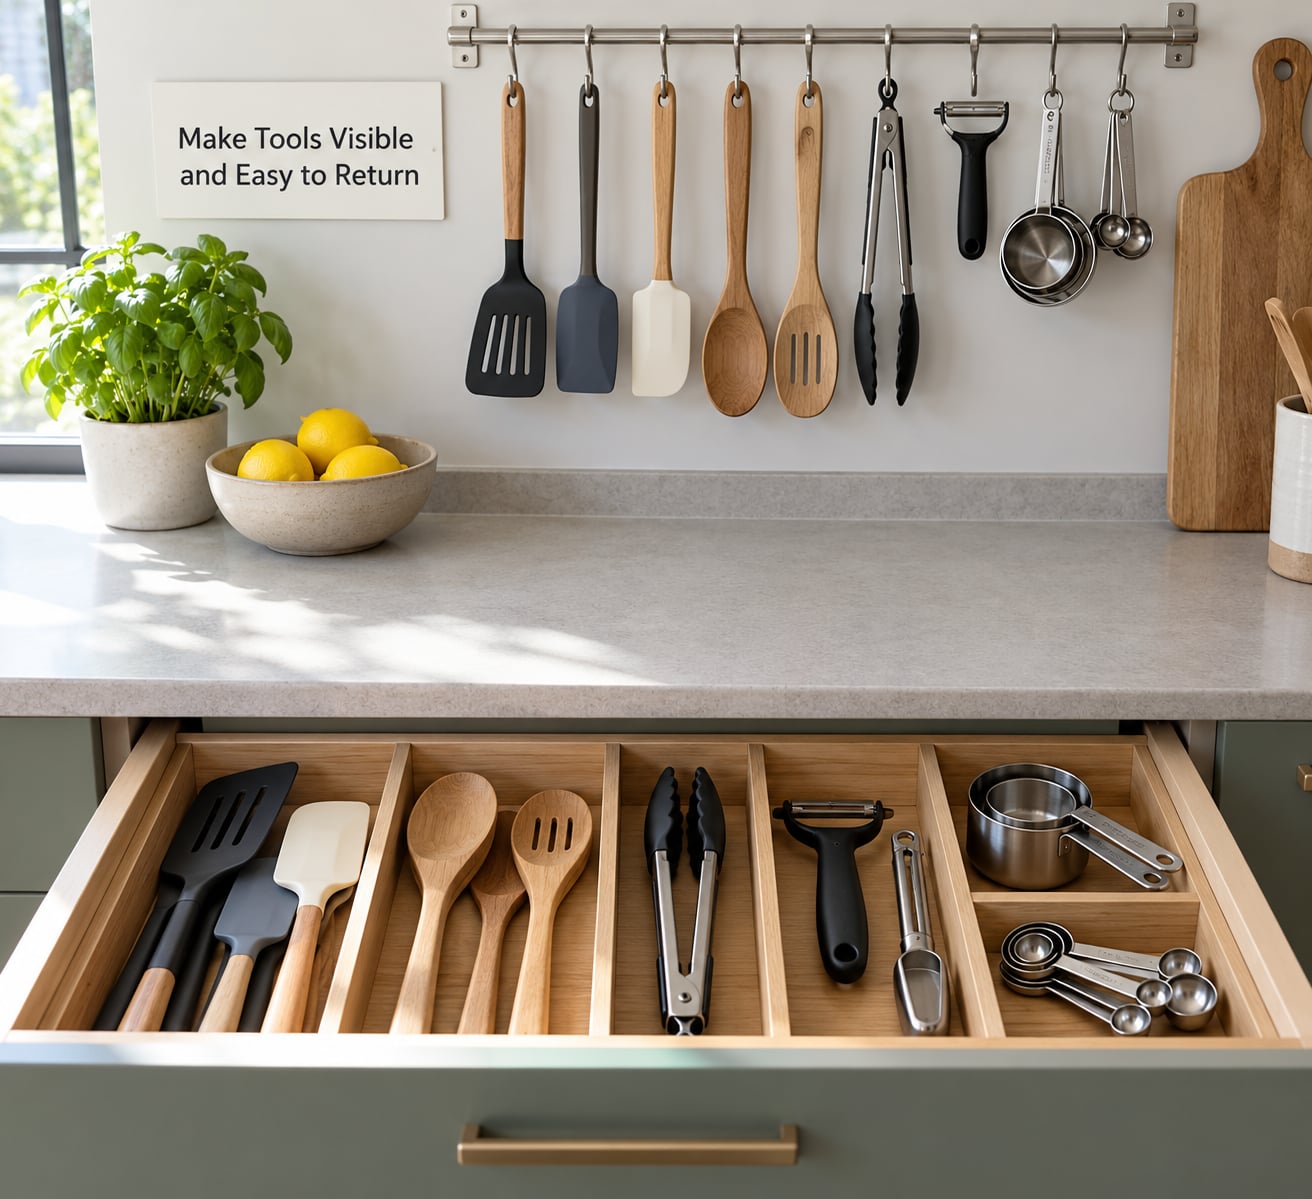
Visibility beats capacity in a small kitchen. A tidy cabinet you have to unpack every morning is worse than a slightly messy one you can read at a glance. Cut duplicates first: four spatulas, two sets of measuring cups and three wooden spoons all collapse into one of each plus a backup for the one that is always in the dishwasher.
Store tools at the point of use. Knives go on a magnetic strip or in a block beside the chopping board, not in a drawer across from the sink. Strainers, the masher and a spider live on hooks inside the cabinet door nearest the sink, where they are used.
Use the vertical dimension everywhere you can. A rack that stands sheet pans and lids on edge recovers more space than a stack ever will. Shelf risers turn one cabinet shelf into two. Over the fridge takes light, bulky, rarely used gear such as a salad spinner and a spare mixing bowl. A rail on the side of the fridge holds squeeze bottles and the spices you reach for daily.
| Fix | Space recovered | Relative cost | Difficulty | Best for |
|---|---|---|---|---|
| Cabinet-door hooks | One shallow shelf’s worth | Very low | Five minutes | Strainers, peelers, small tools |
| Rail beside the fridge or stove | A full narrow cabinet column | Low | Under an hour | Oils, vinegars, daily spices |
| Vertical pan and lid rack | More than half a cabinet | Low to medium | Under an hour | Cookware you use weekly |
| Shelf riser | Doubles one shelf | Low | Five minutes | Cabinets with tall, awkward gaps |
| Magnetic strip for knives | Releases a drawer | Low | Twenty minutes, plus landlord permission checks | Prep-heavy cooking |
| Over-the-fridge shelf or top-of-fridge use | A whole cabinet’s worth | Near zero | Ten minutes | Light, bulky, infrequent gear |
| Wire grocery rack repurposed as shelving | One or two extra shelves | Free | Easy, but expect to rinse it now and then | Rentals and dorm kitchens |
| Drawer dividers | Nothing, but saves repeated digging | Low | Ten minutes | Utensils and small tools |
Then give every essential tool a defined home that a non-cook in your house could guess. That is the whole trick to shared kitchens: a visible, obvious spot is the difference between someone putting the peeler back and someone leaving it on the counter because they could not tell where it went.
Clear and Protect the Main Work Surfaces
Your counter is a tool, not a shelf. Decide in advance what is allowed to live on it permanently, and for most small kitchens that list is short: a kettle, a coffee grinder if coffee happens there, and a soap dish. Everything else goes down or up when the cooking stops.
Move infrequent appliances out of daily reach rather than trying to arrange them attractively. A stand mixer used twice a month does not need prime counter; a microwave used daily does, but a microwave you use for leftovers does not belong in the cooking path at all.
Use one tray as an active project surface. Set out a sheet pan on one side of the board and a wide bowl on the other for scraps and trimmings, and the single counter you have becomes three work surfaces for the length of one recipe.
Pick a landing spot, usually the counter near the entrance or the top of the fridge, for incoming grocery bags and for dishes waiting to go into the cabinet. Without one, the counter becomes a staging area for everything within about four minutes of cooking.
If you have no dishwasher, the drying rack eats the counter you just freed. An over-sink rack or a wall-mounted rack on the wall beside the sink keeps dishes draining out of the work zone, which is the single biggest win in a kitchen without one.
Build a Simple Reset and Shopping Routine
A layout survives on habit or it slides back within a month. Ours is a two-minute nightly reset: dishes go away or onto the rack, the cutting board and knife get washed and returned, the counter gets wiped, and anything that migrated during dinner walks home. That last part is the one that matters when you cook for other people.
Once a week, spend a few minutes checking what is running low and building the shopping list around the next few meals. Ingredients on a list that matches a planned meal get bought; anything else waits. This keeps the dry-goods bins from emptying unpredictably and stops the emergency hardware store run for one ingredient.
Once a month, spend fifteen minutes pulling forward the things you use, wiping the shelf fronts, and checking dates. If a jar has been pushed to the back of the pantry for two months, give it away.
Expect to reorganize once more after about a month. Real habits surface only when you have cooked several times in the new setup, and the layout that suits a Tuesday stir-fry is not always the one that suits a Sunday roast. Treat that second pass as part of the method rather than as failure.
Common Mistakes
Organizing for the kitchen you wish you had. A layout built around baking and batch cooking is wrong for someone who cooks pasta four nights a week. Fix: build from the five meals on your list and treat everything else as a guest.
Buying organizers before auditing. You end up with beautiful empty containers and the same crowded cabinets. Fix: run the box test first. Anything unused for a month goes in the box, and only the survivors earn storage hardware.
Filling every cabinet to the ceiling. A packed cabinet means two things move before you get to the one you want. Fix: leave roughly a third of each shelf empty, front to back.
Putting daily items at eye level because they look better there. The prettiest shelf is rarely where your hands are during a cook. Fix: eye level for infrequent display items, waist to shoulder height for daily tools, below waist for heavy ones.
Pretty containers with no lids. Open grain in a small kitchen finds every shelf. Fix: airtight lids on anything pourable, and clear containers so you can read the contents without lifting them.
Mixing cleaning products with food. It saves a cabinet and costs you safety. Fix: chemicals under the sink or in a utility cupboard, ideally not above or beside open dry goods.
Designing a layout only you can navigate. If your partner cannot find the salt, the system is private rather than useful. Fix: label cabinet doors, keep daily items visible, and give every frequently used tool an obvious home.
A few smaller ones worth naming: storing dishware far from the sink, hanging pans over the burner where they catch grease and heat, and building shelves you cannot reach without a chair all make a small kitchen work harder than it needs to.
Frequently Asked Questions
What should I organize first in a small kitchen?
Start with your counter, then your stove, then the cabinet you open most. Clear the longest uninterrupted counter run first and give it to prep only, because that surface does more work than any cabinet. Next, put everyday ingredients and the three tools you use daily within one step of the burners. Storage capacity matters far less than distance, and rearranging the places your hands already go delivers the biggest change in the least time.
Are kitchen organizers worth buying for a small space?
Some are, and most are not. Worth it: shelf risers, drawer dividers, vertical pan and lid racks, hooks for cabinet doors and a rail for oils and spices. Not worth it: matching container sets, tiered spice racks that force a fixed order, lazy Susans in cabinets you can reach into easily, and anything bulky that hides more than it displays. Buy only after the audit, and never to store an item you stopped using.
Where should I store a microwave or air fryer in a small kitchen?
Store it where it will not interrupt the cooking path. If you use the microwave daily for reheating and drinks, a shelf or microwave shelf above the counter works, ideally not directly beside the stove. If it is occasional, a lower cabinet or the top of the refrigerator is fine. For an air fryer, a cabinet shelf or a sturdy wall shelf above the counter keeps the main prep surface clear. Any appliance that needs heat clearance should follow its manual.
How do I organize a kitchen with little or no cabinet space?
Shift from horizontal to vertical thinking. Use wall rails, magnetic strips, cabinet-door hooks, over-the-fridge space and shelf risers, and stand sheet pans, lids and cutting boards on edge instead of stacking them. Nest items by size so bowls fit inside colanders and pots inside pots. Label the outside of every bin so you can find a container without emptying the cabinet first. A borrowed cardboard box can be tested for a week before you commit to hardware.
How do I keep a small kitchen organized after cooking?
Run a two-minute nightly reset: dishes away or onto a rack, board and knife washed and returned, counter wiped, and anything that moved during the cook put back in its labelled home. Do a fifteen-minute version once a month, pulling forward what you use and checking dates. Keep one tray out for the active recipe so scraps never scatter. Expect one reorganization after about a month, once your real cooking habits show up.
Conclusion: Start With One Real Meal
Pick the meal you cook most, pull out every ingredient and every tool it takes, and arrange the kitchen around that one path from fridge to counter to burner to sink. Nothing else needs to be perfect yet. When that workflow feels easy, repeat it for your second-most-common meal and adjust what blocked you. That is how to organize a small kitchen for real cooking, and it works far better than matching containers ever will.