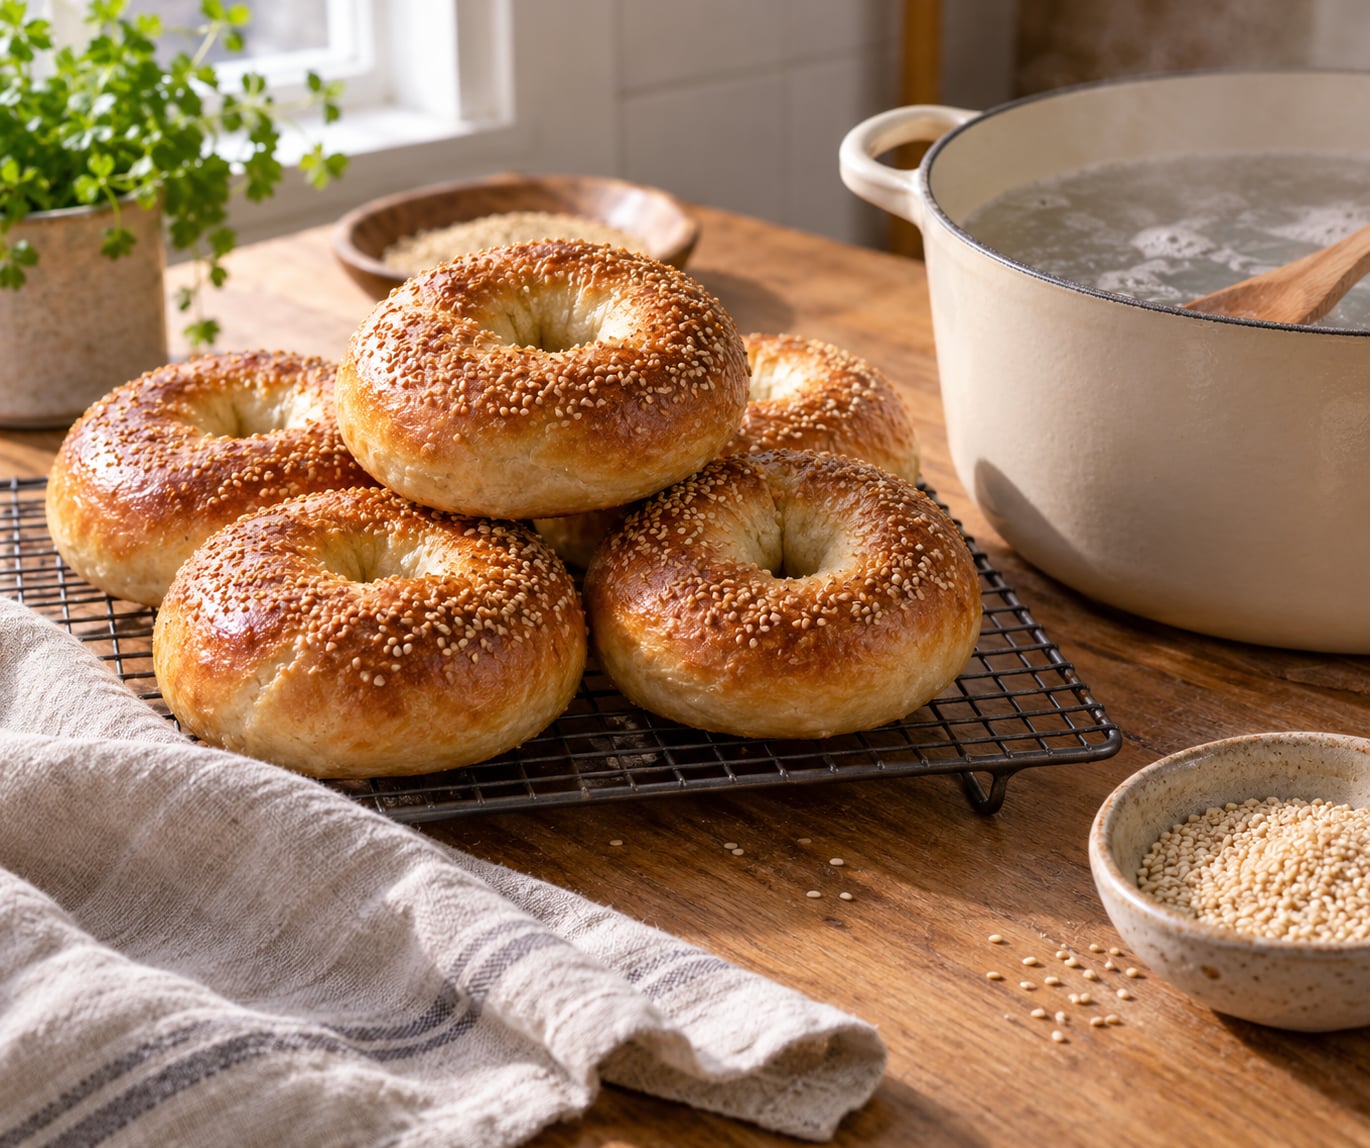
How to make bagels at home comes down to three things: a stiff high-gluten dough, a short boil, and a hot oven. Shape the dough into rings, boil them about a minute a side, then bake at 425°F until deeply golden. From counter to eating takes roughly three hours on a same-day schedule, and the work is more about texture than technique.
The reason a bagel chews and a dinner roll does not is the boil. That minute in hot water gelatinizes the starch on the outside of the dough, forming a thin chewy skin that sets while the bagel bakes. Skip it and you have made a bread roll with a hole in it.
Bakers on r/Bagels and r/Baking tend to say the same thing about the rest: bread flour is not optional, the dough should feel firm and slightly tacky rather than soft, and people who rush the shaping get wrinkly rings. This guide follows that logic, with the timings and cues that tell you when a stage is actually done.
What is the secret to making good bagels at home?
- Bread flour, weighed on a scale. Protein above 12 percent is what gives you chew.
- A firm dough at about 55 to 58 percent hydration. Slack dough spreads in the water.
- A tight pre-shape before you poke the hole, so the ring holds its tension.
- Boiling the full recommended time. That is where the crust comes from.
- Baking deep rather than light. Pale bagels taste raw and bready.
- Baking soda and sugar in the bath for color and chew, not just plain water.
Table of Contents
- What You Need
- The formula in cups and grams
- Baker’s percentages and how to scale the dough
- What each water bath ingredient does
- Equipment
- How to make bagels at home without bread flour, and other substitutions
- Step-by-Step: How to Make Bagels at Home
- 1. Activate the yeast and mix the dough
- 2. Knead the dough
- 3. Let the dough rise
- 4. Shape the bagels
- 5. Rest or refrigerate the shaped bagels
- 6. Boil the bagels
- 7. Top and bake
- 8. Cool and store
- Common mistakes and how to fix them
- Frequently Asked Questions
- Do I need a stand mixer to make bagels at home?
- Why are my bagels dense or flat after baking?
- Can I make bagels without baking soda or malt syrup?
- How long do homemade bagels stay fresh?
- Can I freeze bagels before or after baking?
- How do I get a crisp crust without making the bagels too chewy?
What You Need
The dough below makes eight to ten bagels depending on how large you roll them. Every measurement is given in both US and metric because volume measures vary enough between scoops to throw off hydration, and hydration is the single number that decides whether a bagel is good.
The formula in cups and grams
- 4 1/2 cups (540 g) bread flour, unbleached or bleached, straight from the bag
- 1 1/4 cups (295 ml) cool water, room temperature or cooler
- 2 teaspoons (7 g) instant yeast, or 1 tablespoon (11 g) active dry yeast bloomed in the water
- 1 1/2 teaspoons (9 g) table salt, or 2 1/4 teaspoons (12 g) kosher salt if you like a saltier top
- 1 tablespoon (21 g) honey or sugar, optional, for a little color and a mild sweetness
That is the whole dough. Bagels are a lean dough by design, and a bag of everything seasoning, a handful of seeds or a spoon of cinnamon sugar is where the flavor variation happens, not in the base.
Baker’s percentages and how to scale the dough
Once you measure in grams, a baker’s percentage just makes each ingredient a share of the flour weight, so you can scale any batch up or down without doing math on cups.
| Ingredient | Amount | Baker’s percentage | What it does |
|---|---|---|---|
| Bread flour | 540 g | 100 percent | The structure and the chew |
| Water | 295 g | 55 percent | Hydration. Stays low so the dough holds its shape |
| Salt | 9 g | 1.7 percent | Tightens the gluten, seasons the crumb, firms the dough |
| Instant yeast | 7 g | 1.3 percent | Rise. Cut it to 0.5 percent for an overnight cold ferment |
| Honey or sugar | 21 g | 4 percent | Feeds the yeast and deepens crust color |
To double the batch, go to 1,080 g flour, 590 g water, 18 g salt, 14 g instant yeast and 42 g honey. Watch hydration when you swap flours: whole wheat drinks noticeably more water, and bread flour behaves differently across brands, so treat 55 to 58 percent as a dial rather than a rule.
| Flour | Protein | Water to add | Result |
|---|---|---|---|
| Bread flour | 12 to 13 percent | about 55 percent of flour weight | The classic chewy New York-style bagel |
| All-purpose flour | 9 to 11 percent | about 50 percent | Works, softer and bready. Use 10 g less water per cup |
| Whole wheat flour | 12 to 13 percent | about 65 percent | Nuttier and denser. Expect to knead longer |
What each water bath ingredient does
The bath is 4 quarts (about 3.8 liters) of water, 1/4 cup (50 g) sugar or non-diastatic malt syrup, and 1 tablespoon (14 g) baking soda. Boil it, then lower the heat so it holds a steady simmer with bubbles breaking the surface, not a rolling boil.
| Bath ingredient | Amount | What it does |
|---|---|---|
| Water | 4 quarts / 3.8 L | Gelatinizes starch on the surface, which is the chew |
| Baking soda | 1 tbsp / 14 g | Raises the pH so the surface starch swells more and the crumb tightens |
| Sugar or barley malt syrup | 1/4 cup / 50 g | Deepens the color and adds a faint malt flavor |
Bakers who prefer the malt-forward version swap the sugar for non-diastatic malt powder, which flavors and colors without adding extra sweetness. Diastatic malt powder is a different ingredient entirely and belongs in the dough for browning, not in the bath.
Quick same-day version: skip the second rest, keep the full 7 g of instant yeast, and shorten the bulk rise to 45 minutes. That gets you from mixer to oven in about two and a half hours with a slightly softer crumb. It is a reasonable trade for a weeknight.
Equipment
- A digital scale. Volume measures are the most common reason a dough goes wrong.
- An instant-read thermometer for the water, plus one for checking the baked center if you have patience for it.
- A wide pot, at least 12 inches across, so four bagels can lie flat without bumping into each other.
- A slotted spoon or spider for the bath, and a baking sheet lined with parchment.
- A bench scraper and a small bowl of flour for shaping.
A stand mixer, a bread machine dough cycle or your hands all produce the same dough. Plenty of readers run the knead in a bread machine, then shape and boil by hand, and it works fine.
How to make bagels at home without bread flour, and other substitutions
All-purpose flour works, and the bagels will still be good, but expect a softer, more bready crumb rather than the snap of a New York-style bagel. Pull about 10 percent of the water back when you swap it. Whole wheat needs the opposite adjustment: add water until the dough feels like firm clay instead of tacky, and knead a few minutes longer since the bran cuts into the gluten.
A few other swaps worth knowing:
- Vegan: the dough is already vegan. Skip the egg wash and use unsweetened plant milk or a spoonful of aquafaba for the same shine and seed adhesion.
- Sourdough starter: replace 100 to 200 g of the water with ripe starter and drop the yeast to a teaspoon, then let the dough sit longer at room temperature.
- Greek yogurt: replace 60 g of the water with 60 g of plain yogurt and add a teaspoon of baking soda. The dough will be slightly more tender and the crust slightly more tender with it.
- Sponge or preferment: mix 60 g of the flour with the yeast and 150 g of the water, rest it two to three hours, then add the rest. Better flavor, one extra step.
- Self-rising flour: workable in a pinch, but it brings its own salt and baking powder, so drop the added salt and expect a paler, cakier crust.
Flavor variations that actually work: everything seasoning mixed with flaky salt is the obvious one. Cinnamon raisin works best if you roll the shaped rings in cinnamon sugar before boiling, since the bath washes off anything added afterward. Asiago and roasted garlic hold up fine on top. For a savory vegetable version, add a quarter cup of rehydrated spinach or roasted red pepper to the dough during mixing and pull back about 15 g of the water so the dough does not go slack.
Gluten-free: possible, but not the same experience, and I would rather say so than sell it. Gluten-free bread flour blends have far less protein, so the rings need a firm hand and often turn out closer to dense buns than bagels. Check the package for a dough cycle, and a couple of tablespoons of psyllium husk will help a loose blend hold together.
Above 5,000 feet: boil a little longer and expect a faster rise in the oven, so pull the tray a few minutes early. Drop the oven temperature by about 25°F and add ten minutes of baking time, or the outside browns before the center cooks.
Step-by-Step: How to Make Bagels at Home
1. Activate the yeast and mix the dough
Warm a third of the water to 105 to 110°F (40 to 43°C). Above about 115°F the yeast starts to die, which is the quiet reason some doughs never rise. Stir in the sugar or honey and the yeast, then wait five to ten minutes until the surface looks foamy and alive.
If you use active dry yeast, this bloom is not optional. Instant yeast can go straight into the flour, though mixing it with the water first speeds things along. Add the remaining cool water, flour and salt and stir with a dough whisk or spoon until no dry flour is left.
The dough will look shaggy and slightly tight. That is normal. Resist the urge to add more water.
2. Knead the dough
Work by texture, not by the clock. On a lightly floured surface, fold the dough toward you, press the heel of your hand through it, turn, and repeat for roughly ten to fifteen minutes by hand, or eight to ten at low speed with a dough hook.
You will feel it change. The rough, tearing paste becomes smooth, slightly tacky and elastic, and a small piece stretched between your fingers thins into a translucent membrane without snapping. That window test matters more than any timer, and bread flour at 12 percent protein develops gluten slowly, so a two-minute knead leaves you with a bready crumb.
Finish by folding the dough into a ball, tucking the seams under, and slapping it into the bowl a couple of times to build surface tension. Cover and move on.
3. Let the dough rise
Cover the bowl and let it rise at room temperature for 60 to 90 minutes, until the dough has grown by about half and looks puffy and slack when you poke it. It does not always double in that window, and it does not need to. Bagel dough is lean, so a modest rise is enough.
Kitchen temperature matters more than clock time. Below about 68°F (20°C) the rise stretches past two hours; above 78°F (26°C) it can finish in under an hour. If your kitchen runs warm, refrigerate after 30 minutes rather than hunting for a cooler spot.
The poke test settles it: press a floured finger in about a quarter inch. If the dent springs back fast, wait longer. If it stays, move on.
4. Shape the bagels
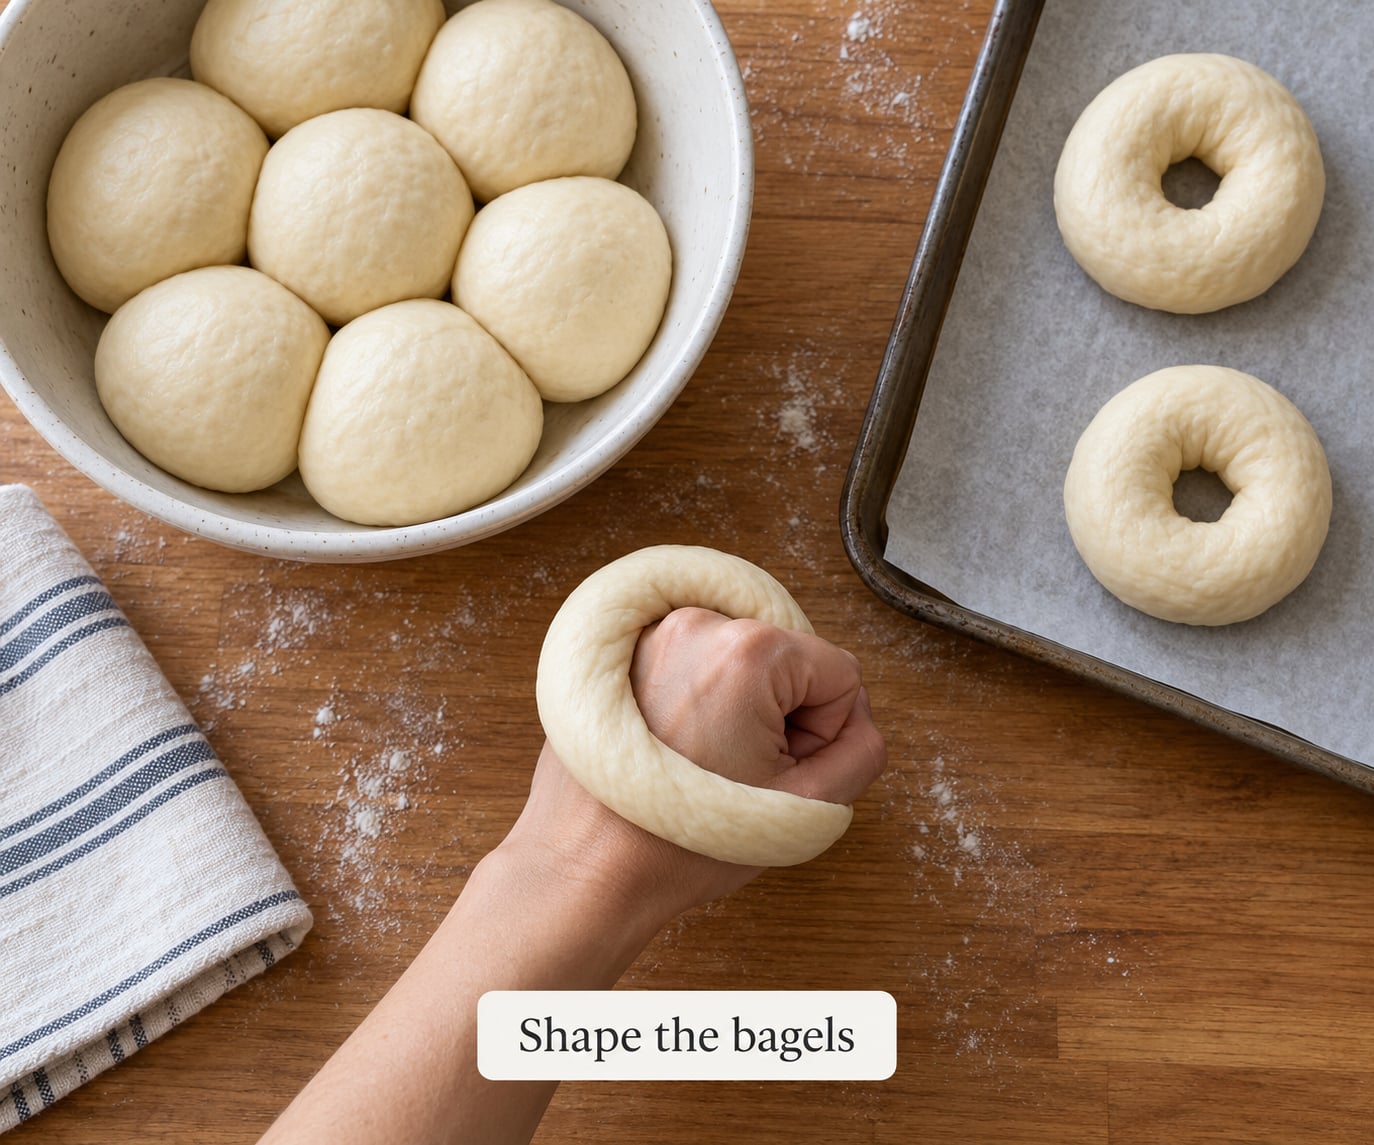
Tip the dough onto a lightly floured surface and cut it into eight or ten equal pieces. Weigh them if you can. Inconsistent weights are the single most common reason a tray bakes unevenly, with the small ones burning before the large ones finish.
Pre-shape each piece into a tight, smooth ball first, rolling it on the counter under your palms until the surface is taut. Rest them for 20 to 30 minutes so the gluten relaxes and you can stretch without the dough springing back. Skipping this rest is what produces thick, lumpy rings.
Now shape. Use the rope method for a chewier, more traditional crumb: flatten a piece into a rope about 8 inches long, wrap it around your fist, pinch the ends together firmly, and roll it seam-side down on the counter to seal. Or use the poke-and-twirl method, which is faster: stick your index finger through the center, lift and twirl the ring a few times to even out the hole, then set it down.
While you work, keep the rest of the dough covered so it does not dry out and tighten. If a piece snaps back hard and fights you, walk away for ten minutes and come back to it.
5. Rest or refrigerate the shaped bagels
Let the shaped rings sit at room temperature for 15 to 30 minutes so they relax slightly and rise a bit. For a more developed flavor, refrigerate them covered for 8 to 24 hours. That cold ferment slows the yeast, adds a faint tang, and gives you a much easier morning because the dough is already firm and shaped.
Freezer-friendly dough works too. Freeze the rings in a single layer on a lined tray, then bag them once solid. Thaw in the fridge overnight or warm them on the counter for an hour before boiling.
Boil straight from the fridge. A cold ring actually holds its shape better in the water than a room-temperature one that is already relaxed.
6. Boil the bagels
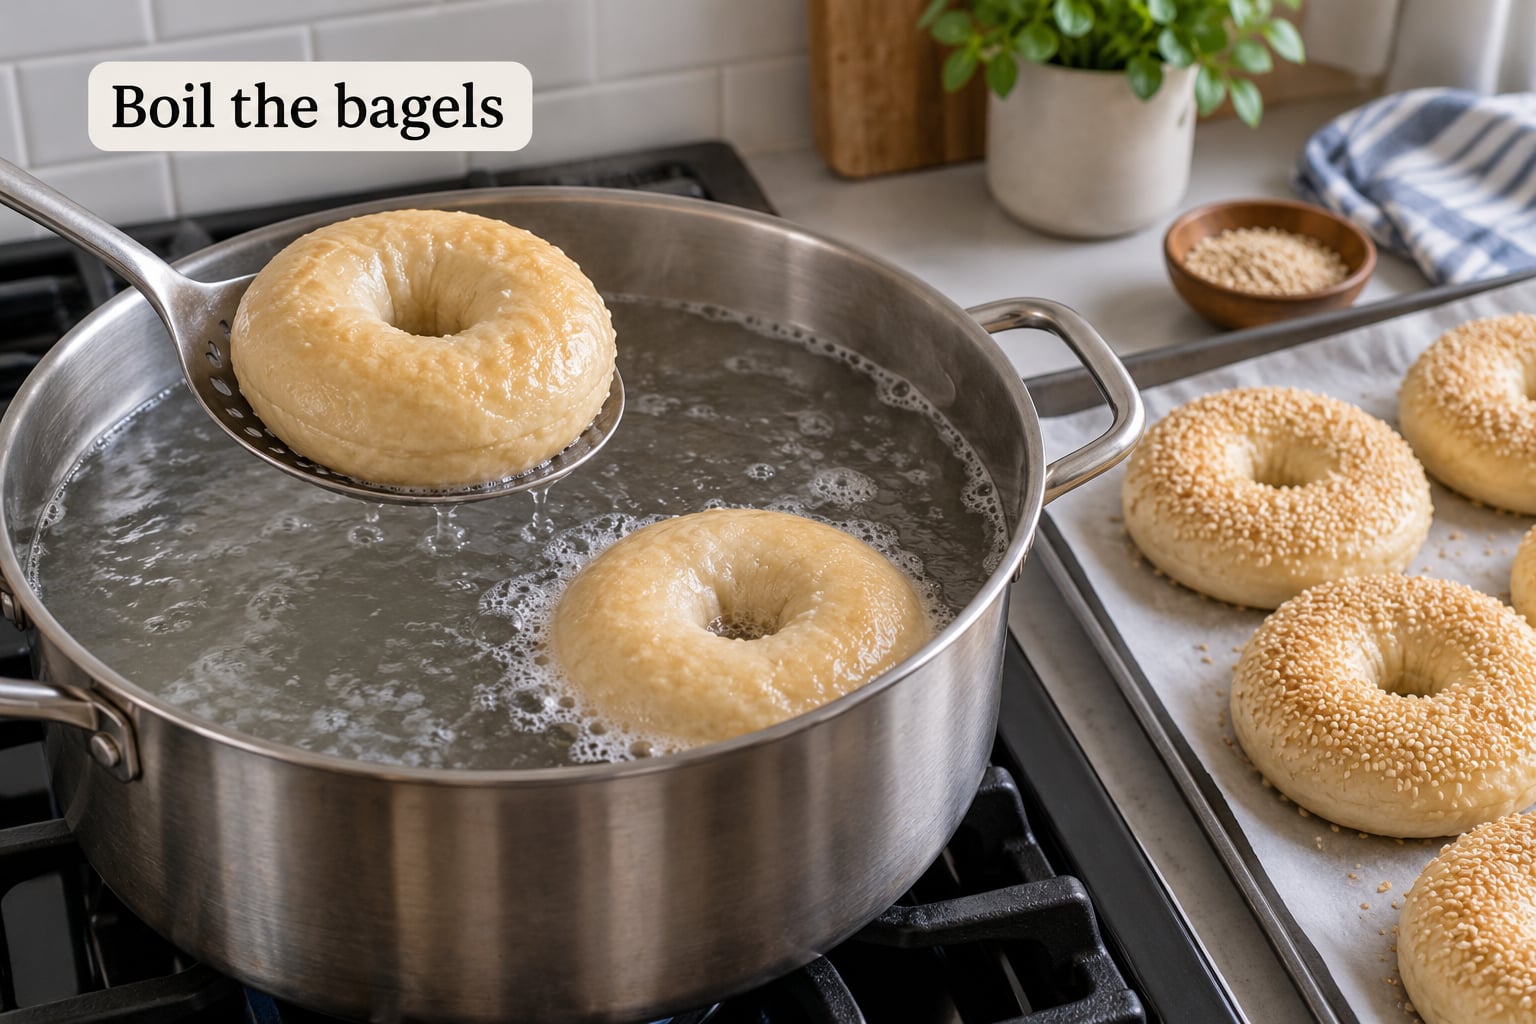
Bring the bath to a boil, then turn it down to a steady simmer. Bubble should break the surface steadily without a hard rolling churn. Lower the heat any time the pot fights you, because a violent boil is what makes rings deflate and wrinkle.
The bagel dates back to Jewish bagel shops, where the water was traditionally made with potato starch to keep the crumb pale and tender. Montreal bagels took a different path with honey and a long boil, and the New York style most home bakers chase sits between them: high-protein flour, a one-minute boil, and a bake hot enough to brown the sugars.
Lower two or three bagels at a time, using a slotted spoon and moving gently. Boil for the texture you want:
| Boil time per side | What you get |
|---|---|
| 30 to 45 seconds | Soft, roll-like, closest to a dinner bagel |
| 60 seconds | The classic New York-style chew |
| 90 seconds | Very chewy and dense, closer to Montreal style |
Turn each bagel with the slotted spoon, gently, and hold it under the surface a moment so the top gets its turn too. The surface should look slightly translucent and set, not rubbery. Lift them out and let the water drain on the spoon for a few seconds rather than tipping the pot.
Bagels that deflate in the bath were almost always over-proofed or handled roughly. Keep the simmer gentle, lower each ring with the spoon rather than dropping it, and if it starts to sink, fish it out and finish baking it anyway. It will bake unevenly, but it will still be a bagel.
7. Top and bake
Heat the oven to 425°F (220°C) and put the empty baking sheet in to preheat. It makes a real difference on the bottom crust. Arrange the boiled bagels on the hot parchment.
Brush with one egg beaten with a tablespoon of water, or with milk if you are avoiding eggs. Add salt, then your toppings, pressing them on firmly so they stick rather than rolling off onto the floor. Everything seasoning, sesame, poppy, coarse salt, dried onion and garlic, cinnamon sugar for a raisin version.
Bake for 20 to 25 minutes, turning the tray once at the 15-minute mark, until the crust is deeply golden and the bagels sound hollow when you tap the bottom. Larger pieces, closer to 125 g, run closer to 25 minutes. Smaller ones around 85 g are usually done at 18.
If the seeds or toppings are darkening before the bagels are cooked through, tent the tray loosely with foil for the last five minutes. That solves most burnt-topping complaints without pulling the bagels out of the oven early.
8. Cool and store
Cool on a wire rack for at least 30 minutes before slicing. The crumb is still setting and steam is still escaping, and cutting too early gives you a gummy interior. This is the step people skip and then blame the recipe.
Same day, bagels are at their best. After that, keep them in an airtight container or a sealed bag at room temperature, where they hold their chew for a day or two. A paper towel left in the container keeps the crust from going soft.
For longer storage, slice and freeze them in a single layer, then move the slices to a freezer bag so nothing sticks together. They keep for a couple of months that way. To revive a frozen bagel, toast or bake it at 350°F for 5 to 10 minutes until the exterior crackles again. Never refrigerate bagels; the starch retrogrades in the cold and the crust turns leathery within a day.
Common mistakes and how to fix them
Almost every disappointing bagel traces back to one of eight things. Find your symptom here and fix the cause rather than adjusting the next step blindly.
| Symptom | Likely cause | Fix |
|---|---|---|
| Dense, bready, doughy inside | Underdeveloped gluten or all-purpose flour | Knead until the window test passes, and use bread flour with 12 percent or more protein |
| Flat, spread-out rings | Dough too wet or shaped when warm and slack | Reduce hydration by 5 g of water per 100 g of flour, and shape the dough straight from the fridge |
| Poor or absent rise | Water above 115°F killed the yeast, or too little salt | Use a thermometer and keep water at 105 to 110°F |
| Tearing while shaping | Gluten too tight, no rest after pre-shaping | Rest the pre-shaped balls 20 to 30 minutes before poking holes |
| Wrinkly, lumpy tops | Loose pre-shape, or a hole poked before the surface was taut | Roll each ball tight on the counter under your palms before you open the center |
| Deflates or splits in the bath | Over-proofed dough, or a boiling hard enough to tear the skin | Cut the bulk rise short and keep the bath at a gentle simmer |
| Pale crust, bready taste | Short boil or an underbaked finish | Boil the full time per side and bake until deep gold, not light brown |
| Gummy center after slicing | Cut while still hot, or pulled from the oven too early | Cool fully on a rack for 30 minutes; check for 200°F in the center on large bagels |
Two questions come up often enough to answer here rather than at the table. On cost, a batch of eight runs on about a cup and a half of flour plus yeast, sugar and salt, which works out to a few cents each. A bakery bagel costs several times more, so a batch pays for itself easily if you eat them through the week, though not on a first attempt made purely out of curiosity.
On nutrition, a bagel is a dense, low-moisture bread, so a single one carries more calories and more sodium than two slices of sandwich bread. Portion and filling do most of the work: a plain bagel with cream cheese and vegetables is a different proposition from a heavily topped one. Nothing about the boil changes that.
One last habit worth building in: weigh your portions. A scale costs less than a single bagel run of trial and error, and it takes the guesswork out of the only step where precision really changes the outcome.
Frequently Asked Questions
Do I need a stand mixer to make bagels at home?
No. A stand mixer with a dough hook saves time and arms, but ten to fifteen minutes of hand kneading gets the same gluten development, and the window test tells you when you are there rather than the clock. Many bakers run the knead on a bread machine dough cycle and then shape and boil by hand, which works well. What matters is that the dough ends up smooth and elastic, not how it got that way.
Why are my bagels dense or flat after baking?
Dense and flat are usually the same problem: weak gluten plus a wet dough. All-purpose flour has too little protein for a proper chew, and a slack dough spreads the moment it hits the water. Fix both by using bread flour with at least 12 percent protein, kneading until a stretched piece of dough thins to a translucent membrane, and pulling your water back to about 55 percent of the flour weight. Boil the full time per side as well.
Can I make bagels without baking soda or malt syrup?
You can, and the bagels will still be edible, just different. Plain water gives you chew from gelatinized starch alone, with a paler crust and a lighter crumb. Baking soda raises the pH of the bath so the surface starch swells more, which is where much of the texture comes from, and sugar or malt syrup mainly adds color. If you skip them, boil a full 60 to 90 seconds per side and let the bagels bake to a deeper brown to compensate.
How long do homemade bagels stay fresh?
Bagels are at their best on the day you bake them, because the starch is still soft and the crust still flexible. In an airtight container at room temperature they hold up well for a day or two, and a paper towel in the container keeps the crust from softening further. Avoid the refrigerator entirely; the cold accelerates starch changes and the crust turns leathery within a day. For anything longer, freeze sliced bagels and reheat them straight from frozen.
Can I freeze bagels before or after baking?
Both work, and each has a different purpose. Freeze unbaked shaped rings in a single layer on a tray, then bag them once solid. Thaw overnight in the fridge or warm on the counter, and they go straight into the boiling water, which makes a cold morning batch easy. Baked bagels freeze well too: slice them, lay the slices flat so they do not stick together, then move them to a freezer bag. Toast at 350°F for five to ten minutes to bring the crust back.
How do I get a crisp crust without making the bagels too chewy?
Boil time is your dial. Thirty to 45 seconds per side keeps the bagel soft and close to a dinner roll, 60 seconds is the classic New York-style chew, and 90 seconds pushes it toward dense and Montreal-style. If you want color and snap more than chew, stay near the middle of that range, add the 1/4 cup of sugar to the bath for faster browning, and bake at 425°F until deep gold. Baking a little past pale is what removes the raw, bready note.
Start with the formula exactly as written, weigh your portions, and give the dough the full rise. Everything else you can adjust once you have tasted a batch made your way. The timings here hold for a home oven at sea level, so if yours runs hot, pull the tray a few minutes early rather than chasing a darker crust.